Showing posts with label Thanksgiving. Show all posts

Wednesday, December 11, 2013

Easy Artisan Bread Appetizer

Obviously I am the one most interested in baking. I think it’s the scientist in me (compared to my creative Beauties.) This recipe started with some fresh baked Bialys (an East Coast favorite) one morning on Lopez Island after some make-your-own pizzas the evening before. The same friend that blew me away with her fresh baking gave me the book she used for Christmas, “Artisan Bread in Five Minutes a Day,” by Jeff Hertzberg, MD and Zoe Francois. Now that is my kind of time commitment!

I have been playing with the main recipe ever since and it’s pretty hard to mess up. That is not to say I didn’t explode Pyrex glass containers in my oven twice before I realized what a broiler pan was but that is part of the hands-on learning I had to experience.

The Master Recipe can be shaped into a Boule, Baguette, Ciabatta rolls, or any variation you’d like. The concept is you make the dough, let it rise for 2 hours, and then throw into the refrigerator for as long as 14 days. Anytime you need a fresh loaf you grab a handful of dough out of your container.


What you need: 

3 cups of lukewarm water (do NOT use to water that is too hot)
1 ½ tablespoons granulated yeast (2 packets)
1 ½ tablespoons kosher or other coarse salt
6 ½ cups unsifted, unbleached, all-purpose white flour
Cornmeal or Whole wheat flour for the pizza peel

1:  Add yeast and salt to the water in a the large bowl you will be storing the dough in or you can use an electric mixer (that is my method and I use the dough attachment.)

2:  Mix in the flour—kneading is unnecessary.  The key to this recipe is do NOT knead at any point!

3: Allow to rise: cover with a lid (not airtight).  At least 2 hours or up to 5 hours.  You could use it at this point to bake but the book suggests that the refrigerated dough is easier to handle.  Put into the refrigerator.

On Baking Day:

4: The gluten cloak: DON’T knead, just “cloak” and shape a loaf in 30 to 60 seconds.  Sprinkle your surface with the cornmeal or whole wheat flour.  Sprinkle the surface of your refrigerated dough with flour.  Pull up and cut off a 1 pound piece (grapefruit size) of dough.  Gently stretch the surface of the dough around to the bottom on all four sides, rotating the ball a quarter-turn as you go.  The correctly shaped product will be smooth on the top and bunched ends on the bottom.

5: Rest the loaf on the pizza peel (or surface) for 40 minutes.

6: Twenty minutes before baking preheat the oven to 450 F with the baking stone on the middle rack and an empty broiler tray on the bottom for holding water.

7: Dust with flour and slash the dough with a cross or X.

8:  Quickly slide the dough off of the surface onto your baking stone.  Quickly and carefully pour 1 cup of hot water into the broiler tray and close the oven door to trap the steam.  Bake for 30 minutes or until the crust is browned and firm to the touch (less time for Baguettes.)  When you take the bread out of the oven it will crackle to the room temperature and cool on a rack.

That is it! I encourage you to get the book if you are interested in other variations or are interested in other details like problem solving your challenges. Once you practice a couple of times you really could come home from work and have fresh bread within the hour. Then opening a can of soup for dinner seem that bad!

~ Jolie

Ta-da! Finished product.

Tuesday, December 10, 2013

Blue Cheese & Rosemary Scalloped Potatoes


THESE ARE THE BEST POTATOES I HAVE EVER HAD. Period. Done. No more explanation needed.

I would end there but I need to give a big shout out to my sister-in-law, Kari, who brought these to Christmas dinner a few years back and introduced me to THE BEST POTATOES I HAVE EVER HAD. Do everyone a service this Christmas and bring this side dish to dinner. Like Rudolph, you'll go down in history...


Blue Cheese & Rosemary Scalloped Potatoes

5 lbs. russet potatoes
2 tsp. salt
1/2 tsp. black pepper
1 1/2 tsp. minced fresh rosemary
3/4 cup crumbled blue cheese
3/4 cup grated Parmesan cheese
1 cup sour cream
2 cups cream (this is not a time to go light, use the heavy cream!)
1 tsp. salt

Preheat Oven to 350 degrees.
Butter a 9x13 glass baking dish.
Peel and slice the potatoes into 1/4 inch slices. Toss them in a large bowl with the salt, pepper, and rosemary.
In a small bowl, toss together cheeses.
Layer half the potatoes in the buttered dish. Sprinkle with half the cheese mixture and top with the remaining potatoes.
In a bowl, whisk together sauce ingredients (sour cream, cream, salt) and pour over potatoes.
Tap the baking dish on the counter to spread out the sauce and help release any air bubbles.
Sprinkle with remaining cheese mixture.
Bake for about 1 hour and 15 minutes, or until browned and completely tender all the way through when poked with a knife.
Take out of oven and let rest for 5 minutes before serving.

You can also make these in advance and store, covered and refrigerated, for up to 2 days.
Bring to room temperature and reheat in a 350 degree oven until hot.
Missy's note: I use more blue cheese and Parmesan than called for because why wouldn't you?

Wednesday, November 14, 2012

Thanksgiving Recipes - Love, BATF

Happy Thanksgiving!
Thanksgiving is upon us, so we thought it would be nice to help you prepare a bit. Whether you’re the one hosting or you’re the one responsible for bringing a side dish, we’ve got all the popular (and some non-traditional) recipes below. All tested and approved!
Here’s wishing you a happy, family-rich holiday full of feasting and drinking!
Love,
Beauties and the Feast
The Traditionals…
1)      The Turkey:


2)      The Stuffing:


3)      The Mashed Potatoes:


4)      The Gravy:


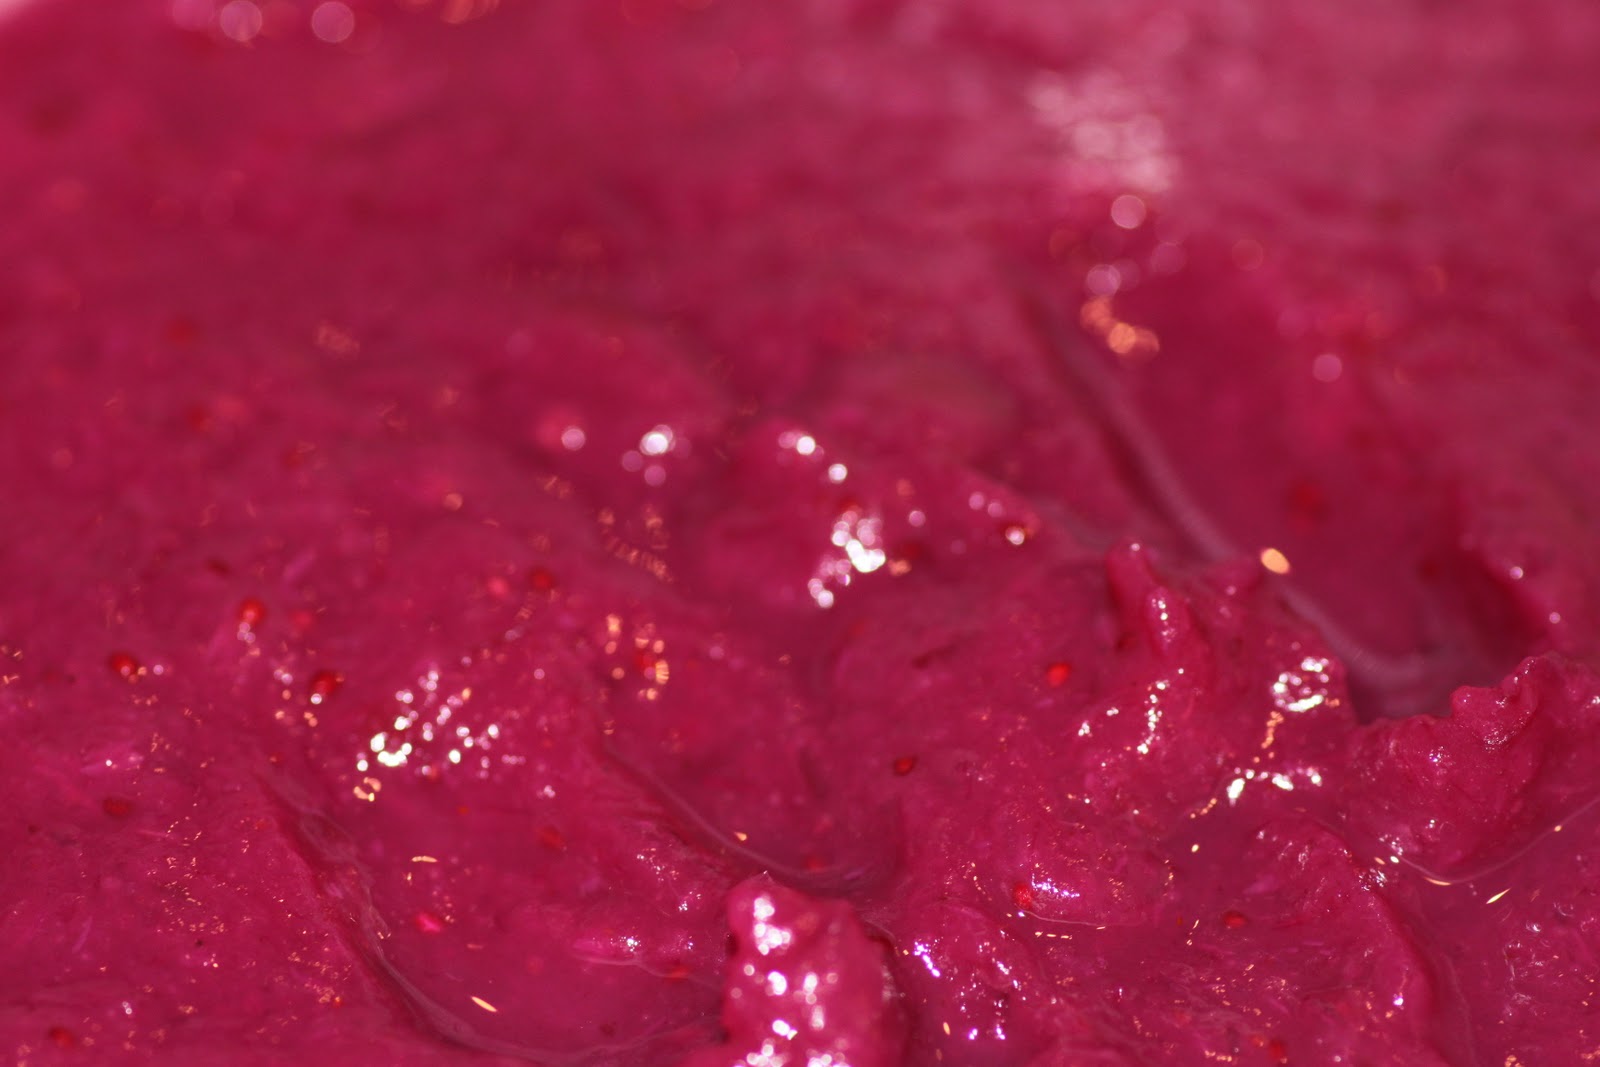
5)      The Cranberry Sauce:


And some non-traditional, vegetarian-friendly side dishes:


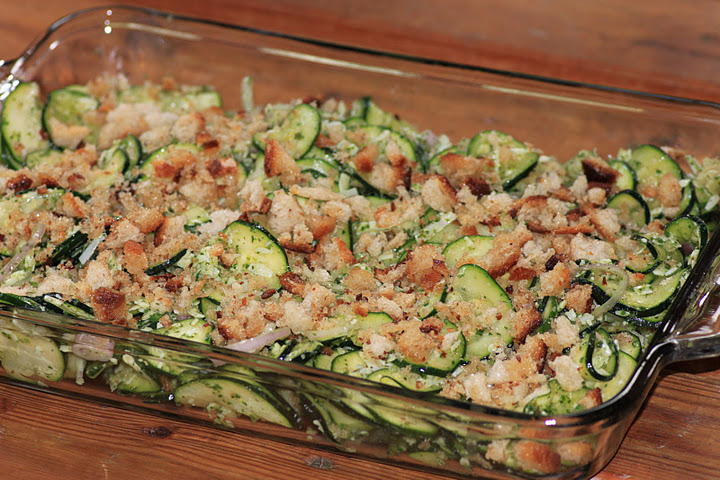
7)      Zucchini Gratin:


The Dessert! (we forgot to take a picture...must have eaten it too quickly)

Wednesday, October 17, 2012

Pumpkin Sugar Cake & Everyday Baking Cookbook Giveaway


Pumpkin Sugar Cake
Because it’s fall and we’re entering into serious comfort food and holiday baking season, we’re giving away three copies of The Old Farmer’s Almanac new cookbook: Everyday Baking!


The Old Farmer’s Almanac Everyday Baking cookbook answers the burning questions with which bakers are faced each and every time they turn on their ovens:

What’s for breakfast? The most important meal of the day can be made sweet with Big-Batch Fresh Raspberry Muffins or savory with Bacon–Blue Cheese Scones.
Bacon Blue Cheese Scones
Is it possible for corn bread to be too rich? Yes, and Everyday Baking has the recipe (it’s delicious!), alongside others for quick breads such as Glazed Lemon Coconut Loaf, Pumpkin Cranberry Bread, and Wheaten Irish Soda Bread—all of which can be made in under an hour.
Entirely Too Rich Corn Bread
Which cookie goes best with milk? Try Triple-Chocolate Pecan Cookies, Pumpkin Spice Cookies, Really Old-Fashioned Gingerbread People, or one of the over two dozen recipes in Everyday Baking’s cookies section.
Chocolate Mud Bars
TO ENTER: 

Leave a comment with your favorite boy name and your e-mail address (We found out we’re having a boy, and yes I’m fishing for good names!).

Three winners will be picked using random.org and announced on Tuesday, November 6. We will mail the cookbook to you. This giveaway is open to U.S. and Canadian residents only.


Pumpkin Sugar Cake 
Recipe from The Old Farmer's Almanac Everyday Baking cookbook 

This "cake" can be served as a coffee cake for breakfast or with a scoop of ice cream for dessert! Please read the recipe all the way through before you begin, as it requires 1 1/2 hours of resting time.

DOUGH: 
¼ cup lukewarm water (105 to 115 degrees)
1 packet (2 ½ tsp) active dry yeast
¾ cup mashed or canned pumpkin
½ cup milk, slightly warmer than body temp
1/3 cup sugar
¼ cup vegetable oil
1 large egg plus 1 yolk, at room temperature
1 ½ tsp. salt
1 tsp. vanilla extract
3 cups all-purpose flour

TOPPING: 
¾ cup packed light-brown sugar
¾ cup chopped walnuts
1 tsp. cinnamon
7 TBSP unsalted butter

For dough: Pour the water in to a small bowl and sprinkle with yeast. Stir to blend, then set aside for 5 minutes.

Meanwhile, combine the pumpkin, milk, sugar, oil, egg and yolk, salt, and vanilla in a large bowl. Stir in the dissolved yeast. Whisk well. Add 2 cups of the flour and beat with a wooden spoon for 2 minutes. Stir in the remaining 1 cup of flour, 1/3 cup at a time, beating well with the spoon for 1 minute after each addition. Do not skimp on the time: This hand beating eliminates the need to knead. Set the dough aside long enough to butter a 13x9-inch baking pan. Scrape the dough out of the bowl and into the middle of the baking pan. Set aside for 5 minutes.

Tear off a sheet of plastic wrap a little larger than your pan and oil it or coat with nonstick spray; the oil will ensure that the plastic doesn’t stick to the dough. Place the plastic on top of the dough with the oiled side toward the dough, center the plastic, and press the dough out evenly into the pan. Take your time to make it reasonably level. Remove the plastic and cover the pan with a fresh sheet of plastic wrap. Set aside at room temperature for 1 ½ hours to rest (it won’t seem to rise very much).

For topping: While the dough rests, put the brown sugar, walnuts and cinnamon into a food processor and pulse until the nuts are very finely chopped. Set aside.

After 1 ½ hours have passed, preheat the oven to 350 degrees. Remove the plastic and cover the dough evenly with the brown sugar topping. Using a fingertip, make 12 deep indentations in the dough (three evenly spaced rows of four holes). Melt the 7 tablespoons of butter and spoon evenly over the top, letting some of it drip into the holes. Bake one the center oven rack for 35 minutes. The top will be a rich golden brown, but the best indicator of doneness is total baking time. Cool in the pan on a rack for 10 minutes before slicing and serving. Makes 12 to 15 servings. 


Thursday, December 29, 2011

Top 5 Recipes of 2011

We at Beauties and the Feast want to thank you for a wonderful first year in the blogosphere!  And as is commonly done in the last week of December, we thought we'd honor a good year of eats (and drinks!) with a countdown of the year's most popular recipes.

You can take the girl out of Nevada but you can't take the Nevada out of the girl.


Best recipe for Turkey ever. The secret is in the brine!


Pasta originated from the brothels of Naples - it's easy


 Potatoes, cheese and creepy leprechauns


And, for the #1 recipe of all time with a whopping 552 pageviews (drum roll please)....

Get on with your bad self, Santa; you made the holidays a little brighter.


Thanks for following us this year.  Hope to see you in 2012 for more eats, drinks and laughs!

Cook, Consume, Comment, Cocktail!
-Jolie, Emily, Rachel, Megan, Missy and Amber

Tuesday, November 22, 2011

A BATF Thanksgiving: Old-Fashioned Apple Crisp Recipe

Kirsten is back with a recipe for my favorite part of the meal – dessert! We were so excited to dig in that we forgot to take pictures, but a visual isn’t really needed, I can assure you this apple crisp recipe rocks!

Kirsten writes:

Happy Thanksgiving week! If you need a supplement to your pumpkin pie this Thanksgiving, here’s an easy and seasonal dessert to add to your table that doesn’t involve fussing with a pie crust. It’s hard to go wrong with a crumble/crisp topping and this version of apple crisp from Barefoot Contessa is delicious with the addition of both lemon and orange juice to the apples--it breaks up the sweetness a bit with a little citrus zing. You’ll have to roll up your sleeves to peel all those apples, but with helpers like Emily and Megan I had no trouble at all! At the time I couldn’t find McIntosh apples, but I thought Granny Smith apples worked just fine or you could also try this version with pears — yum! I also added about 3/4 cup of chopped pecans to the topping mixture to give it even more crunch.

I’m dreaming of making this again soon, but next time maybe I’ll add a little caramel sauce and/or some salted caramel ice cream from Molly Moon’s. Enjoy and have a great Thanksgiving!

Old-Fashioned Apple Crisp (courtesy of Barefoot Contessa)

Ingredients
5 pounds McIntosh or Macoun apples
Grated zest of 1 orange
Grated zest of 1 lemon
2 tablespoons freshly squeezed orange juice
2 tablespoons freshly squeezed lemon juice
1/2 cup granulated sugar
2 teaspoons ground cinnamon
1 teaspoon ground nutmeg
For the topping:
1 1/2 cups flour
3/4 cup granulated sugar
3/4 cup light brown sugar, packed
1/2 teaspoon kosher salt
1 cup oatmeal
1/2 pound cold unsalted butter, diced

Directions
1. Preheat the oven to 350 degrees F. Butter a 9 by 14 by 2-inch oval baking dish.
2. Peel, core, and cut the apples into large wedges. Combine the apples with the zests, juices, sugar, and spices. Pour into the dish.
3. To make the topping, combine the flour, sugars, salt, oatmeal, and cold butter in the bowl of an electric mixer fitted with the paddle attachment. Mix on low speed until the mixture is crumbly and the butter is the size of peas. Scatter evenly over the apples.
4. Place the crisp on a sheet pan and bake for 1 hour until the top is brown and the apples are bubbly. Serve warm.

Tuesday, November 15, 2011

A BATF Thanksgiving: The Mashed Potato Recipe


Seems as if the history of the mashed potato began in 1771 I know! I'm such a nerd—I like to research the history of food! when a French man named Antoine Parmentier came up with the idea of having a competition on ways to make potatoes. Shut up, this is interesting! He won first place and decided to start his own crop, which he had soldiers vigilantly guard. But some sneaky peasants outsmarted the guards and as a result of their potato thievery, potatoes were introduced into the cuisine of France and, much later, widespread Europe.

We're all hopefully familiar with the blight of 1845 which caused the Great Irish Famine. Though there are currently over 5,000 varieties of potatoes, the limited number of varieties initially introduced left the crop vulnerable to disease which resulted in crop failures killing nearly 1/3 of the Irish population from starvation and causing mass emigration from the country. So while I don't mean to depress you this Thanksgiving I do hope that when you make this T-day staple you take a moment to remember the history of the potato and be thankful. It's a powerful little spud.

Ehem, on a lighter note: you can't screw up mashed potatoes so if this is your first time contributing a dish for Thanksgiving, choose this one. Follow my recipe for Roasted Garlic Mashed Potatoes and you'll look like a 5 star chef, for like, barely any additional effort at all. But by all means if you don't want to look like a 5 star chef, leave out the garlic part and stop complaining about how I’m making this too hard for you. Oh, and despite there being over 5,000 varieties of potatoes, the best potatoes for mashing are Russet, Yukon Gold or Red. That’s important.

Ingredients
1 medium potato per person peeled and quartered
1/2 cup or more milk/cream
1 stick butter (use 1/2 stick if you have 6 potatoes or less)
1 tablespoon salt, or more to taste
2-3 full and glorious heads of garlic

Directions
Warm oven to 375 degrees. Wrap each head of garlic in tinfoil and bake for 45 minutes. (Don't let the large number of roasted garlic scare you. When you roast garlic it ends up being much milder in flavor so the more you have the better.) Remove from oven, unwrap and let cool. Your house will smell SO GOOD! Bring a large pot of water to boil and add potatoes. While potatoes are boiling, peel cloves of roasted garlic and put aside in a small dish. Stick your face over the boiling potatoes for a nice steam bath and pore deep cleaning. Boil potatoes until you can stick a fork in the center of one of them easily. Drain. In a kitchen aid mixer, or large bowl w/masher, mash potatoes with milk or cream, butter, salt, and roasted cloves of garlic.  Add more milk or cream if desired mashy-mooshiness is not yet achieved.  Also, thanks a lot spell-check: if I hadn't eagle-eyed that last sentence it would have read "roasted gloves of garlic." And don't even get me started on researching what that means.

Anyway, after they're done you'll want to smother them with homemade gravy.  Click here for the BATF Gravy recipe. Yum!

Additional add-ins: shredded cheddar cheese, sour cream, chives, bacon, and fresh herbs such as rosemary or thyme. Don't over-flavor them, though if you plan to smother them with the BATF gravy recipe.  Yes, that's the same link as above but I just wanted to make sure you saw it.  There's no use in making 5 star mashed potatoes if you put canned gravy on the top.  I'm serious.  Don't even think about it.

Making your spuds ahead of time? Put them in an oven-safe dish with a lid and refrigerate. Pop in the oven with the lid on about 30 minutes before dinnertime to heat.

Monday, November 14, 2011

A BATF Thanksgiving: The Cranberry Sauce Recipe

How can making 3-ingredient cranberry sauce be so difficult? When you choose to work with an old blender and a potato masher rather than a food processor -- that's how.

This really is the easiest recipe on the planet, but somehow I ended up making this at work with the old blender they shove way up high in the cupboards out of sight. Probably by someone who ditched it at work to clear their cupboard for a nice, new food processor/blender that actually blends and purees.

In short- make this in your food processor; you won't have any problems.

As for modifications, I used the entire 12 oz bag of Ocean Spray cranberries. I used Stevia sweetener. And I sprinkled a dash of cinnamon in it too. That's about it!

I grew up with the canned jelly cranberry sauce and I am not ashamed to admit I LOVE the stuff and will be serving it up sliced at Thanksgiving dinners until I die. That being said, I am glad I branched out to try this homemade recipe (because that's the point of this blog) and I can honestly admit it's a decent runner up to the good stuff....


Cranberry-Pineapple Sauce
(by www.skinnytaste.com)

8 oz fresh cranberries

20 oz can pineapple in pineapple juice
1/3 cup sugar (or agave)


Drain liquid from pineapples into a measuring cup. Add water so that you have a total of 1 cup liquid. Add to sauce pan with sugar and bring to a boil.

Place cranberries in a food processor or chopper and chop fine. Add to pan and stir well. Cook over medium heat, stirring occasionally, until thick (about 10 minutes).

Place pineapple in a food processor and chop. Add crushed pineapples to cranberry sauce and cook one more minute.

Allow to cool then place in a covered container and refrigerate overnight.

Makes 3 cups.

Pin It

Friday, November 11, 2011

A BATF Thanksgiving: Slow Roasted Tomato Tart Recipe


For Thanksgiving, Kirsten not only made a fig thyme cocktail and zucchini gratin, she also contributed this slow roasted tomato tart and apple crisp for dessert. See why we keep her around?

Kirsten writes:

For the tomato tart, I admit I took a major shortcut. I planned to make the dough from scratch, but then it seemed too overwhelming and time intensive so I bought a frozen pie crust from QFC as a substitute. I still thought it tasted ok, but if you have the time and energy definitely go for the homemade crust. However, it isn’t worth cheating on the slow roasted tomatoes. Slow roasting is easy and gives the tomatoes a caramelized and rich flavor, not to mention it makes your kitchen smell so good! Since this takes a few hours, I roasted them a few days ahead of time and stored them in a Tupperware in the fridge. Once you have the tomatoes and crust complete, the rest is easy and just involves mixing together a custard as a base for the tomatoes. The major mistake I made is taking out the tart too soon from the oven—I’m sure cooking time varies based on your oven, but in this case it took more time than the recipe states in order for the custard to set.


Slow Roasted Tomato Tart (from The Pantry at Delancey)
Serves 6-8

Tart dough:
1 ½ cups all-purpose flour
1 tbsp sugar
¾ tsp kosher salt
½ cup plus 1 tbsp chilled, unsalted butter, cut into ½ inch cubes
4 tbsp ice water
¾ tsp apple cider vinegar

Tart:
2 ½ lbs ripe tomatoes, trimmed and halved
Sugar to taste
Kosher salt to taste
Freshly ground black pepper to taste
Extra virgin olive oil to taste
Five sprigs fresh thyme, rosemary or oregano (or a mix)
2 large eggs
1 large egg yolk
½ cup crème fraiche
½ cup milk
2 tsp Dijon mustard

Directions:

Tart dough
1. Blend the flour, sugar and salt in food processor to combine.

2. Add butter using on/off pulse, process until coarse meal forms.

3. Add ice water and vinegar, blend until moist clumps form, adding more ice water by teaspoonfuls if dough is too dry.

4. Turn out onto work surface and gather dough together into a ball. Flatten into a disk and wrap in plastic wrap. Refrigerate for 1 hour. Dough can be refrigerated for up to two days or enclose in a resealable plastic bag and freeze up to 1 month. Soften slightly at room temperature before rolling out.

Tart
1. Preheat oven to 300 degrees.

2. Arrange the tomatoes, cut side up, on a parchment-lined sheet pan. Sprinkle generously with sugar, salt and pepper. Drizzle with olive oil and nestle the herbs between the tomatoes.

3. Place the tomatoes in the oven and roast until golden brown in spots and reduced in size by about half, approximately 2-3 hours.

4. While the tomatoes cook, roll out the tart dough on a lightly floured surface. Press it gently into a 9 or 10 inch tart pan with a removable bottom and fold in the overhang to reinforce the sides. Trim excess dough. Place the tart shell in the freezer until the tomatoes are done roasting.

5. When the tomatoes are done, increase the oven temperature to 400 degrees. When the oven is pre-heated remove the dough from the freezer, line with parchment or foil and fill with pie weights (dried beans or rice also work well). Bake, leaving weights in place until the dough dries out and just starts to turn golden, about 15-20 minutes. Carefully remove parchment or foil and weights. Return tart shell to oven and continue baking until lightly golden brown, about 10-15 more minutes.

6. Whisk one egg with 1 tbsp water in a small bowl. Remove crust from oven and brush a thin coating of egg wash over the inside and top of the crust. Return to oven and bake about two minutes more. Reduce oven temperature to 375 degrees.

7. While crust is baking, whisk together remaining egg, egg yolk, crème fraiche, milk, Dijon and a pinch of salt. As soon as pie shell comes out of the over, pour egg mixture into the shell. Arrange roasted tomatoes over the egg mixture.

8. Bake until custard is set and light golden brown in spots, about 15-20 minutes. Transfer tart to a rack to cool and serve warm or at room temperature.

Wednesday, November 9, 2011

A BATF Thanksgiving: Zucchini Gratin with Salsa Verde Recipe


Inviting Kirsten to join us for our BATF early Thanksgiving was one of the best decisions we ever made. We always love her company and her food contributions were spectacular! After she treated us to her fig thyme cocktail, Kirsten made two, non-traditional, side dishes that took our Thanksgiving to the next level!

Kirsten writes:

I love Thanksgiving. I look forward to seeing family, the fall leaves and pumpkins, and even the football games…as far as the food, not so much. This may seem shocking. After all, for many people Thanksgiving is all about the turkey, gravy and stuffing. However, as the lone vegetarian at Thanksgiving meals I usually wind up with some mashed potatoes, cranberry sauce and maybe some green bean casserole. Not terrible, but nothing that great.

But now my opinion about the Thanksgiving meal is changing, thanks to BATF and a recent cooking class. I admit I was a little intimidated when I was invited to the BATF Thanksgiving-themed retreat and had to bring something to contribute. After all, these girls are obviously great cooks. And I totally understand that sometimes vegetarian dishes get a bad rap. My brother, for instance, would be horrified to eat anything labeled vegetarian or any type of “mock meat.” I know he’s not the only one—anyone else see the Parks and Recreation episode where Ron Swanson was asked if he wanted salad and he replied, “Well, since I’m not a rabbit, no, I do not.” Yep. That kind of sums up some people’s perceptions of vegetarian food—not fit for humans— so I wanted to be sure to bring something besides Tofurkey and sprouts.

Luckily, before going to the retreat I attended a great cooking class at The Pantry at Delancey with some delicious veggie recipes that I thought would work really well as Thanksgiving side dishes. I think the trick with these is that while they use vegetables and lots of fresh herbs they also taste like comfort food. I mean, there are definitely really good and healthy vegetarian recipes out there, but this is Thanksgiving. The recipes don’t quite enter into Paula Deen’s realm , but let’s just say they don’t skimp on the dairy.

The two dishes I made were a Zucchini Gratin with Salsa Verde and a Slow Roasted Tomato Tart (recipe coming soon!). Before making the zucchini gratin, I bought a mandoline slicer. This is a great tool and was a much easier way to cut the thin slices of zucchini. (Even though Megan had to intervene and take over for me because I was afraid of cutting my fingers off.)


A key step with this recipe is taking the time to toss the zucchini slices with salt and letting it sit and drain for 30 minutes. This may seem strange, but it helps to draw out the excess water so the zucchini is not too mushy and soggy after baking. Also, I thought making the brown butter was a little tricky. My advice is to keep testing it by pouring a little out into a white bowl to see if it’s turning golden brown. Once it starts to brown, immediately turn the heat off and take it off the burner, otherwise it will burn.

I had so much fun at our BATF Feast weekend and the Beauties inspired me with their amazing options for the Thanksgiving table--I was so excited to try Rachel’s stuffing (she nicely modified her recipe to make a veggie portion for me) and I learned you can even make a vegetarian version of Amber’s gravy recipe. Now I’m feeling so much more prepared to host my first Thanksgiving this year. Whether you’re a vegetarian or not, I hope these might encourage you to change it up and try a new side dish alongside the stuffing and mashed potatoes. And for the Ron Swanson’s out there, at least it’s not salad.


Zucchini Gratin with Salsa Verde (from The Pantry at Delancey)
Serves 4

Salsa Verde:
1 tsp fresh oregano
¼ cup coarsely chopped mint
1 small clove garlic
1 anchovy (I left this out)
½ cup olive oil
1 tbsp capers (drained)
1 tbsp lemon juice
½ tsp kosher salt
Black pepper to taste

Gratin:
2 lbs zucchini
1 ½ cup fresh breadcrumbs
3 tbsp unsalted butter
½ cup sliced shallot
1 tsp minced garlic
1 tbsp fresh thyme
1 ½ cups grated Gruyere cheese

Directions:
1. Heat the oven to 400 degrees. Cut the zucchini into 1/8 inch thick slices. Toss the slices in a large bowl with 1 teaspoon kosher salt and let sit for 30 minutes.

2. Grind all the ingredients for the salsa verde into a paste using a food processor. Transfer mixture into a bowl.

3. Place the breadcrumbs into a bowl. Heat the butter in a small sauté pan over medium heat for a few minutes, until it browns and smells nutty. Let the butter cool slightly and pour it over the breadcrumbs and toss well.

4. Drain the zucchini well and transfer it into a large mixing bowl. Add the shallots, minced garlic, thyme, ½ cup of the salsa verde and some pepper. Toss to combine and add the cheese and half of the butter-coated breadcrumbs. Toss again and taste for seasoning.

5. Place the mixture into a 9x9 gratin dish. Scatter the remaining breadcrumbs over the top and bake for 40-45 minutes, until the zucchini is tender and the top is crisp.

Wednesday, November 2, 2011

A BATF Thanksgiving: The Stuffing Recipe

When we were figuring out assignments for our Thanksgiving smorgasboard, I was kind of late to the party and was SHOCKED to realize that no one had claimed stuffing yet. In fact, one Beauty, who shall remain nameless, even had the audacity to suggest that we skip the stuffing all together! SHAME!!! Are you even an American? You can't have Thanksgiving without stuffing!!! So I snatched up the stuffing assignment just as quick as you please and started hunting for a Beauties-worthy recipe.

THE RECIPE

6 tablespoons butter
8 ounces bacon, cut into 1/4-inch dice
2 onions, finely chopped
2 carrots, peeled and finely chopped
3 celery stalks, finely chopped
2 tablespoons chopped fresh rosemary leaves
3 garlic cloves, chopped
1/4 cup chopped fresh Italian parsley
1 pound day old bread, cut into 3/4-inch cubes
2/3 cup freshly grated Parmesan
1 cup canned chicken broth
Salt and pepper
2 large eggs, beaten to blend

Preheat the oven to 350 degrees. Butter a 15x10 inch baking dish. Melt 2 tablespoons of butter in a large skillet over medium heat. Add the bacon and saute until crisp, about 10 minutes. Using a slotted spoon, transfer the bacon to a large bowl. (NOTE - I mean your biggest bowl. There is a lot of stuff going in there, so make sure you have room!) Melt the remaining butter in the same skillet over medium-high heat. Add the onions, carrots, celery, rosemary and garlic. Saute until the onions are very tender, about 12 minutes. Gently stir in the parsley and then transfer the mixture to the large bowl with the bacon. Add the bread and cheese and toss to coat. Add enough broth to the mixture to moisten. Season to taste with salt and pepper. Mix in the eggs as your last step.

Transfer the stuffing to the prepared dish. Cover with foil and bake until the stuffing is heated through, about 30 minutes. Uncover and continue baking until the top is crisp and golden, about 15 minutes longer.

THE COOKING EXPERIENCE

There is nothing like a group of awesome girlfriends gathered in a cozy kitchen, cooking, talking, eating, drinking and laughing. The seemingless endless chopping required by this recipe was rendered quite pleasant because I was surrounded by my Beauties. As an added bonus, the chopped veggies are very pretty when you put them all together, providing a good photo opportunity.


But after the chopping is done, you are home free. Saute up the bacon and veggies (with the added bonus of making your kitchen smell WONDERFUL, if it doesn't already), toss with the bread, throw it in the pan and let the oven do the rest. The result is crunchy on top, soft and chewy in the middle and oh so delicious topped with a little of Amber's gravy.


The other great thing about this recipe is that it's really flexible. If you don't have celery, throw in green pepper. If you are out of rosemary, use thyme or sage. And the bread options are endless. Have fun and be creative!

Cheers!
Pin It

Friday, October 28, 2011

A BATF Thanksgiving: The Gravy Recipe

Gravy is like a sheep in wolf's clothing.  It's one of those things that seems so complicated to make but is really, actually, quite easy.  There's no reason why you should ever buy premade gravy in a can (blech!) when you're already making a Turkey, or chicken for that matter.  And there's no reason why it should take you longer than 20 minutes to make it from scratch.  Thanks to my mother, Principal Pirtle and homemaker extraordinaire, I've learned the secret is in the roux.  You can make any kind of yummy saucy thing with roux as your starter and gravy is a prime example.  Here's a step-by-step, simple as h*ll way to make the best tasting, most delicious homemade gravy that will impress your guests every time.

1) Before putting your turkey in to roast, add a cup or two of water to the roasting pan
2) Roast your turkey, basting as needed
3) When your turkey comes out of the oven, reserve the turkey drippings.
4) Put a saucepan on medium-low and melt 3 tablespoons butter. 
4) Add 3 tablespoons flour, a pinch of pepper and a little salt.  Stir around until bubbly, about 2 minutes.
5) Add reserved turkey drippings and stir on medium low until thickened - about 20 minutes. Whalla!


Here are a few tips:  If you're worried you won't have enough gravy for all those mashed potatoes, you can always add a little more water, a little chicken or veggie broth, or even a little milk to your sauce pan if you want it creamy.  Just make sure you warm it and stir it enough to thicken and taste it to make sure it has enough seasoning: add salt, pepper, thyme, rosemary, whatever.  The Turkey recipe Missy made created especially good gravy because of all of the fresh herbs she used so I didn't have to add anything.  While the turkey was roasted I did add a little orange juice to the roasting pan (with encouragement from my fellow beauties) to make more liquid at the bottom for both basting and for the gravy and since we'd already stuffed the cavity with an orange it seemed like a good idea. 


What resulted was a delicious (almost too rich) gravy and we had tons of it (which made for a really yummy 2 a.m. snack with mashed potatoes after we got back from the bar in Roslyn, but I digress).  Maybe a little less orange juice next time... Either way, by the time your gravy is done, the person carving the turkey will probably be done.  Notice that is not you.  You can put the wolf's clothing back on this innocent baby sheep and dole out the responsibilities while you stand over to stove and look busy.

Vegetarian Option

For those of you having a Tofurky for dinner this year, you can make veggie gravy for your mashed potatoes by substituting veggie broth for the Turkey drippings.  I'd recommend adding at 1.5 to 2 cups of broth to the roux.

Pin It

Monday, October 24, 2011

A BATF Thanksgiving: The Turkey Recipe


We decided to do something a little different with this blog for the holiday season and rather than posting our monthly recipe, we will post a series of Thanksgiving-worthy recipes leading up to the big day on November 24.

But of course we had to try these delicious dishes first -- so Thanksgiving came a little early for the Beauties this year. During our girls spa/foodie retreat earlier this month, we each brought a dish (or two) to the dinner table resulting in an all-too-filling-but-amazing Thanksgiving dinner. Emily and Amber photographed the whole thing and we all agreed to do a blog post about our findings.

Now I would never in a bazillion-gazillion years sign up to do the turkey. I really wouldn't. Alas, I came across a turkey recipe I have to make for work, if you can believe it. The short story is the recipe is going in a work newsletter sponsored by Butterball. So I thought if there's ever a time in my life to try a turkey, I should do it with my Beauties. There's nothing like having six girls around to help me figure it out.

I signed up to cook the turkey and was immediately struck with fear and regret. Thankfully, throughout the 1,386 emails that flew around between us, I discovered a couple of these girls have cooked a turkey! Oh happy day! And, without further ado, I have to give credit to Amber and Rachel who guided my virgin hand in the process of cooking a Thanksgiving turkey.

Amber helped me clean the turkey which is what I dreaded most. Fortunately, this particular Costco bird was pretty clean already so we just pulled out the bagged gizzard, rinsed the inside, cut off some excess skin and we were good to go. 2 for 2.

Rachel and Emily then added a new word to my culinary language: brine. We brined that bird the night before in a Home Depot paint bucket with the word BRINE scribbled on it in permanent ink -- 'cause that's how we roll. In it we put a couple gallons of water, enough to immerse the bird. In the water mixture was about two cups of salt and whatever spices we had available: rosemary, oregano, basil, lemon wedges and whole garlic heads. It marinated overnight, soaking up that yummy salty juice to give us a tender and flavorful bird.

When the bird was ready to cook, Amber helped me load it onto her roasting pan and put it in the oven. I cooked it at 350 instead of 325 and watched it carefully to make sure it didn't brown too fast. Well, turns out I needn't worry about over-browning: As Amber and I were standing over our bird oohing and aahing at our pre-mature success halfway thru cooking time, Rachel happened to wander by with a questioning look and asked us if the bird was breast side up. With little but forced confidence, we both said yes only to learn we really don't know what breast side up looks like. 2 for 3.

The result of our mistake made for about an hour longer cooking time but I was still on track to serve it up before bed time. Okay well before bed time.

Now I have to back track a bit to my small part in this whole turkey process. The day before, I made the rub. I was excited because I picked the fresh herbs from my garden. Tho I have to admit, as I was chopping herbs and wondering what in the world is dry ground lemon peel, the thought crossed my mind, "I could just cheat and go buy a rub in a fancy, little jar." Once a cheater...

But I made that rub from scratch, taking no shortcuts whatsoever. And tho it is a small piece of this turkey cooking process, it makes for BIG results. This mediterranean rub recipe will not only fill your house with the smell of goodness on Thanksgiving day, it makes the bird pretty and oh OHHH so flavorful! I feel bad for you who has to slice this turkey as it tempts you for just another bite.... (I'm such a sucker.)

If you have not yet discovered your best turkey recipe or want to try something new, this is the one for you. Good luck -- tho I don't think you'll need it.

ROAST TURKEY WITH MEDITERRANEAN RUB, courtesy of Butterball®

Prep Time: 10 minutes
Cook Time: 3 hours
Yield: 12 servings

Ingredients:

1 Turkey (14 to 16 pounds), thawed if frozen
1 cup chopped fresh flat leaf parsley
¼ cup ground dry lemon peel (I messed this up and used chopped lemon zest instead -- totally worked)
4 tsp sugar, granulated
4 tsp sea salt
4 tsp chopped fresh rosemary leaves
1 tbsp dry oregano leaves
2 tsp ground black pepper
½ tsp crushed red pepper flakes

Directions:

1. Preheat oven to 325°F.

2. Remove neck and giblets from turkey. Pat turkey dry with paper towels. Turn wings back to hold neck skin against back of turkey. Place turkey breast side up on flat rack in shallow roasting pan.

3. Roast turkey approximately 1-1/2 hours. Then, cover breast loosely with Reynolds Wrap® Aluminum Foil to prevent overcooking.
4. While turkey is cooking, combine parsley, lemon peel, sugar, salt and spices to make rub. Set aside.
5. Roast turkey another 1-1/2 hours, or until meat thermometer reaches 180°F when inserted into the deepest part of the thigh muscle.

6. Let turkey stand 15 minutes before carving.

7. Sprinkle rub on sliced Butterball Turkey or rub over entire turkey when it is removed from the oven.

NOTE: Recommend using rub within 24 hours for best results. Amber poured orange juice in the roasting pan and stuffed a whole orange inside the turkey which I'm told contributes to its moist and awesome flavor. Since the turkey was awesome I have to agree! 

 Print Friendly and PDFPrint Friendly and PDF
Pin It

Brine spices
Brine-master Emily
Oh baby...just how this turkey likes it.
Some of this turkey did make it to the dinner table.