Showing posts with label Jolie. Show all posts

Wednesday, December 11, 2013

Easy Artisan Bread Appetizer

Obviously I am the one most interested in baking. I think it’s the scientist in me (compared to my creative Beauties.) This recipe started with some fresh baked Bialys (an East Coast favorite) one morning on Lopez Island after some make-your-own pizzas the evening before. The same friend that blew me away with her fresh baking gave me the book she used for Christmas, “Artisan Bread in Five Minutes a Day,” by Jeff Hertzberg, MD and Zoe Francois. Now that is my kind of time commitment!

I have been playing with the main recipe ever since and it’s pretty hard to mess up. That is not to say I didn’t explode Pyrex glass containers in my oven twice before I realized what a broiler pan was but that is part of the hands-on learning I had to experience.

The Master Recipe can be shaped into a Boule, Baguette, Ciabatta rolls, or any variation you’d like. The concept is you make the dough, let it rise for 2 hours, and then throw into the refrigerator for as long as 14 days. Anytime you need a fresh loaf you grab a handful of dough out of your container.


What you need: 

3 cups of lukewarm water (do NOT use to water that is too hot)
1 ½ tablespoons granulated yeast (2 packets)
1 ½ tablespoons kosher or other coarse salt
6 ½ cups unsifted, unbleached, all-purpose white flour
Cornmeal or Whole wheat flour for the pizza peel

1:  Add yeast and salt to the water in a the large bowl you will be storing the dough in or you can use an electric mixer (that is my method and I use the dough attachment.)

2:  Mix in the flour—kneading is unnecessary.  The key to this recipe is do NOT knead at any point!

3: Allow to rise: cover with a lid (not airtight).  At least 2 hours or up to 5 hours.  You could use it at this point to bake but the book suggests that the refrigerated dough is easier to handle.  Put into the refrigerator.

On Baking Day:

4: The gluten cloak: DON’T knead, just “cloak” and shape a loaf in 30 to 60 seconds.  Sprinkle your surface with the cornmeal or whole wheat flour.  Sprinkle the surface of your refrigerated dough with flour.  Pull up and cut off a 1 pound piece (grapefruit size) of dough.  Gently stretch the surface of the dough around to the bottom on all four sides, rotating the ball a quarter-turn as you go.  The correctly shaped product will be smooth on the top and bunched ends on the bottom.

5: Rest the loaf on the pizza peel (or surface) for 40 minutes.

6: Twenty minutes before baking preheat the oven to 450 F with the baking stone on the middle rack and an empty broiler tray on the bottom for holding water.

7: Dust with flour and slash the dough with a cross or X.

8:  Quickly slide the dough off of the surface onto your baking stone.  Quickly and carefully pour 1 cup of hot water into the broiler tray and close the oven door to trap the steam.  Bake for 30 minutes or until the crust is browned and firm to the touch (less time for Baguettes.)  When you take the bread out of the oven it will crackle to the room temperature and cool on a rack.

That is it! I encourage you to get the book if you are interested in other variations or are interested in other details like problem solving your challenges. Once you practice a couple of times you really could come home from work and have fresh bread within the hour. Then opening a can of soup for dinner seem that bad!

~ Jolie

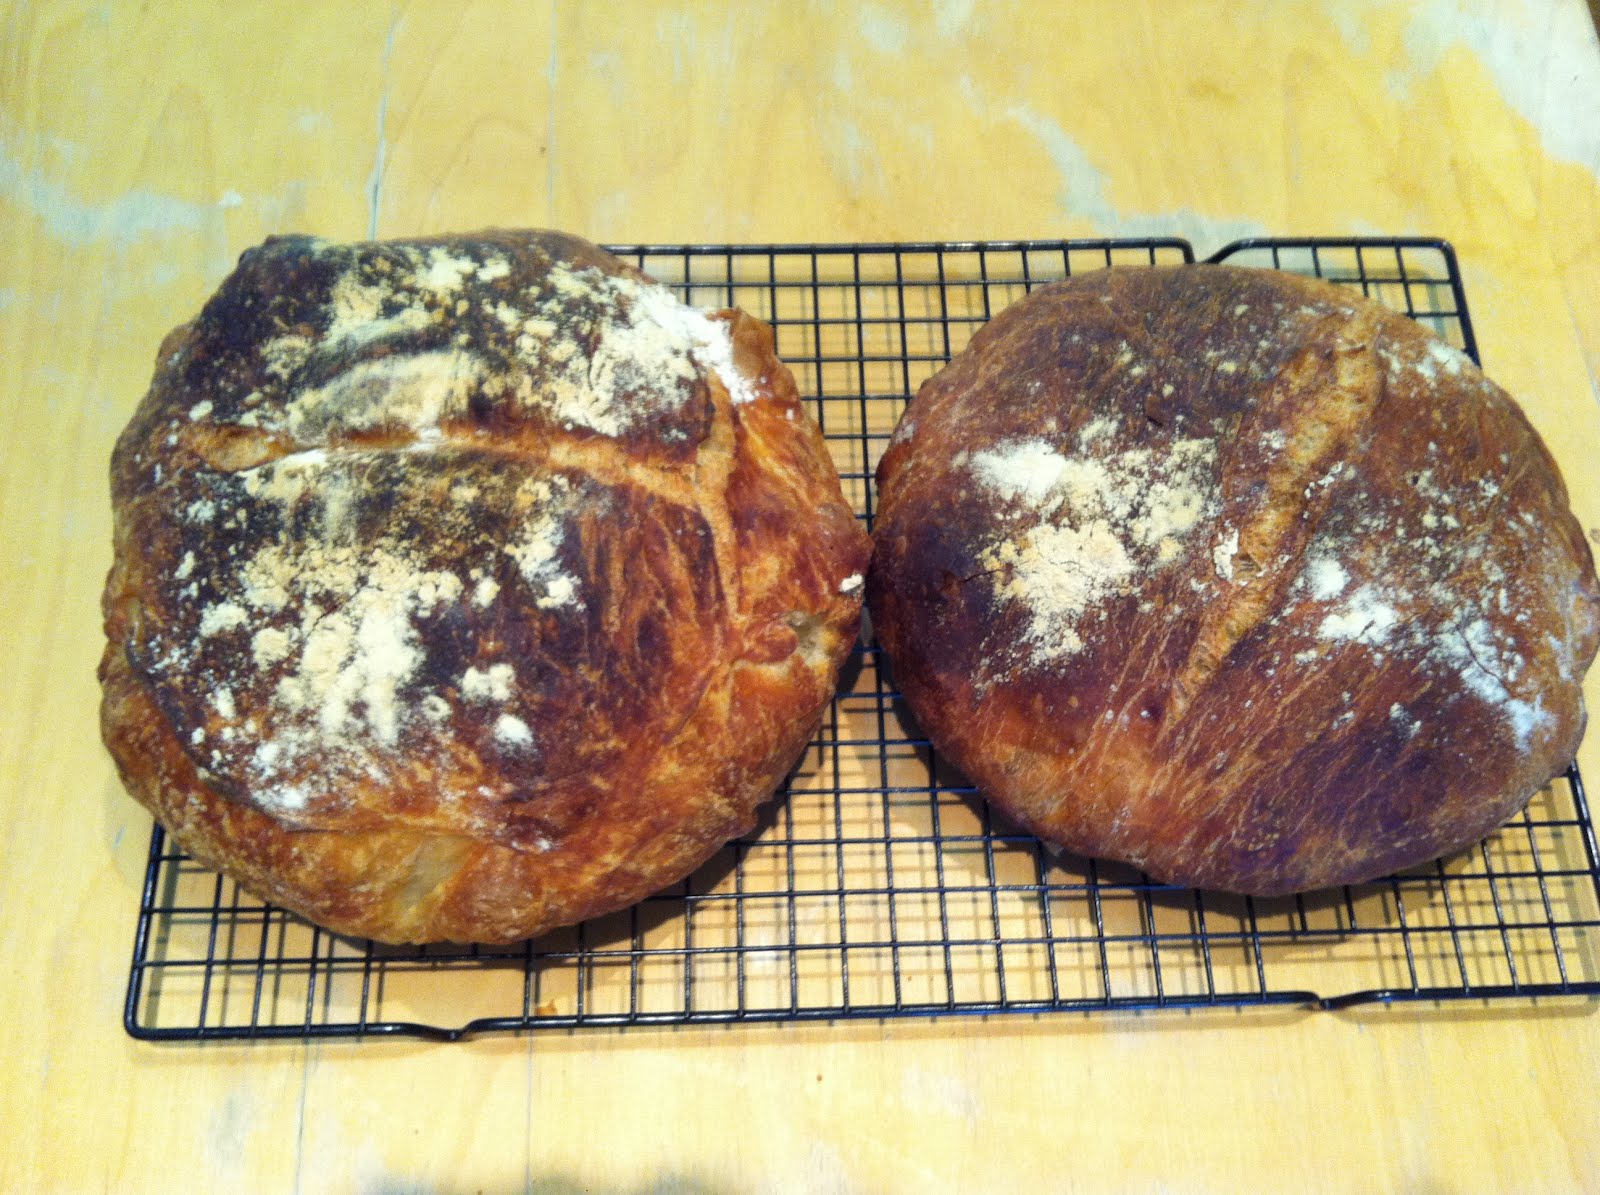
Ta-da! Finished product.

Thursday, October 24, 2013

Red Beans and Rice


I’ve always wanted to make a red beans and rice type recipe that you hear all about from New Orleans.  The only trouble is I have children that won’t eat the spice and I am not a big fan of meat.  How do you accommodate the family?  Well here is what I came up with and I did the user-friendly Slow Cooker version.


In a skillet on Medium heat cook the:
Onion
Green Pepper
3-4 cloves of Garlic (garlic in everything for Rachel)
Trader Joe’s 21 Season Salute  or other spice favorites
(This is also where you would throw in some spicy cayenne pepper if you didn’t have kids.)
6 Chicken Sausages sliced up (or you could use the veggie dog substitute)

Throw the heated mix into your Slow Cooker along with the red beans.  (I used 2 cans but some better cooks soak their beans overnight.)  I also added 2 cups of cooked brown rice at this point, while others like to put their mix over the rice at serving time.

Very important!  Add 2+ cups of water (you could substitute broth) so it can simmer together.  I would add more depending on how long you are going to keep it in the Crockpot.


I’m sure my version doesn’t compare to the spicy, ham soaked original but I felt good about feeding my children something healthy and hot for the evening (plus you throw cheddar cheese on anything and they'll eat it!)  Those are the only two requirements.  The next night we ate leftovers (good with tortillas) after another full day of curriculum night, Walk a Thon, and work.


Here is a picture of Mason on the first night after a full day of school, piano lessons, soccer practice, and now eating standing up while doing homework.  This is the kind of month we are having.  I never thought I would be the family or mom that is signed up for everything.  We only do one sport at a time but things tend to all pile into one time/day and you end up saying yes to everything because you want things to go well for your children and follow through with your commitments.  I’ll let you know how that theory works out for me in the next year.

Sunday, July 21, 2013

Easy Broccoli Slaw


There are three categories of moms.  The first is the full-time working mom with full-time childcare.  I did this for several years with Mason and the disadvantage of this is there is no hope to try to get things done on weekdays.  Everything is saved for weekends and then you're disappointed when you can't fit everything in.

The second category is the full-time stay-at-home mom.  There are plenty of blogs on the challenges and advantages this position brings.  I only did this briefly with both children after they were born so I can’t say I am an expert.

The third category is the part-time working mom with minimal childcare.  This is the category I am in now.  The advantages are you get to mix things up so you have a better balance in life, which I love!  The struggle is the myth that you should be able to accomplish what the working mom does and the stay-at-home mom does, all the while meeting your children’s needs.  On the tough days, I think the children would benefit from full-time care so they aren't ignored by me all day.  On the good days, I get lots done while spending time with my children so I can enjoy the weekends with my family.

If you are still with me, the conclusion is that each position comes with its challenges and it’s nice to have a couple of items in the refrigerator to throw together for a last minute BBQ or a dinner you don’t have time to plan and shop for.  That is where this coleslaw comes in...


Healthy and Tasty Coleslaw by Jolie:

A bag of Broccoli Slaw (shredded broccoli & carrots)
¼ cup of Coleslaw Dressing by Litehouse
A handful of Craisins
A handful of Sunflower Seeds

Toss together and serve!  Those bags of slaw can last forever in the fridge, by the way.  Also, for any of you with guilt over working while your children are feeling ignored, I was given this perspective from someone in the past that helped me:  Think of it like children playing in the fields while their mothers worked.  I am showing them a good work ethic while still being available to them.

Finally, a picture from our last minute weeknight BBQ with neighbors and my dad as we all juggle our lives!


Sunday, June 23, 2013

BBQ Brussels Sprouts


Hello fellow Beauties!

It's Jolie here.  It's been too long since I posted but it doesn't mean I am not thinking about this blog every time I cook.  In fact, Amber's last post about beer brats was exactly what we ate with these Brussels sprouts.

I am the only one the in the group with a school-age kiddo and it feels like we've been on an end-of-the-school-year countdown for the past several weeks!  It's that time of year when the old reading log just doesn't get signed.  But with baseball season, the talent show, and second grade behind us, we are all looking forward to a carefree summer with lots of backyard BBQs!

I grabbed these Brussels sprouts at Costco.  I sliced them in half and put them in a sprayed-down tin foil pouch.  I added garlic, salt, pepper, and a handful of rosemary.  I'm sure if you added butter that would be fabulous but we try to go without.  Then we tossed the tin foil pouch on the grill with the meat.  I think about 20 minutes but I started to lose track with all the mojitos I was drinking.  I don't think you could screw this one up.

Everyone loved them.  It's nice to mix it up a little.  Here is a picture of my family to spice up the post.  I will be back soon, I promise!

Go Sounders FC!

Friday, February 1, 2013

February Food Theme: Casseroles (and a Giving Challenge!)


The food theme for February is: Casseroles!  And you thought soup month was good…

I have always wanted to be better at casseroles. We didn't eat them when I was growing up like my husband (who is now slightly terrified of them).  But the concept is so practical! In fact, one of our Beauties is a part of a frozen dinner club, where they prepare multiple casseroles, freeze them, and then exchange them with the other members. That way you are preparing one huge meal and getting multiple various casseroles in return.

Even if you aren't organized enough to be a part of a meal club, you will surely know someone some day who has just had a baby or someone who just broke their elbow (me) and would love almost ANYTHING hot and made with love. You really should have one go-to casserole you can put together on short notice.

Thank you to our friend Hillary for inspiring me this month and delivering a home made shepherd's pie when I broke my elbow. We didn't even wait for it to thaw and my family ate it so fast it was slightly shocking (really, both children!).

So I challenge you this month to make two trays of your casserole recipe and pay it forward! Then report back on the giving.

Thursday, January 31, 2013

Game Time Party Food

Did someone say something about a Super Bowl? Well, the Beauties are more interested in the commercials, half time show and of course the food. Here's a handy list of some great party foods you can easily prepare for the big game...

Bacon-Wrapped Jalapeno Poppers
http://beautiesandthefeast.blogspot.com/2011/01/party-poppers.html

World's Best Baked Brie
http://beautiesandthefeast.blogspot.com/2010/12/worlds-best-baked-brie.html

 Southwest Egg Rolls
http://beautiesandthefeast.blogspot.com/2012/02/wheres-kale-recipes.html

Easy Cheesy Bread
http://beautiesandthefeast.blogspot.com/2011/12/easy-appetizer-side-dish-easy-peesy.html

Award-Worthy Chili
http://beautiesandthefeast.blogspot.com/2012/11/ambers-award-winning-chili.html

Pizza Dip
http://beautiesandthefeast.blogspot.com/2011/12/ambers-top-3-potluck-party-solutions.html

 3-Ingredient Chocolate Turtles
http://beautiesandthefeast.blogspot.com/2011/12/3-ingredient-chocolate-caramel-oh-so.html

Antipasto Platter
http://beautiesandthefeast.blogspot.com/2011/12/ambers-top-3-potluck-party-solutions.html

 Sausage Balls and Mascarpone Chive Dip
http://beautiesandthefeast.blogspot.com/2010/12/sausage-balls-mascarpone-chive-dip.html

Quick Meatball Subs
http://beautiesandthefeast.blogspot.com/2011/05/busy-moms-version-of-mexican-meatballs.html 

Parmesan Gorgonzola Sticks
http://beautiesandthefeast.blogspot.com/2010/12/reason-we-gain-weight-this-time-of-year.html

Monday, January 28, 2013

Thai Carrot Soup Party


One thing I love about soup month is that you really can’t screw up the ingredient measurements since it all gets blended together. Plus I got a book over the holidays with quick bread recipes that have become super easy, and a perfect addition to our soup nights. More on that later...

We went to a soup party over the holidays which was a brilliant idea! They had four different soups with toppings specific to each soup. (We love taco night for the same reason because you can customize your meal to your taste preference.) The big winner of the soup party was a Thai Carrot Soup, which both adults and children loved.

Inspired by the winner, I picked two recipes on the internet and put together my own version of it. I would love to try it again with coconut milk but I thought I’d go with this one to begin with.

Thai Carrot Soup

3 cloves of garlic
1 small onion
1 inch of ginger
4 cups of vegetable broth (or chicken)
cumin
Lemongrass
7-10 carrots
Fresh Cilantro

(Adult version: red pepper flakes or the Thai garlic red pepper sauce, fish sauce, soy sauce, lime juice, and cilantro blended in)


In a large stir-fry pot add garlic, onion, ginger, and lemon grass. Add the carrots and stir-fry for a couple of minutes then add half of the veggie broth. Simmer for 15-20 minutes until the carrots are soft. (Add spices at this point if you don’t have picky children.)


Now transfer everything to the blender or food processor. Add the rest of the veggie broth if you can or stir it in when you transfer it back to the pot.


Easy, right? Then I had some fun purple Thai rice, little pieces of cooked chicken, cilantro, grilled mushrooms, red pepper flakes out on the table so you could customize it to your tastes. Plus I threw some dough into the oven and you have a dinner party even when your husband is out of town on a boys' weekend.

Wednesday, January 2, 2013

2013 Challenge: Food Themes!

A new year, a new challenge
Wow. We at Beauties and the Feast can hardly believe we’re about to kick off our third year of food blogging. With nearly 220 posts and over 57,000 page views, we couldn’t have imagined having more fun while so many people tuned in to read about our culinary successes, disasters and life reflections.
We’ve had a new challenge each year. Our first was for each of us to claim a month and post a recipe, and have each one of us follow the recipe and post about the results. The second year we went Iron Chef style and chose an ingredient of the month, which challenged us to use something in a creative and delicious way. This year we’ve got a new challenge and we can’t wait for your participation.
In 2013 we’ll each be choosing a food theme in the beginning of the month. This way, we promise you’ll still have at least 4 new recipes (hopefully 6!) and hope that you’ll join in on the fun by sending your recipes to us, or volunteering for a guest-post!
January's Food Theme
Photo courtesty of allthingschristmas.com
So to kick off January, the month of freezing weather, frosty window panes and weekend days spent indoors curled up in a warm blankie, I’m choosing to proclaim the month of January Soup & Stew month! Also, I just got a brand new dutch oven for Christmas that I can't wait to use.


Thank you to all of you who read about, comment on and try our recipes! We really enjoy your participation and inspiration.
Happy 2013!
Love,
Megan, Emily, Rachel, Jolie, Missy and Amber

Wednesday, November 14, 2012

Thanksgiving Recipes - Love, BATF

Happy Thanksgiving!
Thanksgiving is upon us, so we thought it would be nice to help you prepare a bit. Whether you’re the one hosting or you’re the one responsible for bringing a side dish, we’ve got all the popular (and some non-traditional) recipes below. All tested and approved!
Here’s wishing you a happy, family-rich holiday full of feasting and drinking!
Love,
Beauties and the Feast
The Traditionals…
1)      The Turkey:


2)      The Stuffing:


3)      The Mashed Potatoes:


4)      The Gravy:


5)      The Cranberry Sauce:


And some non-traditional, vegetarian-friendly side dishes:


7)      Zucchini Gratin:


The Dessert! (we forgot to take a picture...must have eaten it too quickly)

Tuesday, October 2, 2012

Fall Recipies and Cocktails

Is it bad that all we want to do at BATF is curl up with a mug of hot cider and watch a movie while a big pot of soup cooks in the kitchen? Here in the Northwest we should be happy that the forecast is still sunny for as far as the eye can see, but I was just a little bit thrilled this morning when I woke up and it felt like crisp fall in the air.
In celebration of Oktoberfest, Pumpkins, spiced lattes and Stews we thought we’d post some of the favored autumn recipes from past posts.
Bring on those brooding storms! We’re ready for them!

Our favorite fall foods:

     1)      Oktoberfest Beer Roasted Chicken


     2)      Cranberry Chicken

     3)      Zuppa Toscana


     5)      Dahlia Lounge French Toast

     6)      Ricotta Dounuts

The warmest of beverages:
1)      Mulled Cider

2)      Spanish Coffee

3)      Hot Ginger Toddy

Sunday, September 30, 2012

“Foolproof Thin-Crust Pizza"


Okay the truth is I have wanted to try this recipe for a long time.  And in fact you may see it again another month with a different ingredient!  But as we’ve seen with other Pancetta posts almost anything can have some gourmet bacon thrown on it and it will taste great.

I started talking pizza lingo with someone I work with and he convinced me I needed a pizza stone.  He also gave me a copy of the recipe “Foolproof Thin-Crust Pizza” by Andrew Janjigian from a Cook’s Illustrated magazine (the Jan/Feb 2011 edition).  Before starting with the recipe, the author sets off to prove the science behind the dough.  In summary, he believes the fluffy dough (that rises at room temperate) is less flavorful then the thin crust that rises in the refrigerator.  He also tests the screen pizza pan against the pizza stone and proves that you cannot achieve the same results with anything but the pizza stone.  (Pizza’s are dryer and more cracker-like on the pans.)

If I haven’t lost you yet let’s move onto the dough recipe (he offers a sauce and cheese recipe but the dough is about enough for me today.)


Ingredients:
3 cups of bread flour, plus more for dusting (he recommends Semolina flour for ‘dusting the peel’)
2 teaspoons of sugar
½ teaspoon instant or rapid-rise yeast
1 1/3 cup (10 oz) ice water (no ice but the water needs to be cold)
1 tablespoon vegetable oil, plus a little more for surfaces
1 ½ teaspoon table salt

1.  In a food processor (I used my Blendtec but almost broke it) process flour, sugar, and yeast until combined.  With machine running slowly add water through feed tube; process until dough is just combined and no dry flour remains (10 seconds).  Let dough stand 10 minutes.  (missed this part, whoops)
2.  Add oil and salt to dough and process until dough forms satiny, sticky ball that clears sides of workbowl, 30 to 60 seconds.  Remove dough from bowl, knead briefly on lightly oiled countertop until smooth, 1 minute.  Shape dough into tight ball and place in large, lightly oiled bowl.  Cover tightly with plastic wrap and refrigerate for at least 24 hours and up to 3 days.
3.  One hour before baking pizza, adjust oven rack to second highest position, set pizza stone on rack, and heat oven to 500 degrees. Remove dough from refrigerator and divide in half.  Shape each half into smooth, tight ball.  Place on lightly oiled baking sheet, spacing them at least 3 inches apart; cover loosely with a plastic wrap coated with nonstick cooking spray; let stand for 1 hour.
4.  Coat 1 ball of dough generously with flour and place on well-floured countertop.  Using fingertips, gently flatten into 8-inch disk, leaving 1 inch of outer edge slightly thicker than center.  Using hands, gently stretch disk into 12-inch round, working along edges and giving disk quarter turns as you stretch.  Transfer dough to well-floured peel and stretch into 13-inch round.  Using back of spoon or ladle, spread ½ cup tomato sauce in thin layer over surface of dough, leaving ¼ inch border around edge.  Sprinkle ¼ cup Parmesan evenly over sauce, followed by one cup mozzarella.  Slide pizza carefully onto stone and bake until crust is well browned and cheese is bubbly and beginning to brown, 10 to 12 minutes, rotating pizza halfway through.  Remove pizza and place on wire rack for 5 minutes before slicing and serving.


After reading this three page instructional article, I thought the end result would be an explosion in my mouth!  With such high expectations the little imperfections made it hard for me to make a fair assessment.  My husband ranted and raved, which gives me inspiration to try again.  A couple lessons learned:  go for the Semolina flour because the baking flour on the bottom of the pie didn’t add to the taste.  I turned my oven down to 450 after I put the pizza in to make the second pie not so brown.  The pizza stone was pretty great, although I think it takes some practice on how you take the pizza that is made up and transfer it to the pre-heated stone without it catching and scrunching up.


The next step will be perfecting the ingredients.  I may go on a pizza exploration over the upcoming winter months.  I'm ready for comfort food season to begin!

Thursday, August 2, 2012

August Ingredient: The Tomato


I have always envied great garden's.  To me it seems to be a great mystery that some folks can really be great at.  There are so many variables that it tends to overwhelm me and I leave it up to my husband to be in charge of.  But the one thing I see everyone grow is tomato's!

How do you grow your tomato's?  Is there anything to the newest upside down growth method?  We were so busy this year that we just bought the half way grown ones and they seem to be doing really well.  Is there any way to get them to not all ripen at once?

This month let's really explore this "vegetable" and then we will all have ideas for what to do with all those tomato's when they are ready.
This is for those of you that get confused by the fruit/vegetable debate from Wikipedia:

The tomato fruit is consumed in diverse ways, including raw, as an ingredient in many dishes and sauces, and in drinks. While it is botanically a fruit, it is considered a vegetable for culinary purposes (as well as by the United States Supreme Court, see Nix v. Hedden), which has caused some confusion. The vegetable is rich in lycopene, which may have beneficial health effects.

Sunday, June 3, 2012

Two Months in One: Almost No-Knead Bread


I am excited to present to you my two months into one post. Hey, I am in the busy mom category and I am doing my best! I have been holding onto this recipe for a long time because I didn’t have a Dutch oven until Christmas so I am proud to say I finally used it and it was worth the wait.

We spend each Thanksgiving and Christmas with the Lotz/Bay family. They have been friends with my parents for as long as I am old… Allison is a busy mom of 3 boys and shows up every year with some really cool food items, while I still glorify my cranberry sauce. She makes this home made bread that looks store bought and I asked her for the recipe.

The recipe is called “Almost No-Knead Bread” from America’s Test Kitchen. I actually enjoy reading their recipes because they test the same recipe different ways and explain why you do certain parts to the process—like the reason for using the Dutch Oven. This is the perfect item to bring when invited to dinner and that is just what I did! Pairing it with artichoke tapenade and steamed artichokes met my May goal.


It’s really wordy but actually super fast and easy:

An enameled cast-iron Dutch oven with a tight-fitting lid yields best results, but the recipe also works in a regular cast-iron Dutch oven or heavy stockpot. (See the related information in "High-Heat Baking in a Dutch Oven" for information on converting Dutch oven handles to work safely in a hot oven.) Use a mild-flavored lager, such as Budweiser (mild non-alcoholic lager also works). The bread is best eaten the day it is baked but can be wrapped in aluminum foil and stored in a cool, dry place for up to 2 days and makes one loaf.


3 cups unbleached all-purpose flour (15oz) 
¼ teaspoon instant or rapid-rise yeast 
1 ½ teaspoons table salt 
¾ cup plus 2 tablespoons water, at room temperature (7oz) 
¼ cup plus 2 tablespoons mild-flavored lager (3oz) 
1 tablespoon white vinegar 


1. Whisk flour, yeast, and salt in large bowl. Add water, beer, and vinegar. Using rubber spatula, fold mixture, scraping up dry flour from bottom of bowl until shaggy ball forms. Cover bowl with plastic wrap and let sit at room temperature for 8 to 18 hours. 


2. Lay 12 by 18 inch sheet of parchment paper inside 10-inch skillet and spray with nonstick cooking spray. Transfer dough to lightly floured work surface and knead 10 to 15 times. Shape dough into ball by pulling edges into middle. Transfer dough, seem side down, to parchment-lined skillet and spray surface of dough with nonstick cooking spray. Cover loosely with plastic wrap and let rise at room temperature until dough has doubled in size and does not really spring back when poked with finger, about 2 hours. 


3. About 30 minutes before baking, adjust oven rack to lowest position, place 6 to 8 quart heavy-bottomed Dutch over (with lid) on rack, and heat oven to 500 degrees. Lightly flour top of dough and, using razor blade or sharp knife, make one 6-inch long, ½ inch deep slit along top of dough. Carefully remove pot from oven and remove lid. Pick up dough by lifting parchment overhang and lower into pot (let excess parchment hang over pot edge). Cover pot and place in oven. Reduce temperature to 425 degrees and bake covered for 30 minutes. Remove lid and continue to bake until loaf is deep brown and instant-read thermometer inserted into center registers 210 degrees, 20 to 30 minutes longer. Carefully remove bread from pot; transfer to wire rack and cool to room temperature, about 2 hours.


I’m not saying I didn’t forget to turn the temperature back down, or catch the parchment paper on fire briefly, or slightly burn the bottom of the bread. (I also don’t have a thermometer.) But even with these barriers it turned out great and I managed to impress the Falkin family! (Thank you to the Falkin family for a great dinner, always looking out for Mason when his mom is late, and I’ll be hitting you up for that bagel recipe!)


Now to squeeze in the June ingredient: Rosemary. Use the same recipe above and in the dry mix add 1 tablespoon of minced fresh rosemary and 4 oz finely grated Parmesan cheese. In the liquid mixture add ½ cup of chopped green olives. Then follow the same instructions.

Which beauty will host our family for dinner, so I can have an excuse to make this again?!