I seriously can not believe it is 2013.....I know people say time really flies by but I feel like I just graduated college. Sorry for my recent long absence! I was busy traveling and just got back from Africa. It was a pretty amazing trip and experience. Then the holidays hit, and let's face it I got a serious addiction to Candy Crush on my iPad. I mean luckily you have to wait to get more lives so I was able to fit in walking my sister's dog as well as eating and drinking while catching up with friends.
In reviewing the past year in the world of Beauties, I realized we neglected a very important moment of 2012. Ready for it? The introduction of our newest Beauty baby boy! Rachel welcomed Otto this past summer. His favorite food currently is Mom's milk but we are sure that will change once Rachel's beautiful garden is ready. How could you not love this gorgeous face?
Otto makes it Beauty baby boy number 6 and we are expecting Beauty baby boy number 7 from Miss Emily in February. Yes, the Beauties are working hard to raise a whole generation of male cooks....
We also had some amazing recipes this year. We thought we would do a quick recap of our Top 5 for 2012. Here you go:
#5: The Best Way to Cook an Artichoke
#4: Magic Chocolate Flan Cake
#3: Lavender Infused Gin
#2: Pulled Lamb Gyros
#1: Ricotta & Artichoke Stuffed Eggplant
The Beauties would like to thank all our friend, families, and fans who make this blog so much fun! We look forward to bringing in a new theme for 2013. What was your favorite BATF recipe this year?
Showing posts with label Ricotta. Show all posts
Monday, December 31, 2012
Saturday, April 28, 2012
{Weekend Brunch} Ricotta Pancakes
We had a perfect Saturday
morning that consisted of sleeping in, waking up to sunshine and Curtis whipping up mimosas while I
made fluffy ricotta pancakes for brunch. And the cherry on top was that it was warm enough to eat breakfast outside on our deck!
I took the below recipe from
theKitchn and gave it a Hawaiian twist (obviously inspired by Amber’s Maui recap!) by adding macadamia nuts to the pancake batter and topping the hot
cakes with Greek yogurt, sliced mangos, bananas and maple syrup. After round
one, Curtis suggested chopping the mac nuts before adding them to the pancakes and
that was the way to go!
1 cup ricotta cheese
3/4 cup flour
1/2 teaspoon baking powder
1 1/2 tablespoons sugar
pinch salt (they turned out kind of sweet, so next time I’d add at least ½ tsp. salt or more)
3/4 cup milk
3 eggs, divided
1/2 teaspoon vanilla
3/4 cup flour
1/2 teaspoon baking powder
1 1/2 tablespoons sugar
pinch salt (they turned out kind of sweet, so next time I’d add at least ½ tsp. salt or more)
3/4 cup milk
3 eggs, divided
1/2 teaspoon vanilla
Set ricotta in a fine mesh strainer about 30 minutes before you
start cooking, to drain off excess liquid. (I didn’t bother!)
Whisk together flour, baking powder, sugar, and salt in a bowl.
Combine ricotta, milk, egg yolks, and vanilla in a separate bowl. (Again didn't bother, after I whipped the egg whites, I just dumped everything in the bowl of my Kitchen Aid and mixed it up.)
Beat the egg whites in an electric mixer until stiff (this is the important part, beating egg whites = fluffy pancakes!). Add the dry ingredients to the ricotta and milk mixture, stirring gently until just combined. Whisk in a small amount of the egg whites to lighten the batter, then fold in the remaining whites.
Heat a griddle over medium-high heat, and brush the surface with
butter. Use a ladle or measuring scoop (we used a 1/3 cup measure) to pour batter
onto the griddle. Cook pancakes for about 3 or 4 minutes, then flip, cooking
until both sides are golden brown.
If you’re making the Hawaiian version, add chopped up macadamia nuts to the batter and top with fresh fruit and syrup.
Thursday, April 26, 2012
Ricotta Mango Chutney Bruschetta
This is a super quick and easy, 3-ingredient appetizer that’s so tasty!
Baguette
Ricotta
Mango chutney or mango spread
Directions:
Slice your baguette and toast or grill it. You can spread a
little butter or olive oil on it first if you wish, or leave it naked if you’re
a purist.
Thursday, April 19, 2012
Donna's It's-All-About-The-Cookie-Gun Manicotti
Welcome guest blogger Donna, who submitted a post of her famously easy manicotti (if not famous yet, soon-to-be). I had some -- it's TO DIE FOR delicious! And I begged Donna to post her recipe so we could all be better people because of it. You're welcome...
Donna:
Who doesn’t love manicotti? It’s one of those Italian pasta/cheese/tomato/garlic/and-hopefully-basil combos that sets your soul soaring. But, I could count on the fingers of one foot how many people I knew who would break out and make the stuff. Well, okay, my one gal-pal did…now and then…actually rarely. Why would she do that to herself, I would ask. Stuffing those slimy tubes is like force-feeding a slug…who won’t even help you by at least resisting. (I have a friend with such an aversion to slugs that after reading this she may never eat manicotti again.) I say go make someone else to do it for you; that’s why God created take-out. Oh no, she said, she didn’t do the tube-thing. Her recipe had crepes…little flat pancakes that you made first (by the thousands, I’m sure)…then rolled them up with filling inside…like a basil-y burrito. My anal-retentiveness woke up with that. What if I had a crepe leftover, or too few of them? What do I do then? ACK! And how long did all this take? “Oh only about 3 hours…” “Did you really just say “Only”?” I like huge impact with very little time investment, so to no one’s surprise, the recipe sat in the drawer for years…until just after Christmas one year.
When the kids were young, making Christmas cookies always involved a cookie gun, not only so little hands could do fancy things, but also so the afore-mentioned mom-issue didn’t compel me to fix, straighten and improve everything. I have this ancient cutie my mom bought me at some swap-meet once upon a time for a buck. (That wasn’t the great bargain that swap-meets are supposed to cough up, since under old magic-marker I can still read the original price of $3.49) And one Christmas-baking day, while watching the kids “clean up”, which usually involved shooting bits of leftover dough in their mouths, my brain took note, but still set it aside. It wasn’t until I read where you can make lasagna without cooking the noodles first that I had my great epiphany. That day the heavens opened and they’ve stayed open ever since, for I have tamed the untamable. The recipe came out of the drawer and is now well loved, tomato-stained and barely readable. No more thoughts of take-out I could improve on, or slugs that need feeding…for I can throw down manicotti in an hour and a half, including cooking. I am amazing. And you can be too.
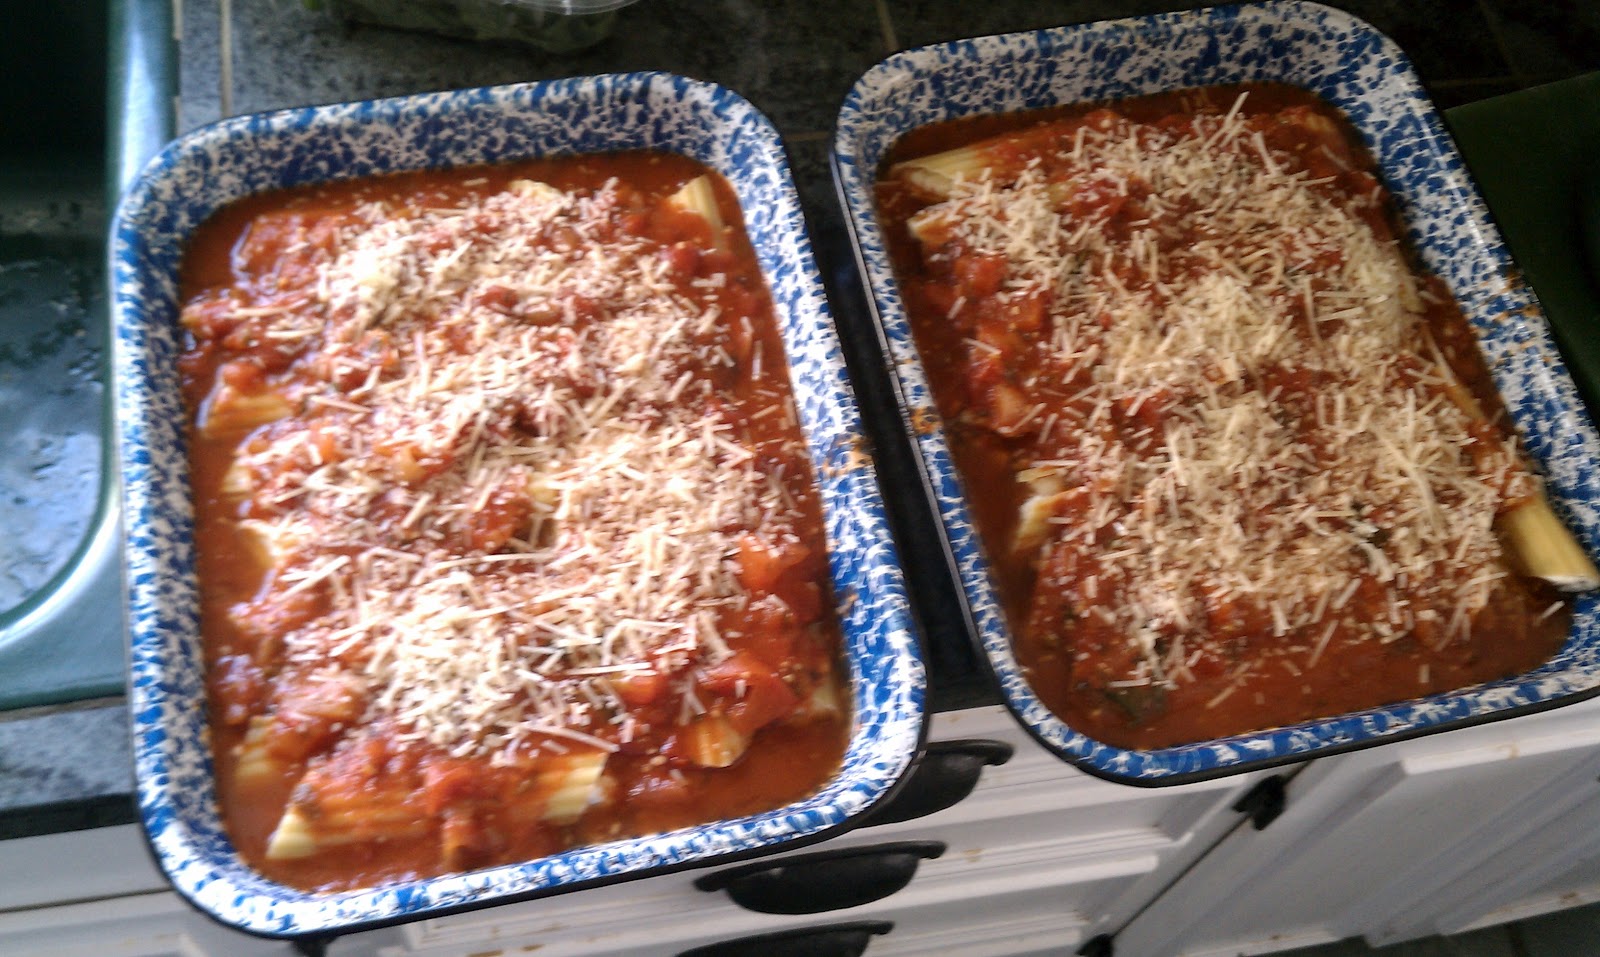
There are two secrets to easy-peasy manicotti. One is that oh-so-wonderful cookie gun! Get one. Once you get the manicotti filling made, load up that sucker, turn it on ‘thick’ and let ‘er rip. Once you become a pro like me (about 10 minutes in), you’ll have a pound of them stuffed in about 10-15 minutes. The second secret is to add an additional 2 cups of water to your sauce just before assembling to bake. That will ensure your raw noodles will be cooked when done. (Adding 2 cups of water to the sauce before assembly works with 1 lb of raw lasagna noodles too.) The only downside to this process is that your noodle edges do tend to stick to each other a little and are a bit difficult to separate. Also, if you cook the noodles in the sauce, realize that gone are the days of snow white manicotti noodles that you pour rich, red sauce on. Nope, the sauce will be absorbed right into the little noodle bodies. But one of your Beauties, Missy said it best in her conclusion of “Umm, who cares?”
Donna’s Manicotti – make enough for 1 pound or 2 boxes manicotti tubes, Yield: 2 casseroles
Manicotti Tomato Sauce:
1/3 cup olive oil
1 ½ cup chopped onion
Clove Garlic, whatever you like, I use about 3
3 (14.5oz) cans diced tomatoes, or combo of cans and fresh
6 oz can tomato paste
2-3 Tbl. fresh parsley
1 Tbl. salt
1 Tbl. sugar
1 Tbl. fresh oregano, chopped
Small chunk fresh basil, chopped
¼ tsp pepper
1 ½ cup water
If you like heat, throw in some cayenne, a pinch or two to taste.
Fry onions and garlic in oil for a minute to two. Add the rest, including water (this is not the extra water for the raw noodles). Let cook while you assemble manicottis.
Filling:
2 eggs
1 tsp salt
¼ tsp pepper
Couple Tbl. fresh parsley
1/3 cup parmesan cheese or combo with parmesan, oregano, asiago
8 oz. mozzarella
2 lb. ricotta
I throw all the filling ingredients in a big mixer for about ½ minute. Load your gun, set on high, take aim and fire at all the noodles. Some might be squashed, so a knife helps here. Once filled, I just put them back in those little plastic crate thingies they come in until I’m ready. Don’t fill too early. They will absorb liquid from the cheese and burst. Not that it matters…
Assembly: Spray 2 13x9 pans with cooking spray. Mix in 2 cups water to your finished sauce for cooking noodles. Put a scoop or two on the bottom of each pan. Add manicottis in one layer on top of sauce and cover with remaining sauce. Sprinkle some parmesan, or asiago or romano over the top, add tight tinfoil lid and bake at 350° for an hour, rotating halfway through.
Donna:
Who doesn’t love manicotti? It’s one of those Italian pasta/cheese/tomato/garlic/and-hopefully-basil combos that sets your soul soaring. But, I could count on the fingers of one foot how many people I knew who would break out and make the stuff. Well, okay, my one gal-pal did…now and then…actually rarely. Why would she do that to herself, I would ask. Stuffing those slimy tubes is like force-feeding a slug…who won’t even help you by at least resisting. (I have a friend with such an aversion to slugs that after reading this she may never eat manicotti again.) I say go make someone else to do it for you; that’s why God created take-out. Oh no, she said, she didn’t do the tube-thing. Her recipe had crepes…little flat pancakes that you made first (by the thousands, I’m sure)…then rolled them up with filling inside…like a basil-y burrito. My anal-retentiveness woke up with that. What if I had a crepe leftover, or too few of them? What do I do then? ACK! And how long did all this take? “Oh only about 3 hours…” “Did you really just say “Only”?” I like huge impact with very little time investment, so to no one’s surprise, the recipe sat in the drawer for years…until just after Christmas one year.
When the kids were young, making Christmas cookies always involved a cookie gun, not only so little hands could do fancy things, but also so the afore-mentioned mom-issue didn’t compel me to fix, straighten and improve everything. I have this ancient cutie my mom bought me at some swap-meet once upon a time for a buck. (That wasn’t the great bargain that swap-meets are supposed to cough up, since under old magic-marker I can still read the original price of $3.49) And one Christmas-baking day, while watching the kids “clean up”, which usually involved shooting bits of leftover dough in their mouths, my brain took note, but still set it aside. It wasn’t until I read where you can make lasagna without cooking the noodles first that I had my great epiphany. That day the heavens opened and they’ve stayed open ever since, for I have tamed the untamable. The recipe came out of the drawer and is now well loved, tomato-stained and barely readable. No more thoughts of take-out I could improve on, or slugs that need feeding…for I can throw down manicotti in an hour and a half, including cooking. I am amazing. And you can be too.
![]() |
| You too can enjoy making manicotti once again... |
![]() |
| This is what a 32-year-old, well-loved recipe looks like. |
There are two secrets to easy-peasy manicotti. One is that oh-so-wonderful cookie gun! Get one. Once you get the manicotti filling made, load up that sucker, turn it on ‘thick’ and let ‘er rip. Once you become a pro like me (about 10 minutes in), you’ll have a pound of them stuffed in about 10-15 minutes. The second secret is to add an additional 2 cups of water to your sauce just before assembling to bake. That will ensure your raw noodles will be cooked when done. (Adding 2 cups of water to the sauce before assembly works with 1 lb of raw lasagna noodles too.) The only downside to this process is that your noodle edges do tend to stick to each other a little and are a bit difficult to separate. Also, if you cook the noodles in the sauce, realize that gone are the days of snow white manicotti noodles that you pour rich, red sauce on. Nope, the sauce will be absorbed right into the little noodle bodies. But one of your Beauties, Missy said it best in her conclusion of “Umm, who cares?”
![]() |
| No tubes were hurt in the making of this manicotti. |
![]() |
| And cookie gun sales start rising... |
Donna’s Manicotti – make enough for 1 pound or 2 boxes manicotti tubes, Yield: 2 casseroles
Manicotti Tomato Sauce:
1/3 cup olive oil
1 ½ cup chopped onion
Clove Garlic, whatever you like, I use about 3
3 (14.5oz) cans diced tomatoes, or combo of cans and fresh
6 oz can tomato paste
2-3 Tbl. fresh parsley
1 Tbl. salt
1 Tbl. sugar
1 Tbl. fresh oregano, chopped
Small chunk fresh basil, chopped
¼ tsp pepper
1 ½ cup water
If you like heat, throw in some cayenne, a pinch or two to taste.
Fry onions and garlic in oil for a minute to two. Add the rest, including water (this is not the extra water for the raw noodles). Let cook while you assemble manicottis.
Filling:
2 eggs
1 tsp salt
¼ tsp pepper
Couple Tbl. fresh parsley
1/3 cup parmesan cheese or combo with parmesan, oregano, asiago
8 oz. mozzarella
2 lb. ricotta
I throw all the filling ingredients in a big mixer for about ½ minute. Load your gun, set on high, take aim and fire at all the noodles. Some might be squashed, so a knife helps here. Once filled, I just put them back in those little plastic crate thingies they come in until I’m ready. Don’t fill too early. They will absorb liquid from the cheese and burst. Not that it matters…
Assembly: Spray 2 13x9 pans with cooking spray. Mix in 2 cups water to your finished sauce for cooking noodles. Put a scoop or two on the bottom of each pan. Add manicottis in one layer on top of sauce and cover with remaining sauce. Sprinkle some parmesan, or asiago or romano over the top, add tight tinfoil lid and bake at 350° for an hour, rotating halfway through.
Labels:
April's Secret Ingredient,
guest post,
pasta,
Ricotta
Monday, April 16, 2012
Spinach Stuffed Pasta Shells
The first thing most people think about when they hear ricotta is lasagna or something similar. I am thankful to Emily and Missy for not doing the go-to recipe and leaving me the most obvious one. I went for the Spinach and Cheese shells as I was looking for something with more veggies and no meat. I did manage to find whole wheat lasagna pasta while shopping so next time I'll go for the lasagna. I was also hoping I could freeze something to bring with us on our road trip to Montana in two weeks! It will be one less meal to cook while being gone for over a week!
Spinach and Cheese Shells (taken from www.allrecipies.com:)
32 jumbo pasta shells
2 cups ricotta cheese
2 (10 ounce) packages frozen chopped spinach, thawed and drained
1 cup grated Parmesan cheese
2 tablespoons fennel seed
2 teaspoons dried basil
4 cloves garlic, minced
salt and pepper to taste
3 1/2 cups spaghetti sauce
Directions
Preheat oven to 350 degrees F (175 degrees C).
Bring a large pot of salted water to boil, gently place pasta shells in boiling water; bring water back to boil. Cook until noodles are just tender; drain well.
Squeeze spinach dry. Combine spinach, ricotta, 1/3 cup Parmesan cheese, fennel, basil and garlic in a large mixing bowl. Season with salt and pepper; mix well.
Spread 1/2 cup marinara sauce evenly over the bottom of a 9x13 inch baking dish.
Fill each pasta shell with the spinach cheese mixture. Arrange the shells, filling side up in the baking dish. Spoon remaining marinara sauce over the shells. Sprinkle remaining Parmesan cheese on top of the shells.
Cover the pan loosely with aluminum foil and bake in preheated oven until heated through; about 30 minutes.
Modifications: I used fresh spinach because it's easy to do (the big one from Costco). I used a ton of sauce because it looks better. I did cook two shells to taste test for my post. I thought they weren't too rich and I didn't think the spinach flavor was noticeable. I just hope the kids feel the same way. The rest I freezed in a throw away pan.
Wish me luck with the kids on a 12 hour road trip! Any tips?
Friday, April 13, 2012
Ricotta Mashed Potatoes
I want a do over for this one. I made Ricotta Mashed Potatoes for Easter dinner and instead of quadrupling all the ingredients to meet the quadrupled amount of potatoes needed for my family, I just sort of "eyed" everything. Included all the listed ingredients including a big tub of ricotta, a bunch of butter, salted it to the ends of the earth -- and it was good! But still too ordinary. I was expecting more of that cheesy tang that was promised in the recipe description and I think I just needed more ricotta.
So here's what I plan to do next time because I still have faith in this little recipe: I'm going to make a much smaller batch for my little family using the proper amount of ricotta cheese, and I'm going to add Parmesan too. Oh and maybe garlic for good measure.
When I make mashed potatoes, I rarely prepare them the same way -- on purpose! Because mashers are the perfect food to take on any bold flavors you like. They're like a clean canvas waiting for your culinary artistry... (Inspired yet?)
Don't be dissuaded by my less than thrilling review of these mashers; I really think there's potential for greatness here:
Ricotta Mashed Potatoes From Country Living
Ingredients
2 pound(s) Yukon Gold Potatoes
2 teaspoon(s) Salt
1 1/2 cup(s) Fresh Ricotta
1/2 cup(s) Whole Milk
3 tablespoon(s) Butter
1/2 teaspoon(s)
Ground Black Pepper
Directions
Heat oven to broiler setting. Peel and cut potatoes into 1-inch pieces. Place potatoes and 1 teaspoon salt in a large pot and cover with water. Bring to a boil and continue to cook over medium heat until potatoes are tender, about 20 minutes more. Drain and return all but 1 cup of potatoes to the pot.
Mash the potatoes with a potato masher. Stir in the ricotta, milk, butter, remaining salt, and pepper to blend. Add the reserved potatoes and mash just until combined. Spoon 1/2 cup potatoes into 10 six-ounce ramekins and set on a baking pan. Place under broiler until browned. Serve hot.
Notes: I left the skins on and obviously opted out of the individual portions. Use a mixer to really blend flavors well.
So here's what I plan to do next time because I still have faith in this little recipe: I'm going to make a much smaller batch for my little family using the proper amount of ricotta cheese, and I'm going to add Parmesan too. Oh and maybe garlic for good measure.
When I make mashed potatoes, I rarely prepare them the same way -- on purpose! Because mashers are the perfect food to take on any bold flavors you like. They're like a clean canvas waiting for your culinary artistry... (Inspired yet?)
Don't be dissuaded by my less than thrilling review of these mashers; I really think there's potential for greatness here:
Ricotta Mashed Potatoes From Country Living
Ingredients
2 pound(s) Yukon Gold Potatoes
2 teaspoon(s) Salt
1 1/2 cup(s) Fresh Ricotta
1/2 cup(s) Whole Milk
3 tablespoon(s) Butter
1/2 teaspoon(s)
Ground Black Pepper
Directions
Heat oven to broiler setting. Peel and cut potatoes into 1-inch pieces. Place potatoes and 1 teaspoon salt in a large pot and cover with water. Bring to a boil and continue to cook over medium heat until potatoes are tender, about 20 minutes more. Drain and return all but 1 cup of potatoes to the pot.
Mash the potatoes with a potato masher. Stir in the ricotta, milk, butter, remaining salt, and pepper to blend. Add the reserved potatoes and mash just until combined. Spoon 1/2 cup potatoes into 10 six-ounce ramekins and set on a baking pan. Place under broiler until browned. Serve hot.
Notes: I left the skins on and obviously opted out of the individual portions. Use a mixer to really blend flavors well.
| And just because I can: My fam scarfing Easter dinner with the OSU baseball game in the background -- that's my nephew pitching on TV! |
Labels:
April's Secret Ingredient,
holidays,
Missy,
Ricotta,
side dish
Monday, April 9, 2012
Ricotta Doughnuts
When
I read this month’s ingredient was ricotta, my first thought was to make one of
my very favorite foods: ricotta gnocchi. Easy to make, and oh so delicious.
But
before Rachel posted her ingredient for the month, I was determined to take
whatever the secret ingredient was and make dessert. I was inspired by a recipe
for Ginger Spice Cake I just saw in Bon Appetit, with Dijon mustard listed as one of
the cake ingredients. See? Anything can be made into a dessert. Well unless she
had picked halibut. That would have been a tough one.
But
alas, I made a breakfast dish. But we all know doughnuts are really just a good
excuse to have dessert for breakfast. And doughnuts followed by Easter candy
made a really great breakfast! The ricotta dough made an awesome doughnut with a crispy outside and spongy, delicious inside.
We
tried three flavors and our favorite was a plain doughnut smeared with mascarpone
lemon cream, followed by powdered sugar and then cinnamon sugar. We don’t have
a deep fryer, so I just used a Le Creuset dutch oven, but I think a regular
frying pan with high sides would have worked just fine as well. This was a
super quick and easy recipe and it was really fun to have homemade doughnuts
for the first time!
Vita’s Ricotta Doughnuts
Ingredients:
6 large eggs
1/2 cup sugar
1 pound whole or skim milk ricotta
2 1/2 cups all-purpose flour
1 heaping tablespoon baking powder
1 teaspoon pure vanilla extract
1/2 cup sugar
1 pound whole or skim milk ricotta
2 1/2 cups all-purpose flour
1 heaping tablespoon baking powder
1 teaspoon pure vanilla extract
Pinch
of nutmeg (optional)
Canola or vegetable oil for frying
Do-Aheads
You can cover the bowl of batter and put it in the refrigerator at this point (up to 1 day ahead) until you’re ready to fry but you may have to increase the frying time slightly to compensate for the colder batter. (We used about 1/3 of the batter on day 1 and will make fresh, hot doughnuts with the rest of it.)
You'll need
Deep-frying thermometer (I don’t have one of these, so I just tested the oil by frying one doughnut at a time until I got it just right. At first it was too hot, but once I turned it down, they turned a nice golden color.)
1. In a large bowl, mix together the eggs, sugar, ricotta, flour, baking powder, vanilla extract, and nutmeg (I forgot to put nutmeg in) until combined, being careful not to over mix the batter.
2. Heat 2 to 3 inches of oil in a deep, heavy pot to 325°F. (Turns out it takes a lot more oil than I thought to fill a Le Creuset with 3 inches of oil. By the time I emptied my bottle, I only had about a ½ inch of oil. But I flipped the doughnuts about every 30 seconds and it worked just fine.) Drop the batter by small ice cream scoopfuls or small spoonfuls (use 2 teaspoons) into the oil and fry for 3 minutes, turning often, until golden brown on each side. You may need fry the doughnuts in two batches to avoid crowding the pot. Break open doughnut to make sure it’s cooked all the way through. Scoop out the doughnuts with a slotted spoon and transfer to paper towels or a brown paper bag to drain. Let the oil come back up to temperature and repeat with remaining batter.
3. Dust heavily with powdered sugar or cinnamon sugar and serve hot.
Optional
Toppings:
Lemon
Mascarpone Cream (our favorite!) – Combine ½ cup mascarpone with 2 TBSP lemon
juice, 1 TBSP lemon zest, 1/8 cup sugar and a pinch of salt. Add more sugar and
lemon to taste.
Powdered
Sugar – Dump some in a brown paper bag. Add a few doughnuts at a time, hot out
of the oil and give it a shakey shake.
Cinnamon
Sugar – 1 tsp. cinnamon combined with 1/3 cup sugar (keep leftovers to put on
toast!). Roll the doughnuts in your cinnamon sugar concoction straight out of the hot oil so it will stick!
Subscribe to:
Posts (Atom)