Showing posts with label beef. Show all posts

Thursday, October 23, 2014

Polenta Taco Bake

Who knew polenta was so awesome? I did not -- until yesterday. I'll be honest, it kind of creeped me out when I was slicing it up. Something about that didn't sit well with me. Texture thing. But when it's cooked, it's amazing! And yesterday was one of those days for me when I had a stroke of culinary genius putting random ingredients together from my fridge before they expired even more than they were already expired. So here we go...


Polenta Taco Bake

1 lb ground beef
1 roll of polenta (Is that normal? Mine came from Trader Joe's)
Mexican shredded cheese
Taco seasoning
Onions, chopped
Toppings: Taco toppings like shredded lettuce, guac, olives, tomatoes, sour cream

Brown the ground beef and drain. Add a half cup of water, seasoning, onions (or in my case, expired pico de gallo), and simmer till well seasoned.

While browning, spray a baking dish. Slice polenta and layer in baking dish. Sprinkle thin layer of cheese over top. 

Layer seasoned beef over top of polenta, then smother it in more cheese. 

Bake at 350 for 20-30 minutes, uncovered. 

Remove from oven and add taco toppings.

You're welcome.


Friday, November 1, 2013

Slow-Cooker Chunky Beef Chili

I wish I could get a picture that does justice to the amount of leaves, dirt and food left on my floor from our Halloween celebration. It's pretty impressive. I should be sweeping and mopping but I'd rather blog and ignore it.

Halloween this year swept thru like a raging storm. I volunteered to be in charge of my son's preschool party -- why? Because I'm insane. (wow, that was loud.) I will say, the snacks probably saved my life because that little platter of fruits, crackers, veggies and cheese was the healthiest thing my 3-year-old consumed all night. During set-up, the teacher didn't disguise very well how tough the day had been after classroom trick-or-treating and parades and costumes (can you imagine potty time for 20-some kids in costumes, omg). Whole new level of respect for teachers!

Then our party at home started and even before we could eat, the trick-or-treaters began knocking. Since my kid was already jacked to the max, we decided we'd let the chili sit on warm in the Crock Pot (slow-cooker bonus!) and go pound the pavement for a bit. So. Much. Fun! Our neighbors really get into the spirit of Halloween, which is merely a warm up for what Christmas brings.

When we returned, we dove into the chili right away. It rocked! It was chunky, meaty, hearty and spicy. And prep was so easy it's almost ridiculous it turned out so good. As the weather turns colder, I will be making this again 100%. This dish screams to be fed to hungry football fans...


The Chili Ingredients

2+ lbs ground beef, lightly browned and drained (I used fattier beef, c'mon it's Halloween, who cares.)
Kirkland no-salt seasoning
6 oz can of tomato paste
2- 16 oz cans of Bush's Chili Beans (I used medium spice)
16 oz can of black beans
2 Tbsps minced garlic
1 pkge chili seasoning
1 cup ketchup
1 onion, chopped
10 oz can of diced tomatoes (I used fire-roasted)

The Bar Ingredients

Shredded cheddar cheese
Chopped onion
Black olives
Corn kernels
Sour cream
Fritos corn chips

Directions

ln a skillet, lightly brown your ground beef and drain it. Add some very hefty shakes of the no-salt seasoning for added flavor. Stir well and simmer for a few minutes.
Add all chili ingredients to the slow cooker.
Cook on low for 8-10 hours.
Top with chili bar ingredients of choice.

Adapted from the Crockin' Girls Hearty Chili recipe.

***

As a bonus, I'm going to post Emily's Pumpkin Dip which was a whipped creamy amazing little appetizer (or dessert) that I went to town on as soon as she put it out. With ginger snaps, it's like mini bites of pumpkin pie. Sooo good! I'm sorry I didn't get a pic so you'll just have to believe it's incredible without a photo -- for now.

Pumpkin Dip

1 block cream cheese
1/3 cup brown sugar
1/2 cup pumpkin
1 Tbsp maple syrup
1/2 tsp ground cinnamon
1/2 cup Cool Whip (or to taste)

Soften the cream cheese and blend everything together with a hand mixer.
Chill for 30 minutes.
Serve with apples, pears, graham crackers, or ginger snaps.


Slow-cooking to perfection.

Graham turned into Grahambo for his very first Halloween. Except he's far too sweet to play the part very well. 

Our trick-or-treaters, young and old, ready to go! You can see how jacked out of the gym my child is...

"Mom, I'm gonna need you to replace all of my pureed squash dinners with  this Milky Way bar from now on."

Big shout out to my sister-in-law Michelle for her candy corn Rice Krispie treats!

And just for fun, this spooky house rocked, complete with bubble and smoke-machines. Plus, they gave out full-sized candy bars so now Emily is going to stalk them every year.

Thursday, October 31, 2013

Simple and Delicious Beef Stew in a Crock Pot / Slow Cooker


I just found the easiest, most delicious beef stew recipe for the slow cooker/crock pot. Best part is it made two different meals! I’m not much of a meat eater, actually, but there’s something about slow-cooked beef and pork that makes me absolutely LOVE it. This recipe was so good, so easy, and low cost that it’s going to become an official recipe in the rotation. Which, is like, the highest form of flattery for a recipe.

Ingredients

1 package Stew Meat
2-3 potatoes, chopped
1-2 cups chopped carrots
2 packages French onion soup mix
1 tablespoon beef bouillon
2 tablespoons oil

Directions
Heat oil in a skillet and brown stew meat. Add chopped potatoes and carrots to the crock pot. Top with browned meat. Add soup mix and beef bouillon and as much water as you want. I made mine really brothy because I wasn’t sure how much water I’d need. I added about 6 cups of water. Which paid off for the second recipe (see below). Cook for 8 hours. Serve with crusty bread, or cheesy bread.


Night Two Ingredients

Leftover Stew
3 tablespoons butter
3 tablespoons flour
1 cup rice

Night Two Directions
Heat leftover stew and cook up some white or brown rice. When rice is done and stew is hot, melt the butter in a saucepan on medium heat and add flour. Stir together and heat up to make a roux. Slowly add about a cup at a time of stew broth until sauce is thick and creamy. Serve rice on bottom and use a slotted spoon to gather stew pieces and put on top of rice. Generously smother with your homemade gravy.

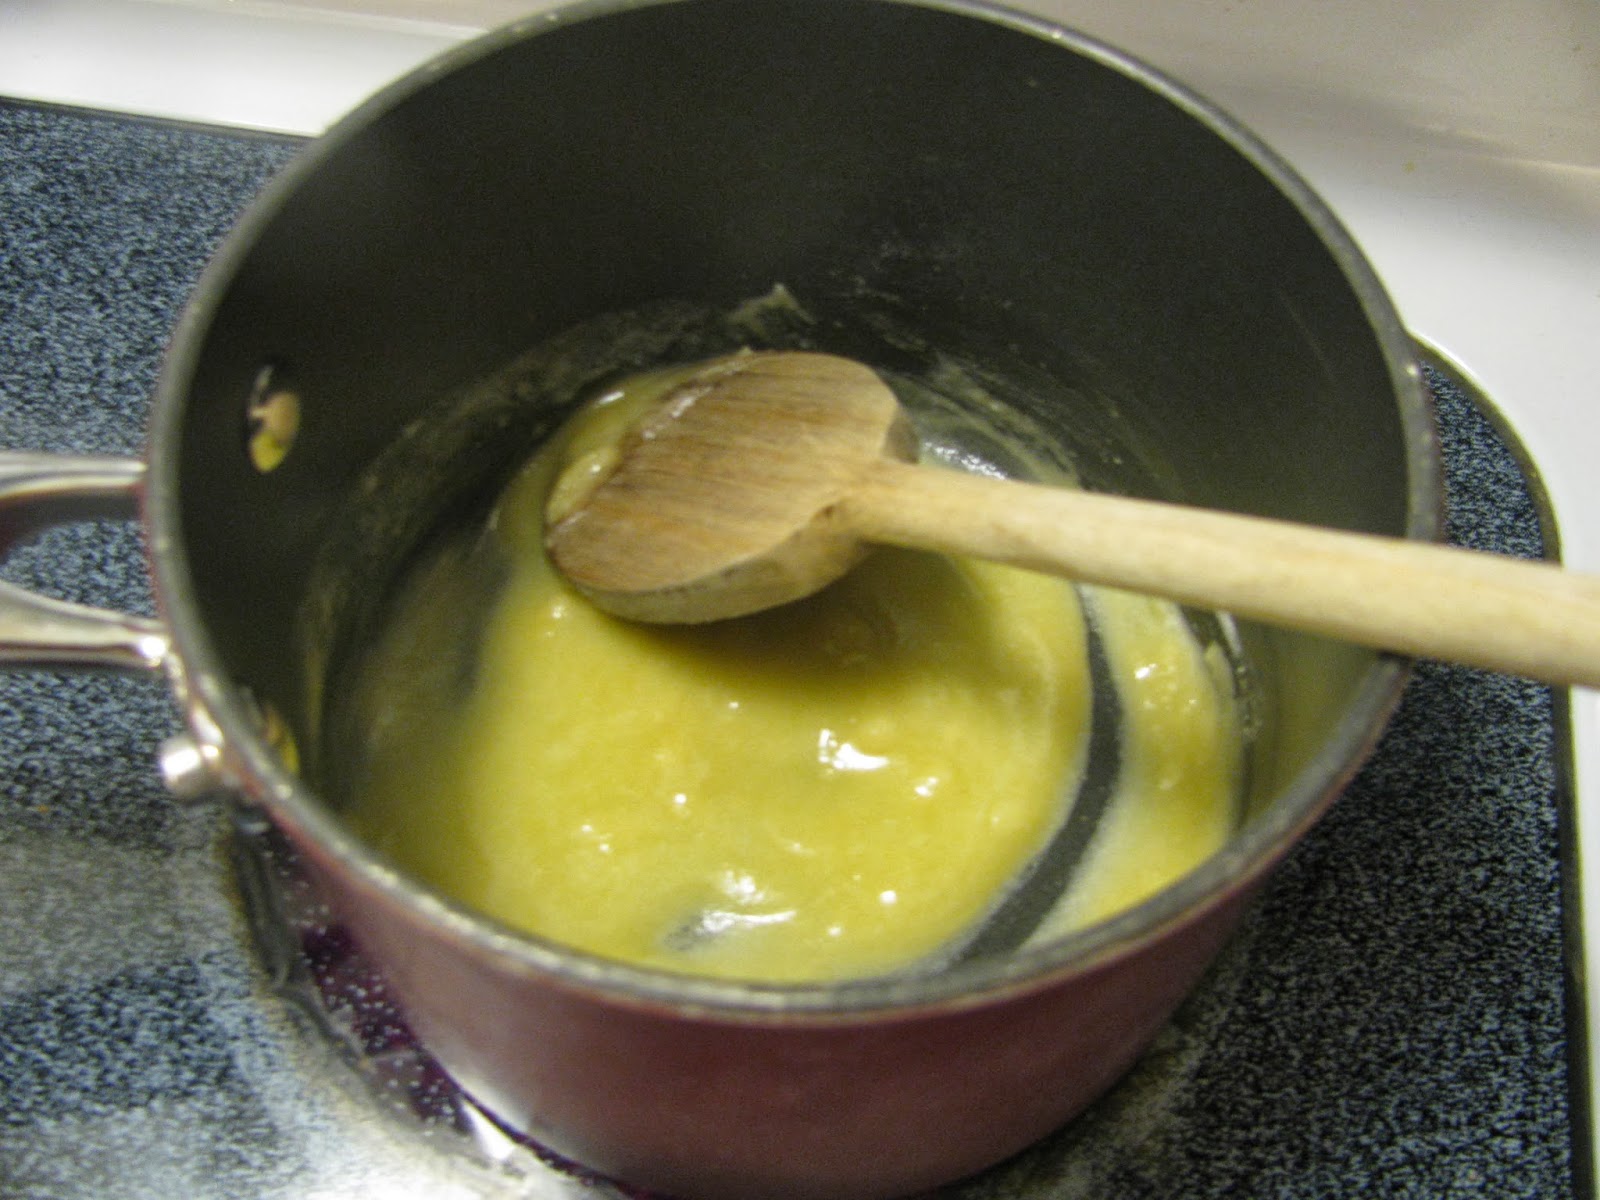
Making the roux
 
 
Ladel-ing some broth to add to the roux. Yes, I totally made up that word.
 
 
Home made gravy!


I thought the first night was good. This was even better. YUM!

And, since it’s Halloween, one of my favorite times of the year, here’s a picture of my fun crazy boys:
 

Monday, October 14, 2013

Slow-Cooker Cheese Steak Sandwiches

A few weeks ago, I found this at TJ's:


Really wanting a cheese steak sandwich at that moment, I knew I'd settle for making tacos with it. So I bought the sirloin and in the freezer it went. Then, at random, a slow-cooker recipe for cheese steak sandwiches popped up on my Pinterest feed, and seriously, how can one deny that I was totally meant to make cheese steak sandwiches for slow-cooker month?

Thank you Sarah Marie, whoever you are, for this amazing slow-cooker recipe. I added to it a bit, but not much.

Slow-Cooker Cheese Steak Sandwiches
Serves 4 - 6

Ingredients

1 lb. round steak, cut into bite sized strips
1 green bell pepper, cut into strips
1 red bell pepper, cut into strips
1 medium onion, sliced
1 can French onion soup
2 Tbsp. Worcestershire sauce
1 tsp. garlic powder
1 Tbsp. minced garlic
1 tsp. Lawry's seasoned salt
hoagie style buns
Provolone cheese, sliced
Beechers flagship cheese, sliced (optional)
Butter

Directions

Place steak, pepper strips, onion slices, French onion soup, Worcestershire sauce, minced garlic, garlic powder, and seasoned salt into slow cooker and stir together thoroughly. Cook on high for 4 hours or on low for 8 hours.

Melt some butter or margarine in a small bowl. Brush the hoagie buns with the melted better, then place ¼ of the steak mixture on each bun*, and top with a slice or two of cheeses. Wrap each sandwich in foil and bake at 350 degrees for 20-25 minutes.

*The steak mixture will be somewhat soupy, so when dipping it out to put on each sandwich, turn the spoon slightly and let the broth drain out before putting it on the sandwich. You will have broth leftover in the slow cooker at the end.


Monday, September 23, 2013

Piroshky Piroshki Pirozhki or Pierogi?

There's this little hole-in-the-wall Russian bakery in Pike Place Market, Seattle, called Piroshky Piroshky and one of my very favorite foods of all time is there: the beef and onion piroshky -- a flaky hot pocket filled with savory ground beef like I've never tasted anywhere else. I'm not talking Taco Tuesday ground beef. It's special, like extraordinarily crazy good flavored beef. I kind of need a moment when I'm eating it.

When I began my search for piroshky recipes, the search engine kept asking if I meant to search for piroshki with an i. So after a search for "easy piroshki recipes" (because the word "easy" must precede every single recipe search I do), I found the winning recipe below.

The outcome was awesome! So good, it actually made me second guess the memory I have of the Pike Place piroshky. Having admitted that, I still think if I put up a piroshky to my piroshki, piroshky would still be my favorite. Lost yet? Basically this recipe provides a reeeeally good substitute, although its taste does not surpass the original.

On my search of piroshki history for this post, the first Wiki thing to come up was for pirozhki, Russian individual fried or baked buns with a variety of fillings, which is also known as pyrizhky in Ukraine, or pirosky in Greece. In Japan you can get a piroshiki and in Poland you can get a pierogi, while in America's frozen food aisle, you can get a hot pocket. So- we're covering a lot of ground here as you can see.

Thank you Just a Pinch Recipes for this cinch recipe:

They taste way better than they look...see photo below.

The Easy Piroshki-y-zhki-zhky-ogi Pocket

Ingredients

1 lb ground beef
1/4 - 1/2 large onion, diced
2 Tbsp sour cream
To taste seasoning salt
To taste no salt seasoning if you have it (I used Kirkland brand)
To taste garlic powder
To taste minced garlic
2 pkgs refrigerator crescent rolls
white flour
1 egg yolk
2 Tbsp water

Directions

1. Begin cooking ground beef in skillet. After slightly browned, add the onion and saute until beef is nicely browned. Remove from heat and set aside.
2. Prepare a place to roll out the crescent roll dough by sprinkling a little flour on a large flat surface. Open the tube and carefully unroll the sheet of dough. Flatten it on the floured surface and push the perforated areas together to make one large slab of dough. Roll dough with rolling pin to even out the surface. Dough should become somewhat wider as you do so. Cut dough into 8 or 10 evenly sized squares (I used a pizza cutter). Or if you want larger pockets, cut into 4 or 6 squares.
3. Preheat oven to 400 degrees F.
4. Pour off some excess grease from meat mixture but leave a little, then add seasoning salt, no salt seasoning, garlic powder, minced garlic and sour cream. Mix well, taste and adjust seasonings. Place equal portions of filling on each square of dough. Then fold over one corner of each square to make triangle-shaped pockets, pressing the edges to seal (if you have trouble getting seal to form, dampen finger in water and rub around edge to be sealed, then press together again). Spray a cookie sheet and place your piroshki on it.
5. Once all piroshki have been sealed, cut a small slit or poke holes with fork in top of each pocket. Mix egg yolk with 2 tbs water and brush wash onto tops of pastries. Bake in preheated oven for 10 - 12 minutes until golden brown.

The reason I don't bake. Ever.


Friday, June 14, 2013

West Coast Fave - BBQ Tri Tip!


So once again my sister Megan (one of the Beauties) is out gallivanting. This time, she is road-tripping in Italy before joining the rest of the crew on her newest yacht to tour the Mediterranean.  Tough life, right? Before she left, she gave me strict instructions to provide a guest post for the Beauties, so here goes!

Megan was able to make a very quick trip to visit before she started her latest adventure.  I asked her for her dinner request, and she asked for tri-tip.  For those not familiar with it, tri-tip is a cut of beef mostly used in the West - I really only started eating it when I moved to Los Angeles

For those really interested in tri-tip, Wikipedia has some handy dandy info about tri tip which you can find by clicking here

Twice a year our little beach town has a local event called Fiesta Hermosa. In the food tent area of the Fiesta, a restaurant from Santa Maria sells phenomenal tri-tip sandwiches.  My husband Scott was convinced he could do better, and I think he did.  Below is the recipe we use, and we made for Megan:

Scott's Tri Tip Sandwiches

Ingredients
Tri tip (we buy the 2 pack from Costco, and 1 tri tip will serve 4)
2 tablespoons of Lawry’s Salt
1 tablespoon of garlic powder
1 tablespoon of onion powder
2 teaspoons of pepper

Optional
1 onion
1 green pepper
1 red pepper
3 jalapeños
Tater tots
Cajun salt (we use Louisiana Fish Fry Products Cajun Seasoning)

Steps
  • Slice all the vegetables (de-seeding the jalepenos to reduce the heat), and place in a saute pan with 1 tablespoon of oil.  You can use any combination of veggies to suit your preference, and skip the jalapenos all together if you are preparing for little ones. 
Sliced veggies ready to sauté
  • Preheat the oven, and salt the tater tots
  • Let the meat warm to room temperature
  • Mix the spices together 
  • Generously coat tri-tip with seasoning, setting aside a small portion of the seasoning (to use later to season meat when cooked
  • Light up the grill, and let it heat up. 
  • Cook meat, fat side up, on indirect heat and cook to desired doneness.  Scott recommends using a meat thermometer and cooking to medium rare.
Seasoning the tri tip
  • Put the tater tots in the oven (timed to finish when the meat comes off the grill)
  • When the meat is mostly done, sauté the veggies
  • Pull the meat off the grill and let it rest for 5 minutes or so
  • As thinly as possible, slice the meat (we use a meat slicer)
  • Top toasted rolls or buns with meat and veggies
  • Serve with crispy Tater tots and extra tri-tip seasoning.  I also like a little creamed horseradish sometimes
Seasoned and crispy tater tots
This is a simple, flavorful, and affordable way to enjoy the grill.  Happy tri-tipping!

Unfortunately, I didn't capture a picture of the entire dish,
so you will just have to enjoy this picture of Megan and Curly cuddling on the couch!


Wednesday, May 15, 2013

Weeknight Meal: Stuffed Bell Peppers

NEW favorite! And it's not even a slow cooker meal (shocking).

It's been a while since I've made stuffed peppers and it is such an easy, well-rounded, delicious dish -- it's kind of the perfect weeknight meal. So I made them last night and here's how it went down:


Stuffed Bell Peppers

2 - 4 medium bell peppers, depending on size and whether you want meat leftovers for a night 2 creation.
1 lb ground beef
1/2 c black beans, drained
1/2 c chunky salsa
1 packet taco seasoning
3 Tbsp minced garlic
3 Tbsp curry powder
1-2 c of some sort of minute rice or packet quinoa (or the like). I used Trader Joe's 3-minute brown rice. 
1 cup shredded cheese (I used Beecher's "Just Jack")

Slice the top off your pepper and de-seed. Rinse it well. Slice into two halves. Pop the stem out of the top and chop that little bit of pepper to use in your meat mixture (waste not!). 


Brown the ground beef, drain. Then add everything but the cheese. Toss in your extra pepper chunks. Cook the rice and add that in too. Let everything simmer for 10 minutes, stirring occasionally. 


Put your pretty peppers in a pan and fill them up with your meat mixture. Bake in the oven, covered, on 375 for 45 minutes or until peppers are desired tenderness. Sprinkle with cheese during last 5 minutes of baking. Devour.


Now, here's the thing: You'll notice as you keep adding to your meat mixture that it gets to be quite a lot, probably more than you need for your peppers. So I would say it fills 6-8 pepper halves, if you have a few more mouths to feed than me. I had 4 pepper halves and then plenty of leftover meat mixture that I'm sure tonight we'll be adding sour cream and making burritos for dinner. Bam! Another 2-in-1 meal just like that. Also, you can break this operation into two parts. Make the meat mixture early on and stuff the peppers, put them in the fridge. Wait for the fam to get home in the evening and then pop them in the oven to bake. Easy enough, right?

Monday, February 11, 2013

Tagliarini Casserole


Tagliarini (in our home pronounced tag-uh-lini, though who knows if that's right?) was a staple in our home growing up. It was one of those meals that fed a lot of mouths for few dollars and my mom knew all five of her kids would scarf it down. And it was a step up from Hamburger Helper, which I will admit we ate, enjoyed, and though I haven't had it in a really long time, I probably still would. So take that, HH haters.

The recipe came from one of my mom's old church cookbooks waaay back in the day. (You know church ladies can cook up some comfort.) Not that the recipe is anything special; it's just filling, cheesy and damn good! Plus, I happen to have good food memories attached to it, so there's that. 

I forgot how quick it is to whip this up, all in one pot. I made a double batch to fulfill Jolie's pay it forward challenge and it was so easy. Most of the ingredients were already in my pantry. 

Hope you enjoy this little gem that's been a favorite of mine for many years...

Tagliarini

2 c Rotini pasta (rainbow Rotini makes it way cooler), uncooked
1 lb ground beef
1 can tomato soup
1 can corn, drained
1 can sliced black olives, drained
1 cup cheddar cheese, grated
1 cup onion, chopped
2 Tbsp butter or oil
1 can tomato sauce, 8 oz
1 can water (tomato sauce can), 8 oz

Brown chopped onion in butter or oil.
Add meat and brown well. Drain fat.
Add all other ingredients, except the cheese.
Cover and cook until noodles are done, about 15 minutes. Turn off heat.
Add most of cheese to pan and mix (keep some cheese to top casserole).
Pour into casserole dish and top with remaining cheese.
Cover with foil. Bake at 350 degrees for about 45 minutes.
Uncover and bake additional 15 minutes or until bubbly.

Cook's Notes: I made a double batch and doubled everything but the corn and olives. Because of that I added a can of red kidney beans for fun. I felt like it was still plenty of everything so I may end up halving the corn and olives from now on when I make a single batch...or perhaps I just need to make a double batch every time. Decisions...


The Tagliarini recipe lives in this cookbook (below) my nieces made for me when Kelly and I got engaged and moved away from family 11 years ago. It's full of some family-favorites...and apparently the family was concerned about us. The following pages describe kitchen tools, measurements, kitchen terms, etc. It's pretty hilarious, and I'd be lying if I didn't say helpful. I have another post coming up from this treasured book later so I'll share a few more pages then. Those are my much-needed placemats pictured left, btw.

"Missy's culinary challenged, how to boil water, I hope I can cook cookbook"

Wednesday, December 19, 2012

No-Stress Beef Stew

Yesterday I started taking inventory of all the food prep I have to do for Christmas and then second-Christmas and then New Year's and beyond. I started thinking of my food assignments in the coming weeks...and I suddenly lost all motivation to cook dinner. Sorry fam.

If you're ever having a day where you're kinda feeling like that too, here's a really easy way to put something on the table, thank you random person on Pinterest:

No-Stress Beef Stew

Stew meat chunks
1 packet each: Ranch Dressing, Italian Dressing and Brown Gravy 
2 cups water
Veggies -- I had carrots and potatoes, frozen peas and frozen pearl onions

Toss it all in the slow cooker, cook on high for 6 hours. (I added the peas in the last hour.) Serve.

Aaand she's back!

This is seriously almost too good to be this easy.


Monday, November 19, 2012

Amber's Award Worthy Chili

It is seriously stormy outside. Like stormy, stormy. The kind that turns an umbrella inside out, the kind that makes the middle of the day look like midnight, the kind that makes you want to say, "Ef off, work" so you can go home and cuddle by the fire, watch a movie, and drink a hard cider while a steaming pot of chili cooks on the stove… Do you see where I’m going here?

When Emily posted this month’s ingredient “Cocoa” I was a bit uninspired. I know, call me a crazy person. Can I even call myself a woman? But I just love love love savory food and dessert is usually a thing I do only because everyone else is doing it. But then I ran into Andrew Robinson, a fellow parent at the daycare where I take my kids, who also loves to cook who also happens to be a BATF follower, and we had an inspiring conversation, whilst peeling off children’s coats and hanging out by the sign in sheet. “Chili,” he said. And I was sold.
Turns out, like, all of the famous and award winning chili recipes have cocoa in them. That’s what all the people on Google tell me--it's like the secret ingredient to chili success. So I found a few ‘award-winning’ recipes and made up my own. Some had all beans and some had all meat and I thought to satisfy the carnivore in my husband and the herbivore in me, I’d do a little bit of both. And to satisfy the beer lover in both of us, I chose to add a bit of that too. It was super delicious. My 5 year old ate his entire bowl (mixed with a lot of sour cream to minimize the spice) and my 2 ½ year old only had one bite. So, there’s a 50/50 chance your kids will like it. And if you don't have small children, I recommend you add a lot more spice to this recipe! Some hot sauce, chili peppers, and anything else you can find.
My verdict on the cocoa: Though it wasn't noticeable at all, I have chosen to believe my chili wouldn't have been as good without it. Now, can I call my recipe "award-winning" too? Next up, a chili cook-off so I can officially add that to the title.
Amber’s Award-Winning Chili
Ingredients
1.5 lb. lean chuck, ground
1 lb. lean pork, ground
4 cloves garlic, finely chopped
1 finely chopped onion
8 oz. hunts tomato sauce
1 can diced tomatoes
1 can pinto beans
1 can kidney beans
1 cup water
1 can beer
3 Tablespoons chili powder
2 tablespoons instant beef bouillon (6 cubes)
2 Tablespoons ground cumin
2 teaspoons paprika
2 teaspoons oregano leaves
2 teaspoons sugar
½ teaspoon ground coriander
1 teaspoon unsweetened cocoa
1 teaspoon cornmeal
1 teaspoon flour
1 Tablespoon warm water

Directions:
1)      In a large saucepan, brown meat. Drain the fat.
2)      Add onion and garlic and soften
3)      Add the tomato sauce, tomatoes and beans and mix well
4)      Add water, beer, chili powder, bouillon, cumin, paprika, oregano, sugar, coriander and cocoa
5)      Bring to a boil and then reduce heat and simmer for at least 2 hours.
6)      In a small bowl, mix cornmeal and flour, then add warm water and mix well.
7)      Stir into chili and cook, covered for an additional 20 minutes

Garnishes
I chose to add all of the below garnishes, just to add a bit more fun and flavor.
1)      Sour cream
2)      Shredded cheddar cheese
3)      Chives and/or green onions
4)      Heavy dash of hot sauce
Yow! Lookin' hot.
Sides
Tortilla chips or sourdough bread! This would have been excellent in a bread bowl.