Showing posts with label baking. Show all posts

Thursday, October 9, 2014

Smokehouse Chili Relleno


Say Cheese!

This recipe for chili relleno is so simple you really will be smiling. Technically relleno means “stuffed” with cheese but in this case our chilies are layered with it – to make things simple for you – hence all the smiling.

Prep time: 5 minutes; Cook time: 1 hour

Ingredients

·         12 oz. Smokehouse Organic Creamy Jack Cheese by Sierra Nevada Cheese Company

·         Four large Anaheim peppers

·         Fresh Red Salsa

I love to shop at our regional market, Haggen because of their diverse selection of original ingredients so I’d recommend their smokehouse jack and their fresh red salsa for this recipe– the smokehouse jack adds just a hint of smoky flavor and the cold salsa’s fresh and crispy jalapeƱos and onions make for the perfect complement to the hot, smoky taste of the melty relleno.


Directions

Cut off the tops of the Anaheim peppers and slice them down the middle. Remove seeds and set aside. Cut your smokehouse jack into thin strips. Coat a square or round glass pan with non-stick spray and line the bottom of the pan with half of your cheese. Place sliced Anaheim peppers on the top and then layer the remaining cheese on the peppers. Cover with tinfoil and bake at 350 degrees for 45 minutes. Remove tinfoil and bake an additional 15 minutes until cheese browns and bubbles.


Serve with a healthy spoonful of fresh red salsa and smile, this time because it’s so so so delicious.


Thursday, April 10, 2014

Homemade Croutons


This recipe is for you if you a) hate store-bought croutons and think they taste like cardboard and b) like easy recipes and c) love salad.

This is dedicated to you Missy, who, in a recent spaghetti and salad post, confessed your dire hatred for pre-packaged croutons. And it's totally your style because it’s frickin’ e-a-s-y!

All you need is some good bread. French bread, sour dough, crusty wheat, whatever. This is the perfect thing to do with day or two old bread. Cut it into 1 inch cubes and throw them in a plastic baggie. Shake the bread cubes with a generous drizzle of olive oil, salt, pepper, garlic powder and oregano or parsley. Spread them on a baking sheet and bake on 350 until golden brown. (the only hard part is you can't get busy and forget to watch them like I did, below. Good thing I had extra bread!) Pull them out and let them cool and harden. These last for at least a week stored in a sealed plastic bag so you can use them all week in your salads.

 
Cut...
 
Toss...
 
Burn... oops. Don't be like me. Let's try that again.
 
Perfect.
 
Clearly the Croutons are the star of this Caesar Salad.


To make the semi-homeade Caesar salad above, slice some romaine lettuce, roast some garlic (wrap a head of garlic in tinfoil and bake at 350 for 45 min, cool, then peel), add some grilled chicken, homemade croutons, a slice of lemon and toss with your favorite Caesar dressing.

Monday, March 10, 2014

Apple Oatmeal Coffee Cake Muffins


I used to not be much of a baker. Something about measuring things precisely always intimidated me; I much preferred the creativity in cooking. But lately something has shifted. Somehow, I’ve found myself really enjoying following directions and always (almost) getting perfect results. Maybe I’m finally growing up.

The boys have started enjoying it too. They wake up on Saturday or Sunday mornings and ask me to make muffins, waffles, or banana bread. Ansen’s favorite was Amish Friendship Bread and I was really good about keeping a starter going for a while and then I finally failed at keeping it alive. So one morning when he woke up and asked for Friendship Bread, I had to break the news. No more friendship bread. But it got me looking through my Betty Crocker Cookbook for something Ansen would accept in its place and I found this amaze-ball recipe. I’ve made it several time since and I’m proud to say it has now taken the place of the Friendship Bread. And there’s no starter to babysit and keep cool but not too cool and massage/squash every day.

Apple Oatmeal Coffee Cake Muffins
(recipe from Betty Crocker)
Prep: 25 min; Bake: 20-25 Min for Muffins, 55 Min. for Cake

Ingredients
Oat-Streusel Topping (below)
1 ¾ cups all-purpose flour
1 cup packed brown sugar
¾ cup old-fashioned oats
½ cup stick butter, softened
1 cup buttermilk
3 teaspoons baking powder
1 teaspoon ground cinnamon
½ teaspoon baking soda
¼ teaspoon salt
¼ teaspoon ground nutmeg
1 large egg
1 ½ cups chopped apples (2 small)

Directions

1.      Heat oven to 350 degrees. Grease bottom and sides of two muffin tins (or for cake 9 x 9 x 2 inches)

2.      Prepare Oat-Streusel Topping; set aside

3.      Beat remaining ingredients except apples in large bowl with electric mixer on low speed 30 seconds. Beat on medium speed 2 minutes, scraping bowl occasionally. Stir in apples. Pour batter in muffin tins (3/4 full) or in pan. Sprinkle with topping.

4.      Bake 20-25 minutes for muffins or 55 minutes for cake until golden brown and toothpick inserted in center comes out clean. Serve warm.

Oat-Streusel Topping

Ingredients 2 tablespoons butter, firm
¼ cup all-purpose flour
2 tablespoons packed brown sugar
½ teaspoon ground cinnamon
¼ cup old-fashioned oats

Directions

1.      Cut margarine into flour, brown sugar and cinnamon in medium bowl, using pastry blender or crisscrossing 2 knives until crumbly. Stir in oats.


Thursday, April 11, 2013

Jack's Huevos Desperados

Once famous on this very same blog for his Trailer Park Margaritas, Jack Pirtle (my father) returns again, but this time for breakfast. (I realize I'm posting this a month too late for breakfast month but I figured you'd forgive me.)

Thanks to my wonderful, fabulous, truly talented cousin Janna, for posting this recipe on facebook. Janna visited her parents (my aunt and uncle) in Tucson over Christmas and documented this recipe and even took a picture of it!


From Janna: We had this for breakfast.  Sally told a ghost story.  Buz talked about the aliens.  Mark got the story from Regan about how she found Grandpa George on the Benson Highway with her psychic powers.  Just a regular Sobel/Pirtle/Kaufman/Roberts/Siek/Havens family breakfast.)


From Jack:

Ingredients:
10 farm-fresh Mexican eggs (you may substitute American eggs)
1 1/2 cups flour
1/2 teaspoon garlic salt
1 teaspoon ground pepper
2 cups low-fat cottage cheese
16. oz shredded goat cheese
1 cup or less diced green chilies
1 cup chopped mushrooms
1 cup diced red onion

Directions:
Throw the mess into a mixing bowl and mix.  Bake at 350' until eggs set (about 35 min?) Serve to Pancho with salsa, warm flour tortillas, and enough tequila to keep him tranquil for a couple hours or so.  Skip the tequila if you expect Pancho to fix the screen door.  He will be hungry by noon, whether he fixes the door or not, so what do you have in mind for lunch?

History:
Margarita, Pancho Villa's seventh wife, once was challenged by Pancho to present him with an egg dish worthy of a bandit's hearty appetite.  He followed the request with a threat.  Either create the egg dish, or he would leave her forthwith and start a revolution somewhere.  Margarita waited several weeks for him to carry out his threat and leave, until finally taking pity on him and whipping up her now famous "Huevos Desperados."  Having filled himself with the delicious dish one fine Mexican morning, Villa proclaimed everlasting love to Margarita, and promised that he would retire from the revolutionary scene and just hang out around the casa.  Pancho's retirement was not what Margarita had in mind... though perhaps he could learn to be of some help around the house... but she doubted it.  

Monday, December 17, 2012

Peanut Butter Cup Peanut Butter Cookies


Whoever first decided peanut butter and chocolate should go together is brilliant.

This is my sister-in-law Kristi's recipe and one of our favorites that I make over and over again. I'm in charge of bringing a dessert to my work holiday party and decided this was the way to go, since these little bites of goodness are always a huge hit. I made a double batch of dough (to freeze some) and have extras for us to eat at home and to bring to the rest of the holiday events that will arise this month.

I used Kirkland Signature peanut butter cups instead of Reese's. Last year we had a big group of people at my parent's house and did a blind tasting and if I remember correctly, one did not win over the other. But if you ask me personally, I prefer the KS cups and Curtis likes Reese's better - so you really can't go wrong. I do not, however, recommend Trader Joe's version of peanut butter cups (but don't worry, I'm a huge fan of Trader Joe's and love 98% of their products!).
Available at Costco
If you want to make this a super easy, 2-ingredient recipe, then you can use store bought peanut butter cookie dough (or chocolate chip is good too) - but I  like to use Kristi's peanut butter cookie recipe, below!


Peanut Butter Cup Peanut Butter Cookies 

Ingredients: 

Mini peanut butter cups, unwrapped (you'll need lots, some for the cookies, some to pop in your mouth)

Store bought peanut butter cookie dough or the following:
1/2 cup (2 sticks) unsalted butter, softened
3/4 cup peanut butter (I use Kirkland Signature Organic Creamy PB)
1 cup brown sugar
1 cup white sugar
2 eggs
2 tsp. vanilla
2 cups flour
1 1/2 tsp. baking soda
1/2 tsp. salt

1. Cream together the butter, peanut butter, white and brown sugar.

2. Add eggs and vanilla, beat until combined.

3. Add flour, baking soda and salt - being careful not to over mix.

4. Chill the dough for a few hours, it will make it easier to roll.

5. Preheat oven to 350 degrees. Roll the cookie dough into balls and put it in ungreased mini muffin tins. Bake for 10-12 minutes. Push a mini peanut butter cup into each ball as soon as they come out of the oven
Push 'em in like this!
 and let the cookies cool in the muffin tin for at least 20 minutes (I put the dough back in the fridge in between batches).

Wednesday, June 27, 2012

Rosemary Zucchini Bread


This wasn’t supposed to be a rosemary post.

In fact this had nothing to do with blogging. I had a ton of zucchini in my fridge that needed to be used so I did a simple search for zucchini bread via Food52 and the first recipe I clicked on had rosemary in it! What are the odds? So I stopped browsing because obviously this was the recipe that I was meant to make.

And now this summer, when your garden is overflowing with zucchini and your rosemary bush is huge and fragrent, you will be set. This recipe covers it all.

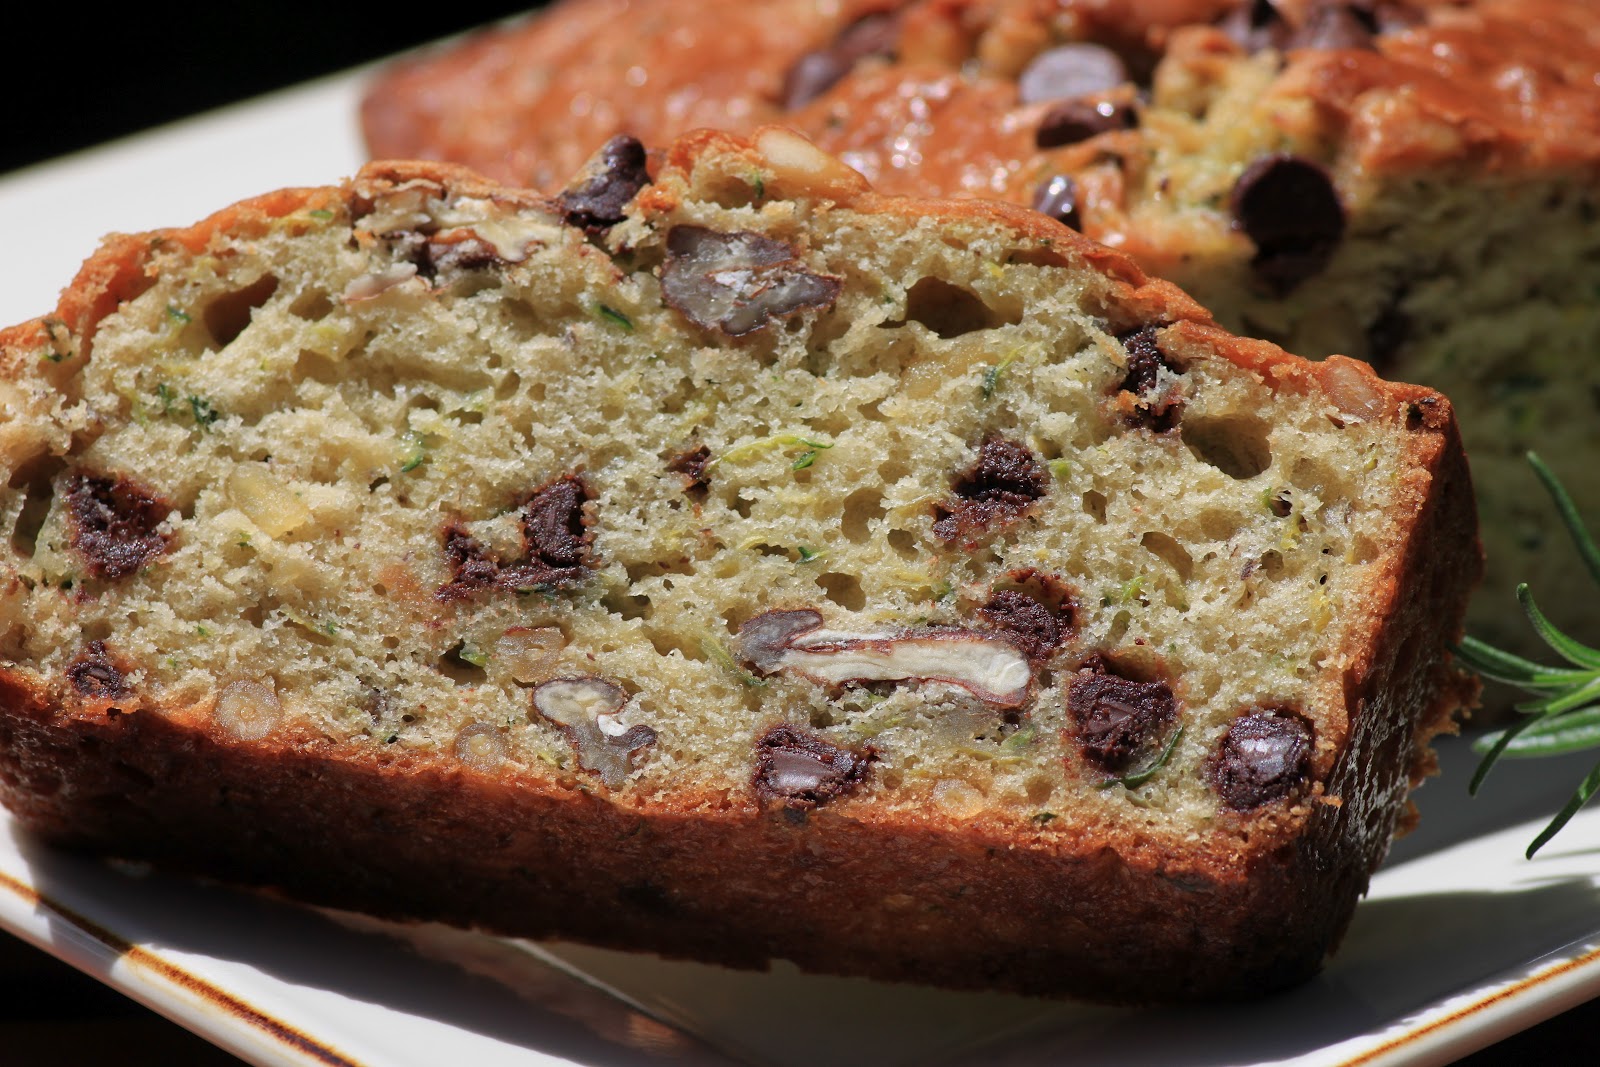
This isn’t traditional … it has yogurt in it, olive oil, orange juice, pecans and pine nuts. I’d call it hearty. And I always add chocolate chips to my banana or zucchini bread but I wasn’t sure if this savory combo of ingredients would work with chocolate or just be weird.

But those who know me best, know I can’t pass up chocolate, so I went for it!

I had an orange in my house. Just one. And I ate it yesterday. So instead of zest and fresh juice (which I’m sure would have been amazing) I poured just a splash of O.J. in.

As I was getting all the ingredients out, I pulled my Costco-size bag of chocolate chips down from the top shelf of the pantry, ate a few (of course) and set the bag, wide open on the table (dumb move). As I walked away, it promptly tipped over with half the bag ending up on the floor. Maybe it’s a sign from God I should be staying out of the chocolate chips?

The verdict? This doesn’t taste like cake or dessert like many banana and zuchhini breads do, but it’s really good. I’m not sure I get much of the rosemary flavor, but I think it gives it a unique little kick and the chocolate and nuts sure are delicious. I cut both loaves up into big fat slices, froze them and plan to grab them for breakfast on the days I commute.

There is one more rosemary recipe I really want to make. It’s the whole reason why I chose this ingredient for June, just so I could make this specific recipe. Amber ran across it too. But alas it’s not going to happen this month, so I may be posting one more, belated rosemary post in July. Stay tuned.


Rosemary Zucchini Bread

Recipe from Food52

Makes 2 loaves

3 Large eggs

1/2 cup of plain yogurt

1/2 cup of olive oil

1 3/4 cup of sugar

2 cups of zucchini; shredded

2 teaspoons fresh rosemary; finely minced

Zest of one orange (wish I had this!)

Juice from 1/2 of the orange (I used a splash of O.J.)

3 cups of flour

1 teaspoon of baking soda

1/2 teaspoon of baking powder

1 teaspoon of salt

1 cup of toasted pecans; chopped, or pine nuts (I used both, I like my bread nutty!)

Chocolate Chips (optional)


Preheat your oven to 350 degrees. Grease two loaf pans and set them aside.

In a large bowl beat the eggs. Mix in the yogurt, oil, and sugar. Then mix in the shredded zucchini, rosemary, orange zest, and orange juice. Set aside.

In a separate bowl whisk together the flour, baking soda, baking powder, salt and toasted nuts.

Stir the dry ingredients into the wet ingredients. Add a few big handfuls of chocolate chips.

Once the batter is well combined divide it evenly between the two loaf pans (I lined ‘em with parchment paper and sprinkled extra chocolate chips on top.)

Bake the loaves for one hour, give or take a few minutes, until a tester inserted comes out clean. My loaves took exactly one hour and were perfect.

Remove the loaves from the oven and allow them to cool for 10 minutes inside the loaf pan before transferring them to a cooling rack to cool completely. Slice and eat!


Tuesday, June 19, 2012

Rosemary Salt French Bread

When I was growing up, some of my fondest memories are of my mother baking French bread in the kitchen, her purple and white flowered apron tied loosely around her neck and waist, a kitchen towel draped over her shoulder. I would wait patiently for the bread to rise in a bowl, and when it was time, I got the joy of punching it with my little fist. Even though my parents no longer live in Nevada where I grew up, I swear it feels just like home when I walk into their Tucson house, my mother never failing to make a couple of warm aromatic loaves on the day I arrive. (I usually request it with a side of Swiss cheese fondue…)
I’ve always been a little intimidated to try baking the bread myself; after all, no one will ever make it as good as my mother. But when Emily proclaimed June as Rosemary month, I thought this was as good a time as ever. You see, I love Rosemary in bread and if I could incorporate the fragrant, pine-like herb into my mother’s famous french bread recipe (just like Jolie added it to her bread), it just might make it different enough that I wouldn’t be disappointed if it didn’t turn out the same, and creative enough to go on Beauties and the Feast.
The thing about this bread is that there are very few ingredients and it is actually easy to make but by the time I finished it I felt like I had birthed a bread baby. It took lots of patience and nurturing. But it was fun, too, and the perfect thing to do on a Saturday. I called my mom about 15 times during the process and even sent her a picture I took with my phone of the yeast to make sure I didn’t kill it.

Before you read any farther, I must warn you that if you plan to make this bread, start the process 5 hours before projected dinner time. I hope I didn't scare you off, it is just that this bread takes a lot of time sitting and rising, just go and do other things while it does.
Ingredients
-1 Package Active dry yeast (1 tablespoon)
-1 cup warm water

-1/2 cup scalded milk
-1 tablespoon sugar
-1 1/2 teaspoons salt
-1 tablespoon oil
-4 cups flour

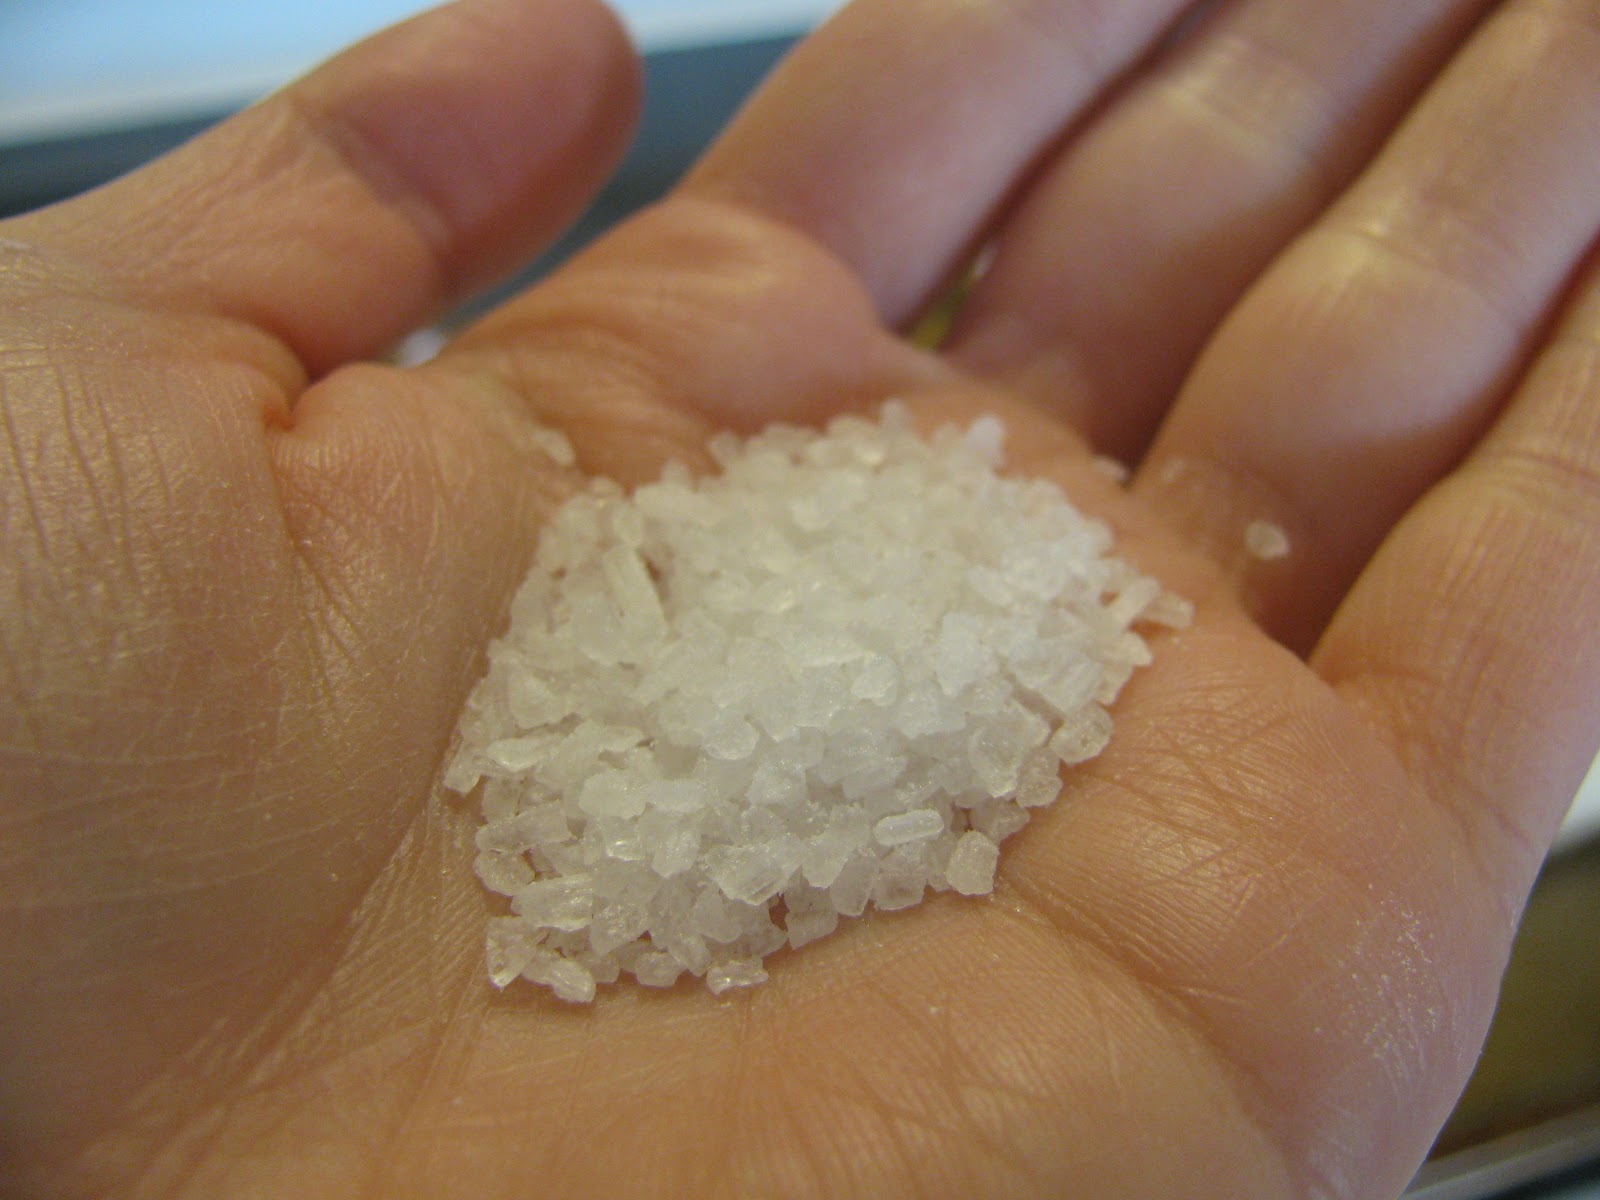
* 1 heaping tablespoon of chopped, fresh rosemary, and a couple of pinches of sea salt if you'd like to make Klaire Pirtle's traditionally delicious recipe turn into Rosemary Salt French Bread.

Directions
1) Sprinkle yeast in 1/2 cup of warm water (not too hot or you'll kill the yeast).

2) Scald the 1/2 cup of milk by putting it in a microwavable bowl or cup and heating it in the microwave until a film forms at the top. Stick it in the refrigerator or freezer to cool for a few minutes.

3) In a large bowl dissolve sugar, salt and oil in remaining water and add cooled milk.

4) Add yeast mixture and rosemary and mix well.

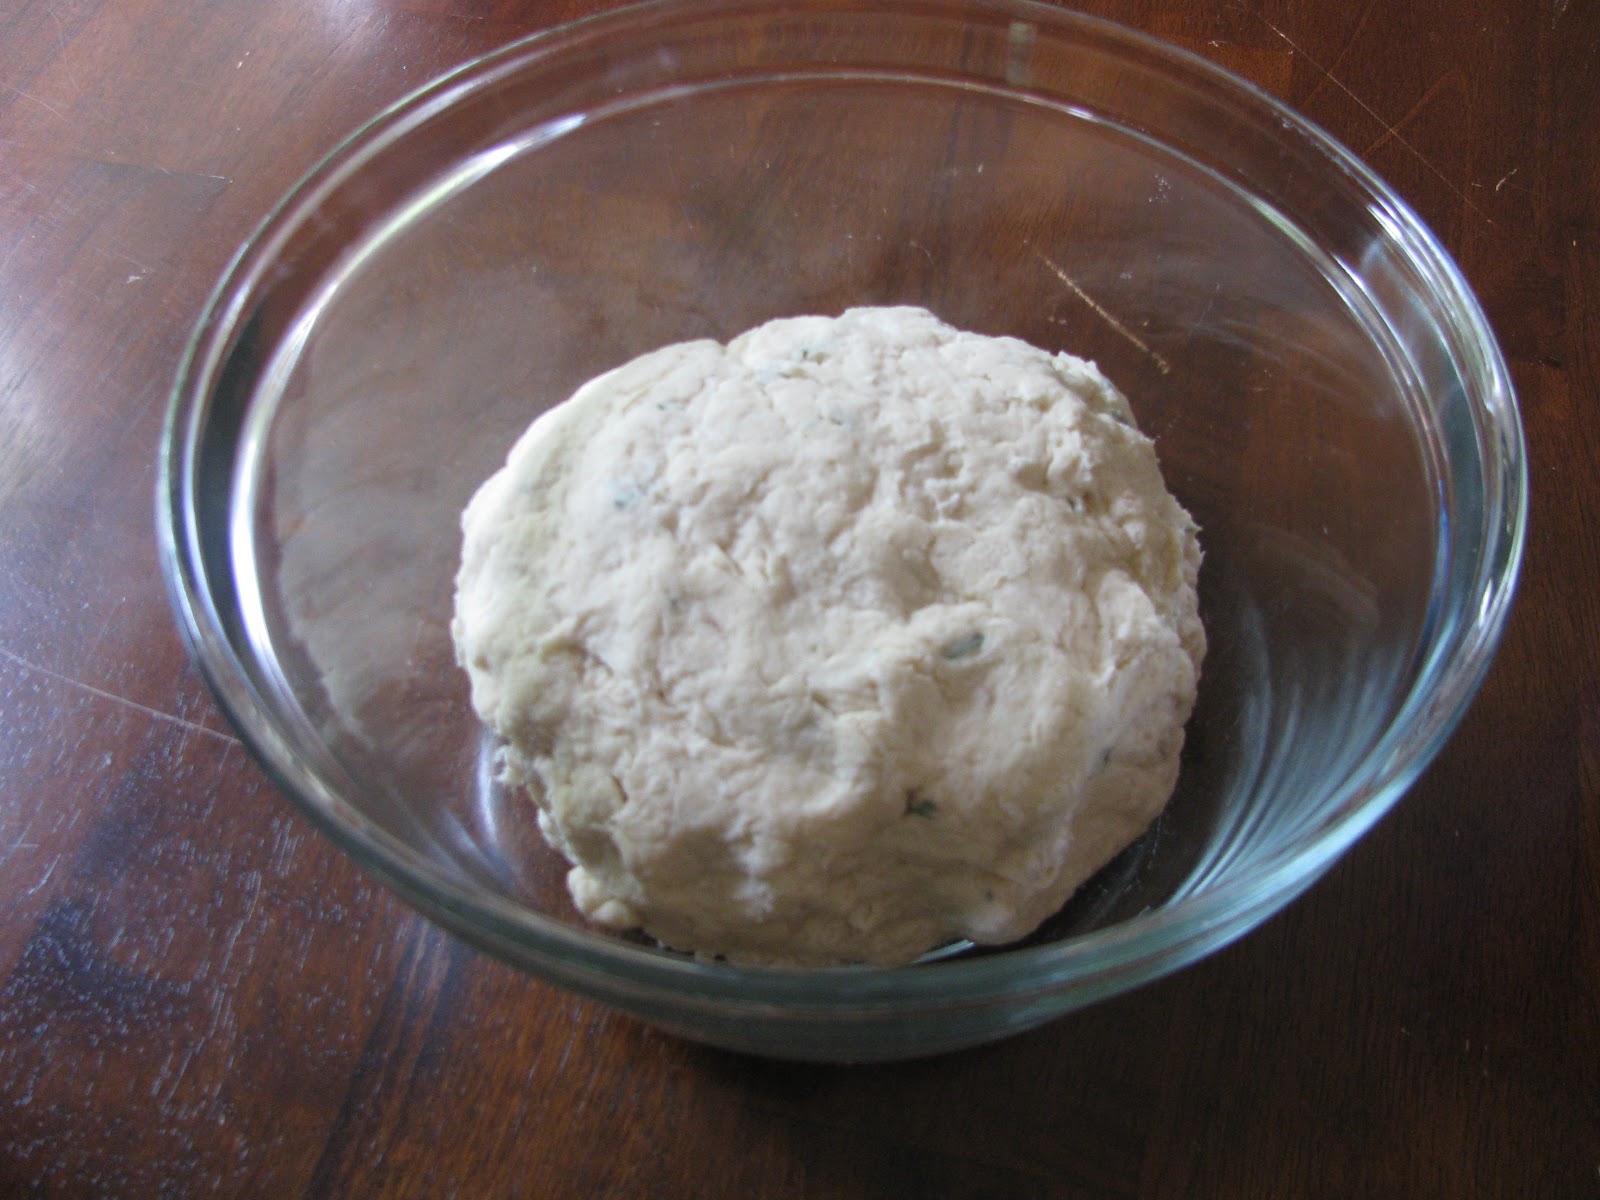
5) Add flour a little at a time. Knead dough until it is workable and comes off the side of the bowl.

6) Cover with a towel and let it rise in a greased, warm bowl until double in size. (aprx. 1.5 hours), then the fun part: punch it!


7) Turn dough on lightly floured board, divide in half and let balls stand 10 minutes.


8) Roll each ball into a long loaf, place on greased cookie sheet and score 6 times.


9) Sprinkle sea salt on the top of the loaves.


10) Cover with a towel and let the loaves rise 1.5 hours or until double in size.


11) Bake 425 degrees for the first 10 minutes, then reduce heat to 350 degrees for about 1/2 hour. Right before it is ready to come out of the oven, brush bread with butter. Bake 3 minutes longer.

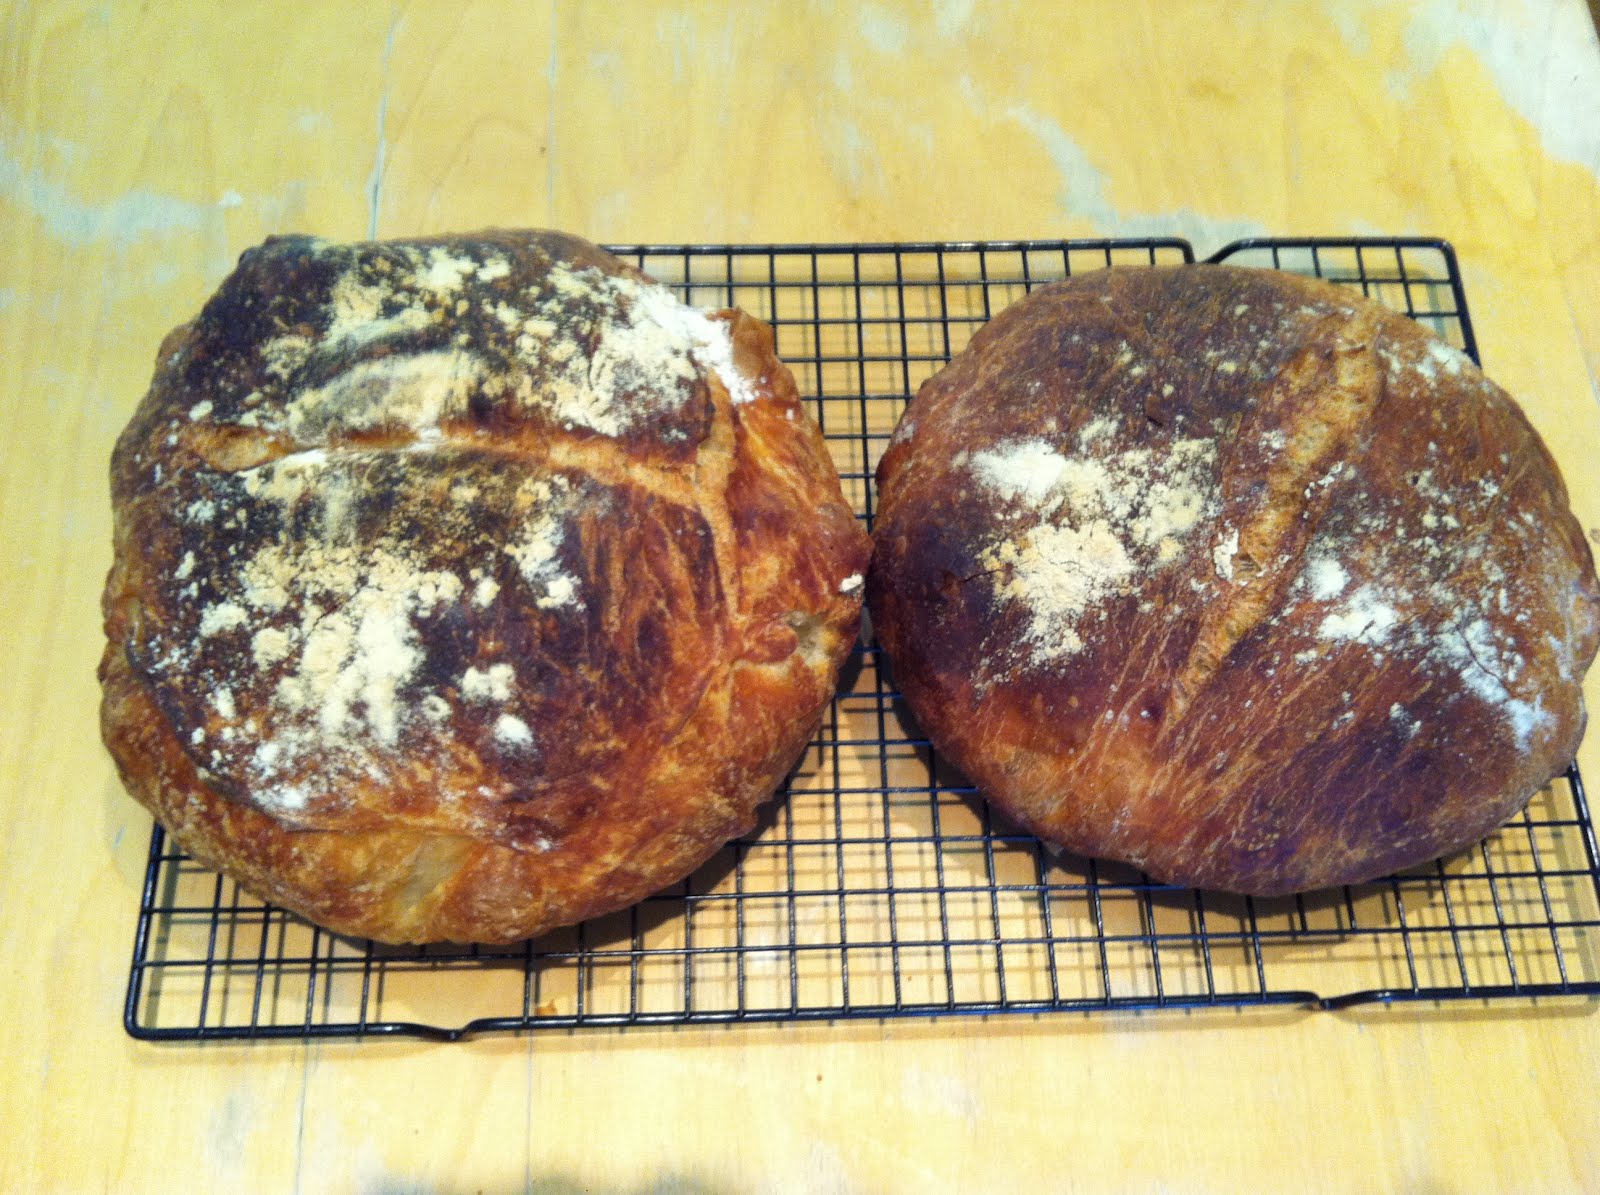
Behold the bread babies. They are twins. I am so proud.


I made some spaghetti with homemade meatballs to go with the bread. This was a very wise choice. I want to eat this all over again and it is only 9:00 in the morning.


Asher loved his bread and by the time he was done eating, he looked like any self-respecting two year old would: covered head to toe in spaghetti noodles AND sauce. I proclaimed it bath night.


When my mother was visiting us a couple of years ago while we awaited the birth of baby Asher, she and I did a lot of cooking. Here she is with a then 2 1/2 year old Ansen making M'nM cookies with her signature towel over her shoulder. Lucky Ansen that he got to do so much cooking with Buggie and lucky me that I got to do so much eating. I was 15 months pregnant after-all.


Sunday, June 3, 2012

Two Months in One: Almost No-Knead Bread


I am excited to present to you my two months into one post. Hey, I am in the busy mom category and I am doing my best! I have been holding onto this recipe for a long time because I didn’t have a Dutch oven until Christmas so I am proud to say I finally used it and it was worth the wait.

We spend each Thanksgiving and Christmas with the Lotz/Bay family. They have been friends with my parents for as long as I am old… Allison is a busy mom of 3 boys and shows up every year with some really cool food items, while I still glorify my cranberry sauce. She makes this home made bread that looks store bought and I asked her for the recipe.

The recipe is called “Almost No-Knead Bread” from America’s Test Kitchen. I actually enjoy reading their recipes because they test the same recipe different ways and explain why you do certain parts to the process—like the reason for using the Dutch Oven. This is the perfect item to bring when invited to dinner and that is just what I did! Pairing it with artichoke tapenade and steamed artichokes met my May goal.


It’s really wordy but actually super fast and easy:

An enameled cast-iron Dutch oven with a tight-fitting lid yields best results, but the recipe also works in a regular cast-iron Dutch oven or heavy stockpot. (See the related information in "High-Heat Baking in a Dutch Oven" for information on converting Dutch oven handles to work safely in a hot oven.) Use a mild-flavored lager, such as Budweiser (mild non-alcoholic lager also works). The bread is best eaten the day it is baked but can be wrapped in aluminum foil and stored in a cool, dry place for up to 2 days and makes one loaf.


3 cups unbleached all-purpose flour (15oz) 
¼ teaspoon instant or rapid-rise yeast 
1 ½ teaspoons table salt 
¾ cup plus 2 tablespoons water, at room temperature (7oz) 
¼ cup plus 2 tablespoons mild-flavored lager (3oz) 
1 tablespoon white vinegar 


1. Whisk flour, yeast, and salt in large bowl. Add water, beer, and vinegar. Using rubber spatula, fold mixture, scraping up dry flour from bottom of bowl until shaggy ball forms. Cover bowl with plastic wrap and let sit at room temperature for 8 to 18 hours. 


2. Lay 12 by 18 inch sheet of parchment paper inside 10-inch skillet and spray with nonstick cooking spray. Transfer dough to lightly floured work surface and knead 10 to 15 times. Shape dough into ball by pulling edges into middle. Transfer dough, seem side down, to parchment-lined skillet and spray surface of dough with nonstick cooking spray. Cover loosely with plastic wrap and let rise at room temperature until dough has doubled in size and does not really spring back when poked with finger, about 2 hours. 


3. About 30 minutes before baking, adjust oven rack to lowest position, place 6 to 8 quart heavy-bottomed Dutch over (with lid) on rack, and heat oven to 500 degrees. Lightly flour top of dough and, using razor blade or sharp knife, make one 6-inch long, ½ inch deep slit along top of dough. Carefully remove pot from oven and remove lid. Pick up dough by lifting parchment overhang and lower into pot (let excess parchment hang over pot edge). Cover pot and place in oven. Reduce temperature to 425 degrees and bake covered for 30 minutes. Remove lid and continue to bake until loaf is deep brown and instant-read thermometer inserted into center registers 210 degrees, 20 to 30 minutes longer. Carefully remove bread from pot; transfer to wire rack and cool to room temperature, about 2 hours.


I’m not saying I didn’t forget to turn the temperature back down, or catch the parchment paper on fire briefly, or slightly burn the bottom of the bread. (I also don’t have a thermometer.) But even with these barriers it turned out great and I managed to impress the Falkin family! (Thank you to the Falkin family for a great dinner, always looking out for Mason when his mom is late, and I’ll be hitting you up for that bagel recipe!)


Now to squeeze in the June ingredient: Rosemary. Use the same recipe above and in the dry mix add 1 tablespoon of minced fresh rosemary and 4 oz finely grated Parmesan cheese. In the liquid mixture add ½ cup of chopped green olives. Then follow the same instructions.

Which beauty will host our family for dinner, so I can have an excuse to make this again?!

Tuesday, May 22, 2012

The best way to cook an artichoke


I’m an artichoke purist.  What I mean by this is that there’s almost nothing I love better than a steamed artichoke with the leaves dipped in salted butter.  There are a few problems with eating an artichoke this way, though (Insert cheesy info-mercial where you see a clumsy person trying to eat a leaf dipped in butter but getting greasy chin and dropping butter all over his clothes—“This just won’t do!”)
So since this month is artichoke month I started researching other ways to cook an artichoke, while still keeping it in its truest form.  I knew I couldn’t steam it for a blog post because that’s a little boring, but what I did find was an EXCITING way to cook an artichoke while still keeping it plain and simple. 
You bake it.  Yep.  Get ready to get your mind blown.  I’ll never steam an artichoke again. it's a little more prep on the front end but way easier to eat after it's cooked.  Now if only I could invent a kitchen contraption that would do it all for me--I could be rich!
Ingredients
2 Artichokes, prepped (see directions below)
1 cup veggie or chicken broth
For Rub:
2 tbsps. olive oil
1 lemon, squeezed
1 tsp. sea salt
3-4 cloves garlic, diced


How to Prep your artichokes
Cut off about an inch at the top, trim the leaves, and cut in half.  Use a spoon to hollow out the fuzzy hairs. 
For some reason this is the only picture I got of prepping the artichoke.  I clearly need practice in being a food blogger.  Now picture this artichoke cut in half, and the fuzzy hairs scooped out.  Ok?  Good, let's move on.
Directions
Combine Artichoke Rub ingredients in a small bowl and mix together.  Prep your artichokes.  Smother your prepped artichokes in artichoke rub (get all up in that artichoke) and place them face down in a casserole dish.  It is important that you make the rub prior to prepping your 'chokes so that you can rub them immediately after you've cut them.  The lemon in the rub will keep them from browning.  After placing your artichokes face down in the casserole dish, pour in the chicken or veggie broth and cover with a lid (tin foil will do).  Bake at 350 degrees for about an hour and a half (may be less, just check them after an hour.  You’ll know they are done when the outer leaves are soft and edible).
Before going into the oven

After baking. Yum!

Oh yeah.

Another angle.  Work it, girl!

This picture makes me want to bite my screen.

Review
This was the best artichoke I have ever had in my life.  My husband was able to eat his so fast (no dipping!) I swear he could have won an artichoke eating contest.  We each had an entire artichoke to ourselves, no problem.  Kids didn’t want to try them but that was fine by me; I didn’t push it.
And in the spirit of Artichoke month at BATF, here are a few other inspiring things you can do with this crazy perennial thistle:
Artichoke as a fashion statement
What Kevin Spacey was really dreaming about
Come here, little baby artichoke and let me pose with you as if you were a precious egg on my wedding day.
I don't know, guys.  Just because it's on pinterest doesn't mean it's a good idea.  Just sayin'.
Um... ya.