Showing posts with label Amber. Show all posts

Tuesday, December 16, 2014

Delicious Gingerbread Cookie Recipe


I have to admit I’ve never been a fan of Gingerbread Cookies. They’re sort of hard and taste a little like spicy cardboard. But we just got this adorable Christmas book called “The Gingerbread Mouse” that comes with a recipe for gingerbread cookies, which prompted my children to ask if we could make them. I thought, sure, that sounds fun, even if they aren’t worth their weight in calories. But I was wrong! These cookies are damn good. Contrary to the visions of gingerbread cookies in my head, these were soft, moist, and, well… DELICOUS!

So here you go my friends, the first and only delicious gingerbread cookie recipe, compliments of The Gingerbread Mouse.

Ingredients
2 ½ cups all-purpose flour
½ teaspoon baking soda
2 ½ teaspoons ground ginger
½ teaspoon ground cloves
1 ½ teaspoons cinnamon
1 2/4 sticks (14 tablespoons) butter, softened
1 cup packed brown sugar
1 large egg
1 teaspoon vanilla extract
 
Directions
Sift flour, baking soda, ginger, cinnamon and cloves into a large bowl. Beat butter and brown sugar in a medium bowl until creamy. Add egg, vanilla extract and beat until blended. Stir flour mixture into butter mixture, blending well. Refrigerate dough until firm (about 30-45 minutes). Preheat oven to 350 degrees. Roll out a portion of the chilled dough onto a floured surface. Cut cookie shapes with a knife or cookie cutter. Bake cookies on a cookie sheet (I used parchment paper too) for 9 minutes. Cool cookies on wire rack. Frost cookies with your favorite icing (I cheated and bought some at the store that was already in an easy to use tube) and your favorite sprinkles, etc.


Happy Holidays!


Thursday, October 9, 2014

Smokehouse Chili Relleno


Say Cheese!

This recipe for chili relleno is so simple you really will be smiling. Technically relleno means “stuffed” with cheese but in this case our chilies are layered with it – to make things simple for you – hence all the smiling.

Prep time: 5 minutes; Cook time: 1 hour

Ingredients

·         12 oz. Smokehouse Organic Creamy Jack Cheese by Sierra Nevada Cheese Company

·         Four large Anaheim peppers

·         Fresh Red Salsa

I love to shop at our regional market, Haggen because of their diverse selection of original ingredients so I’d recommend their smokehouse jack and their fresh red salsa for this recipe– the smokehouse jack adds just a hint of smoky flavor and the cold salsa’s fresh and crispy jalapeƱos and onions make for the perfect complement to the hot, smoky taste of the melty relleno.


Directions

Cut off the tops of the Anaheim peppers and slice them down the middle. Remove seeds and set aside. Cut your smokehouse jack into thin strips. Coat a square or round glass pan with non-stick spray and line the bottom of the pan with half of your cheese. Place sliced Anaheim peppers on the top and then layer the remaining cheese on the peppers. Cover with tinfoil and bake at 350 degrees for 45 minutes. Remove tinfoil and bake an additional 15 minutes until cheese browns and bubbles.


Serve with a healthy spoonful of fresh red salsa and smile, this time because it’s so so so delicious.


Wednesday, April 23, 2014

How to Make Sushi at Home


Sushi Rolls are a lot easier to make at home than you'd think. And they're A LOT CHEAPER than going to a restaurant, too.

When my brother James and I were in college we had a ritual every Sunday. It was called Sunday Sushi Sake Cinema night. He had learned how to make his own Sushi after having visited Japan on deployment in the Navy and since he had become vegetarian, we made some really amazing veggie sushi together. Who needs fish when you have ingredients like jalapeno, avocado, red pepper and cream cheese? Though this recipe is easily alterable if you want to add crab or salmon. Best when served with warm Sake, great company and a good movie.

Here are some essential ingredients that you can pick up at your local Asian Market:

1)      Calrose Rice

2)      Nori (get at least ten up to twenty sheets)

3)      Wasabi

4)      Rice Vinegar

5)      Sriracha Sauce if you like it spicy

6)      Soy Sauce

7)      Sushi Mat Roller. I’m sure this has a technical name. I don’t know what it is.


At the grocery store, get lost of yummy veggies. My favorites are:

·        Avocado (this is a must)

·        Jalapeno

·        Cucumber

·        A colorful Bell pepper

·        Sprouts

·        Marinated tofu

·        To make it non vegetarian, you could also get crab or sushi grade salmon or tuna

·        Cream Cheese
 
Directions

1)      Cook at least four cups of Calrose Rice. When fluffy, add a generous drizzle of Rice Vinegar and mix. Let rice cool a bit.
 
2)   While Rice is cooking, slice your ingredients thinly.

3)      Lay a sheet of Nori shiniest side down on the sushi roller. Spread rice evenly on Nori, leaving about an inch uncovered at the base of the roll.

4)      Spread with cream cheese (if you’d like) and top with yummy veggies. Add Sriracha sauce in a line if you want it spicy.

5)      Roll starting at the base of the veggies and tightly push down with your thumbs as you get closer to the end.

6)      Place on a cutting board and slice in one-inch pieces with a serrated knife. If knife gets gunky, dip it in a glass filled with hot water which will help it slice through the sushi better.

7)      Serve with dipping plates filled with Soy Sauce and use wasabi to your liking.


Thursday, April 10, 2014

Homemade Croutons


This recipe is for you if you a) hate store-bought croutons and think they taste like cardboard and b) like easy recipes and c) love salad.

This is dedicated to you Missy, who, in a recent spaghetti and salad post, confessed your dire hatred for pre-packaged croutons. And it's totally your style because it’s frickin’ e-a-s-y!

All you need is some good bread. French bread, sour dough, crusty wheat, whatever. This is the perfect thing to do with day or two old bread. Cut it into 1 inch cubes and throw them in a plastic baggie. Shake the bread cubes with a generous drizzle of olive oil, salt, pepper, garlic powder and oregano or parsley. Spread them on a baking sheet and bake on 350 until golden brown. (the only hard part is you can't get busy and forget to watch them like I did, below. Good thing I had extra bread!) Pull them out and let them cool and harden. These last for at least a week stored in a sealed plastic bag so you can use them all week in your salads.

 
Cut...
 
Toss...
 
Burn... oops. Don't be like me. Let's try that again.
 
Perfect.
 
Clearly the Croutons are the star of this Caesar Salad.


To make the semi-homeade Caesar salad above, slice some romaine lettuce, roast some garlic (wrap a head of garlic in tinfoil and bake at 350 for 45 min, cool, then peel), add some grilled chicken, homemade croutons, a slice of lemon and toss with your favorite Caesar dressing.

Monday, March 10, 2014

Apple Oatmeal Coffee Cake Muffins


I used to not be much of a baker. Something about measuring things precisely always intimidated me; I much preferred the creativity in cooking. But lately something has shifted. Somehow, I’ve found myself really enjoying following directions and always (almost) getting perfect results. Maybe I’m finally growing up.

The boys have started enjoying it too. They wake up on Saturday or Sunday mornings and ask me to make muffins, waffles, or banana bread. Ansen’s favorite was Amish Friendship Bread and I was really good about keeping a starter going for a while and then I finally failed at keeping it alive. So one morning when he woke up and asked for Friendship Bread, I had to break the news. No more friendship bread. But it got me looking through my Betty Crocker Cookbook for something Ansen would accept in its place and I found this amaze-ball recipe. I’ve made it several time since and I’m proud to say it has now taken the place of the Friendship Bread. And there’s no starter to babysit and keep cool but not too cool and massage/squash every day.

Apple Oatmeal Coffee Cake Muffins
(recipe from Betty Crocker)
Prep: 25 min; Bake: 20-25 Min for Muffins, 55 Min. for Cake

Ingredients
Oat-Streusel Topping (below)
1 ¾ cups all-purpose flour
1 cup packed brown sugar
¾ cup old-fashioned oats
½ cup stick butter, softened
1 cup buttermilk
3 teaspoons baking powder
1 teaspoon ground cinnamon
½ teaspoon baking soda
¼ teaspoon salt
¼ teaspoon ground nutmeg
1 large egg
1 ½ cups chopped apples (2 small)

Directions

1.      Heat oven to 350 degrees. Grease bottom and sides of two muffin tins (or for cake 9 x 9 x 2 inches)

2.      Prepare Oat-Streusel Topping; set aside

3.      Beat remaining ingredients except apples in large bowl with electric mixer on low speed 30 seconds. Beat on medium speed 2 minutes, scraping bowl occasionally. Stir in apples. Pour batter in muffin tins (3/4 full) or in pan. Sprinkle with topping.

4.      Bake 20-25 minutes for muffins or 55 minutes for cake until golden brown and toothpick inserted in center comes out clean. Serve warm.

Oat-Streusel Topping

Ingredients 2 tablespoons butter, firm
¼ cup all-purpose flour
2 tablespoons packed brown sugar
½ teaspoon ground cinnamon
¼ cup old-fashioned oats

Directions

1.      Cut margarine into flour, brown sugar and cinnamon in medium bowl, using pastry blender or crisscrossing 2 knives until crumbly. Stir in oats.


Wednesday, February 26, 2014

How to make Big-Ass Belgian Waffles


My husband is a huge fan of Belgian Waffles. I never thought I could make them because we had a ‘normal’ sized waffle maker. So he asked for a legitimate Belgian Waffle maker for Christmas. His parents bought us a really nice one so I got to cooking one Saturday morning. While the bacon sizzled I looked up my usual waffle recipe in my Betty Crocker Cookbook and made waffles. Poor Andy wondered why they tasted the same as my regular waffles, only thicker and harder. Then he asked the question, “Aren’t Belgian Waffles made with like, different batter or something?” Doh.
Yes, my friends. They are. Turns out there’s more to a Belgian Waffle than a big-ass waffle maker.

The Belgian Waffle is formally called the Brussels Waffle, based on its origins from Brussels, Belgium. It was introduced at the World’s Fair in Seattle in 1962 but the Seattleites didn’t somehow know what or where Brussels was so they named it the Belgian Waffle instead. Its soft, crispy melty-in-your-mouthness has been taking North America by storm ever since.
So, after a lot of tries I found a great recipe that I then modified just a little bit to make it easier (this one doesn't require yeast) and healthier (really, two whole sticks of butter?) than some of the others. We think it tastes really delicious and authentic so I think you should try it and let me know what you think.

Ingredients
2 cups all-purpose flour
¼ cup sugar
3 ½ teaspoons baking powder
2 eggs,
separated
1 ½ cups milk
1 stick (1/2 cup) butter, melted
1 teaspoon vanilla extract
Sliced fresh strawberries or syrup


Directions
In a bowl, combine flour, sugar and baking powder. In another bowl, lightly beat egg yolks. Add milk, butter and vanilla; mix well. Sit into dry ingredients just until combined. Beat egg whites until stiff peaks form (this is the hard part. If you figure out a genius way to do this without making your forearm feel like falling off please let me know) fold into batter. Bake in preheated big-ass waffle iron until golden brown


Wednesday, January 29, 2014

How to Make Kale Salad

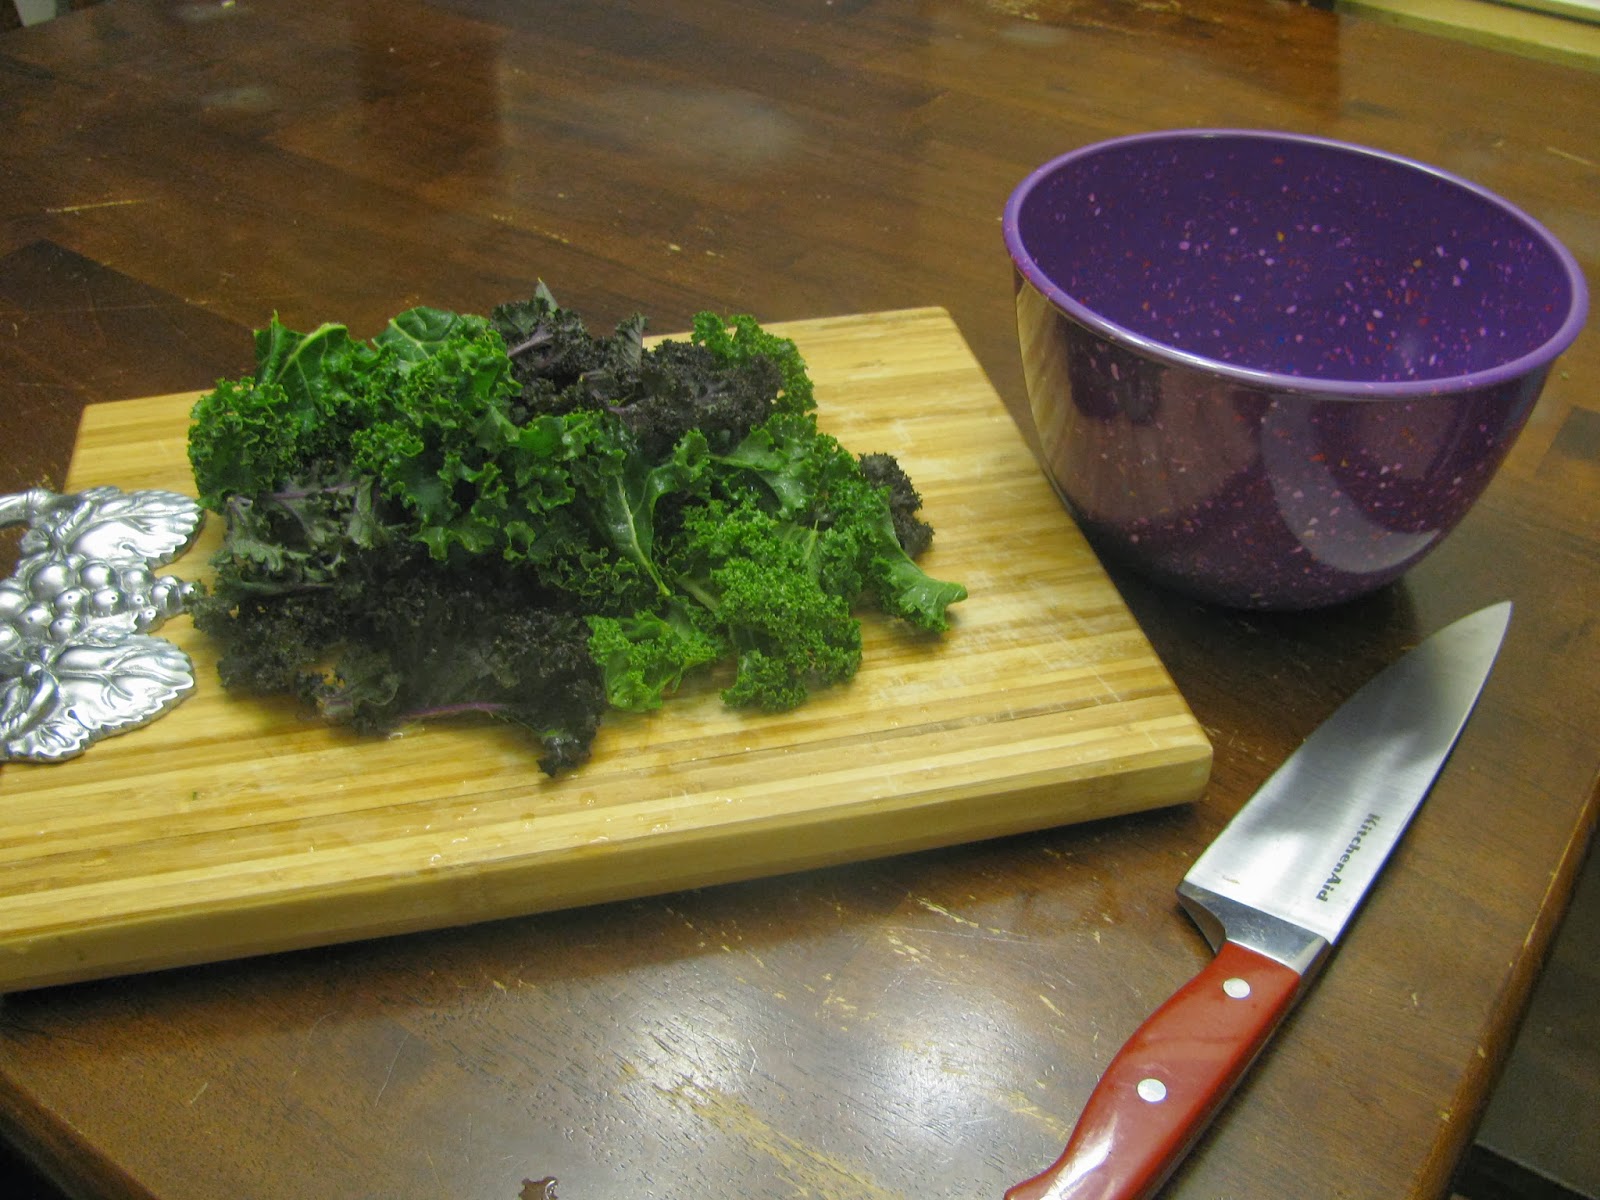
Kale is like, the most popular vegetable on the planet right now. If it could get an academy award it would. In fact, it deserves its own cover on People. Do you know why it’s so popular? Because it’s like, the best thing you could ever put in your body. But if you’re like most people, you might be wondering why you can’t jump on the kale bandwagon. What is it about this leafy green and purple that even tastes remotely good? I’m here to save the day and let you know there are lots of ways to make kale delicious—the easiest and one of the healthiest of which is to make a kale salad. And here’s how you do it.

1)      Grab a bushel of green or purple kale. I like to mix green and purple so I get one of each

2)      Wash

3)      Peel kale from the spines

4)      Mush kale all together on a cutting board and slice very thinly, as if you were making shredded iceberg lettuce (which has like, no nutritional value by the way)

5)      Put in a bowl and drizzle with olive oil

6)      Add the juice of half a lemon (or whole, depending on how much you’re making)

7)      Add course sea salt and pepper

8)      Take off your rings and get your hands in there. Massage that kale like you love it. Get the oil and lemon juice all up in those leaves. (This makes sure the kale is not dry and gross, and is a very important step in the process)

9)      Sprinkle with Parmesan cheese (freshly shaved is the best but as you see from my picture I used (gasp!) Kraft)

10)   To make a real meal out of it and be like an incredibly delicious restaurant my sister Linde takes me to in Reno called Campo, pile salad high on a plate and top with an over-medium fried egg. You have to trust me on this.


Other Kale Recipes on BATF:
Obviously we love our Kale.


And, the top 10 reasons Kale is so damn good for you, according to www.mindbodygreen.com :

Kale is being called “the new beef”, “the queen of greens” and “a nutritional powerhouse.” Here are ten great benefits of adding more kale to your diet:


1. Kale is low in calorie, high in fiber and has zero fat. One cup of kale has only 36 calories, 5 grams of fiber and 0 grams of fat. It is great for aiding in digestion and elimination with its great fiber content. It’s also filled with so many nutrients, vitamins, folate and magnesium as well as those listed below.


2. Kale is high in iron. Per calorie, kale has more iron than beef. Iron is essential for good health, such as the formation of hemoglobin and enzymes, transporting oxygen to various parts of the body, cell growth, proper liver function and more.


3. Kale is high in Vitamin K. Eating a diet high in Vitamin K can help protect against various cancers. It is also necessary for a wide variety of bodily functions including normal bone health and the prevention of blood clotting. Also increased levels of vitamin K can help people suffering from Alzheimer’s disease.


4. Kale is filled with powerful antioxidants. Antioxidants, such as carotenoids and flavonoids help protect against various cancers.


5. Kale is a great anti-inflammatory food. One cup of kale is filled with 10% of the RDA of omega-3 fatty acids, which help, fight against arthritis, asthma and autoimmune disorders.


6. Kale is great for cardiovascular support. Eating more kale can help lower cholesterol levels.


7. Kale is high in Vitamin A. Vitamin A is great for your vision, your skin as well as helping to prevent lung and oral cavity cancers.


8. Kale is high in Vitamin C. This is very helpful for your immune system, your metabolism and your hydration.


9. Kale is high in calcium. Per calorie, kale has more calcium than milk, which aids in preventing bone loss, preventing osteoporosis and maintaining a healthy metabolism. Vitamin C is also helpful to maintain cartilage and joint flexibility


10. Kale is a great detox food. Kale is filled with fiber and sulfur, both great for detoxifying your body and keeping your liver healthy.


Friday, December 6, 2013

Mandarin Orange Blue Cheese Salad


It’s pretty typical that all six of us don’t get together unless Megan is in town. She’s sort of like the Movie Star amongst us, flitting here and there on yachts, dining at places like Italy, Greece, and Aspen, and experiencing the beauty of a world the five of us could only imagine. Yes, she does have to work hard, clean up and prepare food for rich people, but to the rest of us being a stewardess on a yacht seems like a pretty glamorous life. So when she does make time in her schedule to come home to Washington State we can’t help ourselves but plan a big get-together complete with lots of laughter, trashy magazines, spa time, and what else…. Hmmm… it feels like I’m missing something here. Oh yeah! FOOD!

This year we decided to spend an evening preparing a Christmas Feast, to, um, do our followers a favor and help them with some recipe ideas. I know, we are so selfless. We do this ALL for you. I was in charge of the salad. Can you believe it? Just the salad! So since I felt like I’d gotten off a little easy this time around I knew it couldn’t be any old salad. Which is why I chose my most favorite salad of all time, originally posted by my cousin Beth Sobel. Mandarin Orange Blue Cheese Salad. It was perfect for a Christmas Feast. Light, citrusy, a bit creamy and a little crunchy and sweet. It was just what we needed.
 
Because we were waiting for our honorary Beauty, Kirsten (Megan’s childhood friend and fellow foodie), to arrive at the cabin on the shuttle, we thought we’d start the evening off with the salad. Here’s my simplified recipe of the original below. (And for the original recipe, complete with instructions on making your very own caramelized pecans, click here.)


Here's the final product, paired with Apple Cider Honey Bourbon. Recipe coming soon...
 
Mandarin Orange Blue Cheese Salad serves 8
2 large heads Lettuce, chopped small
2 cans Mandarin Oranges
½ cup Scallions, sliced
1 cup (or more) Blue Cheese crumbles
1 bag Emerald Glazed Pecans
½ cup Poppy Seed Dressing
½ cup to 1 cup orange juice


Directions
Add all salad ingredients into a big bowl. Combine Orange Juice and Poppy Seed Dressing together and mix well. Toss.

Rachel and me. Obviously very proud of the salad.


"I hate when you are doing something and you think 'isn't there someone you can pay to do this?'  And you realize you are the person being paid to do this. My glamorous life!" - Megan Crosby


Tuesday, November 26, 2013

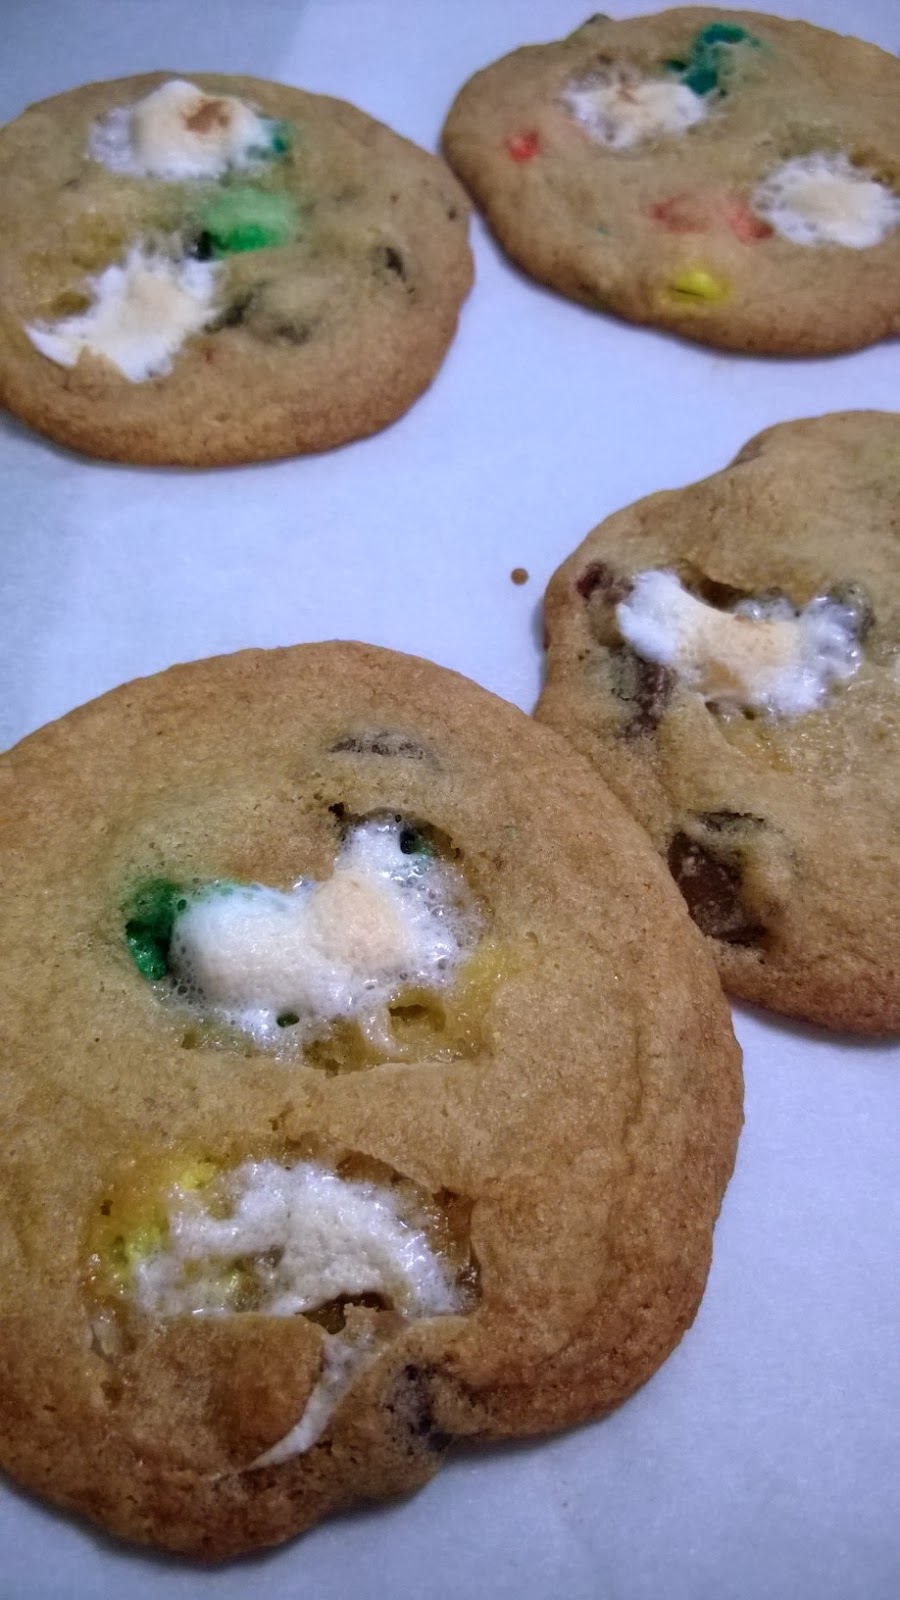
Chocolate Chip M&M Marshmallow Cookies


I woke up on Saturday and started to peruse Pinterest on my phone in bed, looking for the perfect cookie or bar recipe to post for Beauties and the Feast. All the fancy cookie pictures looked so yummy (and somewhat complicated). And then my six year old ran into our room and said, “Mom, can we make cookies today?” And I said, “Why, yes! I was just thinking about doing that!” So then I asked him, “What kind of cookies should we make?” And he said, literally without a second’s thought, “Chocolate Chip M&M Marshmallow Cookies!”

How can you say no to that? I’ve never made chocolate chip M&M marshmallow cookies before but I figured it couldn’t be that hard. So I took a regular chocolate chip cookie recipe and altered it slightly. They seriously turned out soooooooo good!

Ingredients
1 cup (2 sticks) Butter, softened
2/3 cup Brown Sugar
2/3 cup Sugar
1 Egg
1 ½ tsp. Vanilla Extract
2 cups Flour
1 ¼ tsp. Baking Soda
1 tsp. Salt
½ cup semi-sweet chocolate chips
½ cup M&M’s
½ cup Mini Marshmallows

Directions

1.      Preheat oven to 350 degrees.

2.      In a large bowl, cream butter and both sugars until well blended. Add egg and vanilla extract and mix to combine.

3.      In a separate bowl, stir the flour, baking soda and salt together. Slowly add these ingredients into the butter mixture and stir until combined.

4.      Fold in the M&M’s and chocolate chips.

5.      Drop dough by rounded tablespoons onto a lightly greased baking sheet about 2 inches apart (or as I prefer, onto parchment paper).

6.      Stick 1 to 2 mini marshmallows into the top of each cookie.

7.      Bake for 10 minutes.


The boys were very "helpful" in the kitchen. How did they help, you ask? By eating most of the M&M's while sitting on the counter and watching me cook.
 
I was originally going to add the marshmallows into the batter but the batter was so sticky I thought they might not fold in that well, hence the sticking them into the top. It turned out great to have a nice gooey center. And they tasted just a bit like they’d been roasted over a campfire. We’ll definitely be making these again! They were so easy and the kids had a blast making them.