Showing posts with label appetizer. Show all posts

Wednesday, January 29, 2014

How to Make Kale Salad

Kale is like, the most popular vegetable on the planet right now. If it could get an academy award it would. In fact, it deserves its own cover on People. Do you know why it’s so popular? Because it’s like, the best thing you could ever put in your body. But if you’re like most people, you might be wondering why you can’t jump on the kale bandwagon. What is it about this leafy green and purple that even tastes remotely good? I’m here to save the day and let you know there are lots of ways to make kale delicious—the easiest and one of the healthiest of which is to make a kale salad. And here’s how you do it.

1)      Grab a bushel of green or purple kale. I like to mix green and purple so I get one of each

2)      Wash

3)      Peel kale from the spines

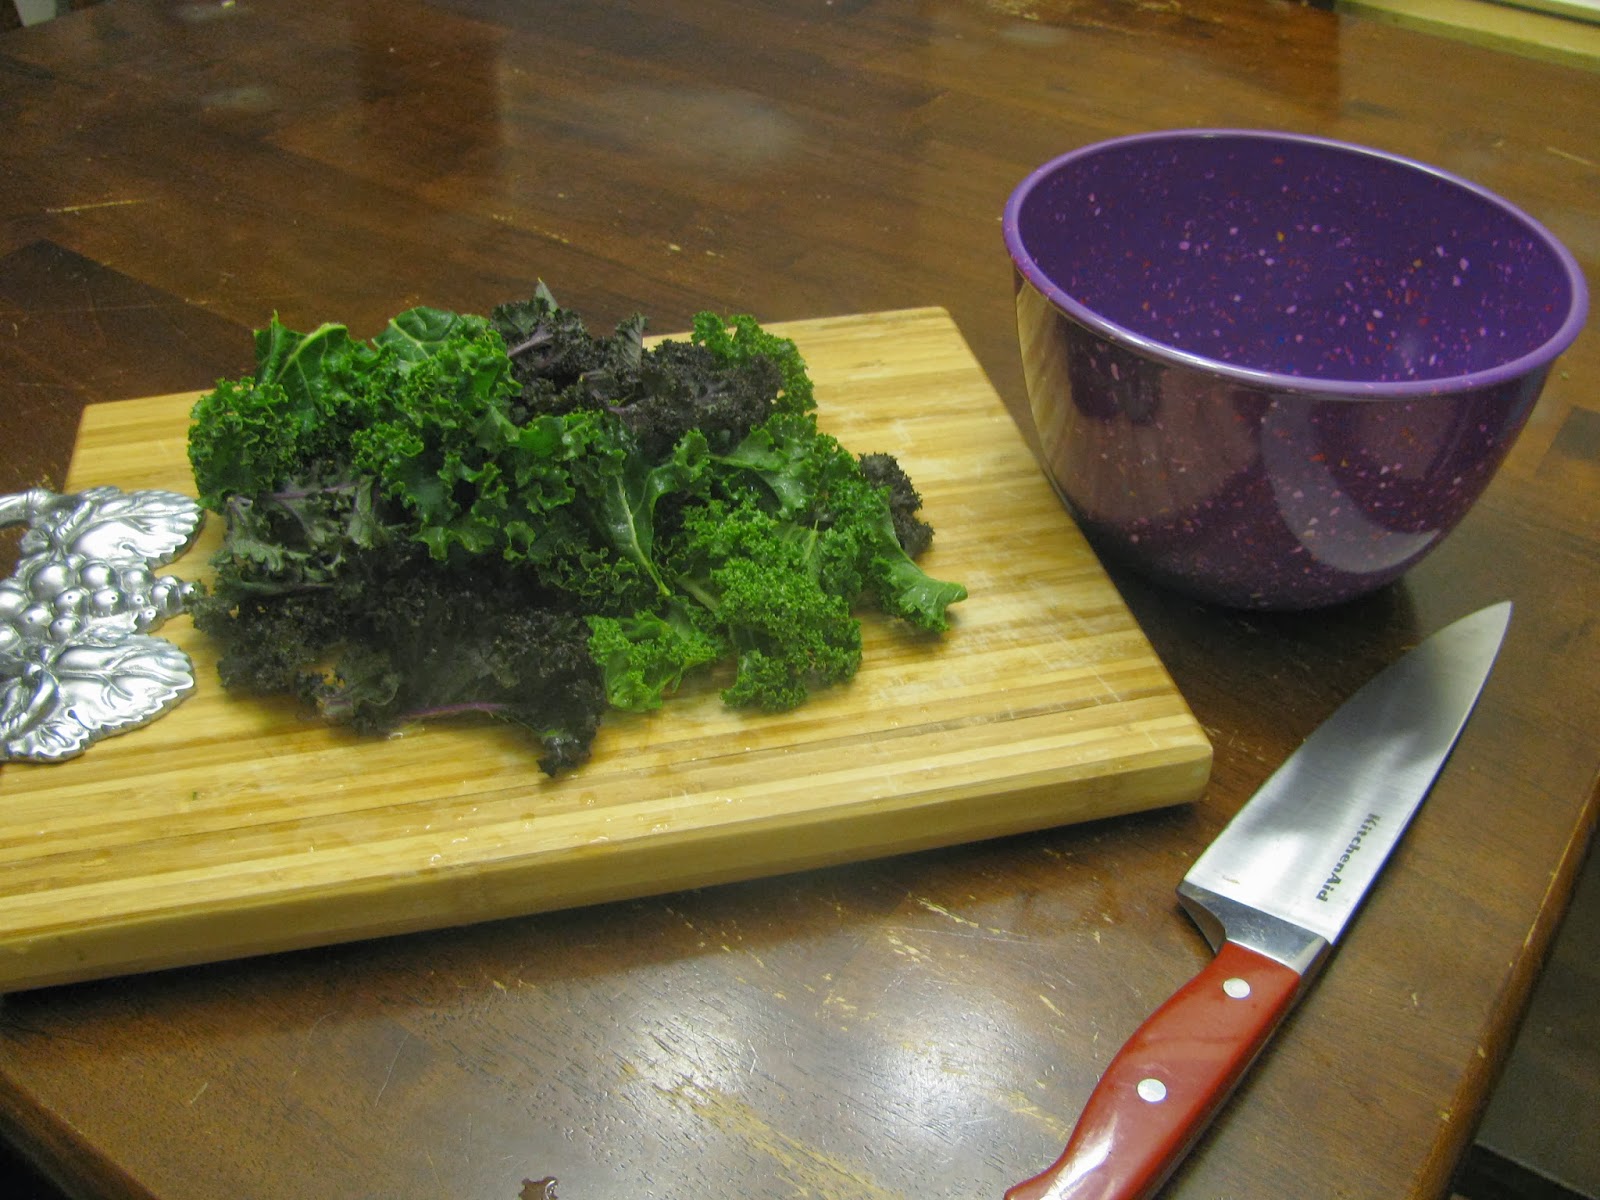
4)      Mush kale all together on a cutting board and slice very thinly, as if you were making shredded iceberg lettuce (which has like, no nutritional value by the way)

5)      Put in a bowl and drizzle with olive oil

6)      Add the juice of half a lemon (or whole, depending on how much you’re making)

7)      Add course sea salt and pepper

8)      Take off your rings and get your hands in there. Massage that kale like you love it. Get the oil and lemon juice all up in those leaves. (This makes sure the kale is not dry and gross, and is a very important step in the process)

9)      Sprinkle with Parmesan cheese (freshly shaved is the best but as you see from my picture I used (gasp!) Kraft)

10)   To make a real meal out of it and be like an incredibly delicious restaurant my sister Linde takes me to in Reno called Campo, pile salad high on a plate and top with an over-medium fried egg. You have to trust me on this.


Other Kale Recipes on BATF:
Obviously we love our Kale.


And, the top 10 reasons Kale is so damn good for you, according to www.mindbodygreen.com :

Kale is being called “the new beef”, “the queen of greens” and “a nutritional powerhouse.” Here are ten great benefits of adding more kale to your diet:


1. Kale is low in calorie, high in fiber and has zero fat. One cup of kale has only 36 calories, 5 grams of fiber and 0 grams of fat. It is great for aiding in digestion and elimination with its great fiber content. It’s also filled with so many nutrients, vitamins, folate and magnesium as well as those listed below.


2. Kale is high in iron. Per calorie, kale has more iron than beef. Iron is essential for good health, such as the formation of hemoglobin and enzymes, transporting oxygen to various parts of the body, cell growth, proper liver function and more.


3. Kale is high in Vitamin K. Eating a diet high in Vitamin K can help protect against various cancers. It is also necessary for a wide variety of bodily functions including normal bone health and the prevention of blood clotting. Also increased levels of vitamin K can help people suffering from Alzheimer’s disease.


4. Kale is filled with powerful antioxidants. Antioxidants, such as carotenoids and flavonoids help protect against various cancers.


5. Kale is a great anti-inflammatory food. One cup of kale is filled with 10% of the RDA of omega-3 fatty acids, which help, fight against arthritis, asthma and autoimmune disorders.


6. Kale is great for cardiovascular support. Eating more kale can help lower cholesterol levels.


7. Kale is high in Vitamin A. Vitamin A is great for your vision, your skin as well as helping to prevent lung and oral cavity cancers.


8. Kale is high in Vitamin C. This is very helpful for your immune system, your metabolism and your hydration.


9. Kale is high in calcium. Per calorie, kale has more calcium than milk, which aids in preventing bone loss, preventing osteoporosis and maintaining a healthy metabolism. Vitamin C is also helpful to maintain cartilage and joint flexibility


10. Kale is a great detox food. Kale is filled with fiber and sulfur, both great for detoxifying your body and keeping your liver healthy.


Tuesday, December 17, 2013

Holiday Appetizers: Apricots with basil-goat cheese and almonds & Pomegranate Avocado Salsa

The Beauties definitely know how to set a weekend agenda. Santa, please bring me another weekend filled with delicious food & drinks, and a full day at the spa, with a little dancing at the Brick thrown in for good measure.

I arrived late for the Christmas dinner feast, so I was glad my cooking responsibilities were limited to appetizers and a side dish, especially since I was mostly looking forward to catching up with the Beauties and enjoying Megan’s cocktails. I can vouch that these recipes didn’t require me to set down my drink for very long.  Thank goodness.

I discovered this recipe for an apricot appetizer in Sunset magazine and it has become one of my staples. The combo of savory/sweet + cheese is hard to turn down.

And what is there to say about the avocado salsa except it has avocado, so of course it’s decadent and amazing. Plus the addition of pomegranate makes it just about as festive as your favorite holiday sweater.


Apricots with basil-goat cheese and almonds (from Sunset magazine)
Makes 40 appetizers
4 ounces fresh goat cheese such as Laura Chenel, at room temperature
About 2 tsp. milk
2 tablespoons finely chopped fresh basil
40 dried apricots
40 salted almonds, preferably Marcona
2 teaspoons honey

1. Mix together cheese, 2 tsp. milk, and basil with a wooden spoon until spreadable. Thin with more milk if necessary.
2. Spread a heaping 1/4 tsp. cheese on each apricot and top each with an almond.
3. Drizzle with honey.


makes about 2 cups
1 small shallot, chopped
1 large avocado, diced
juice of one lime
1 tablespoon chopped cilantro
1/2 cup pomegranate seeds
salt and pepper to taste
*If you like spicy foods, you could add a diced jalapeno to the mix!

Place chopped shallot, avocado, lime, and cilantro in a small bowl and stir to combine. Add pomegranate seeds and season to taste with salt and pepper.


Wednesday, December 11, 2013

Easy Artisan Bread Appetizer

Obviously I am the one most interested in baking. I think it’s the scientist in me (compared to my creative Beauties.) This recipe started with some fresh baked Bialys (an East Coast favorite) one morning on Lopez Island after some make-your-own pizzas the evening before. The same friend that blew me away with her fresh baking gave me the book she used for Christmas, “Artisan Bread in Five Minutes a Day,” by Jeff Hertzberg, MD and Zoe Francois. Now that is my kind of time commitment!

I have been playing with the main recipe ever since and it’s pretty hard to mess up. That is not to say I didn’t explode Pyrex glass containers in my oven twice before I realized what a broiler pan was but that is part of the hands-on learning I had to experience.

The Master Recipe can be shaped into a Boule, Baguette, Ciabatta rolls, or any variation you’d like. The concept is you make the dough, let it rise for 2 hours, and then throw into the refrigerator for as long as 14 days. Anytime you need a fresh loaf you grab a handful of dough out of your container.


What you need: 

3 cups of lukewarm water (do NOT use to water that is too hot)
1 ½ tablespoons granulated yeast (2 packets)
1 ½ tablespoons kosher or other coarse salt
6 ½ cups unsifted, unbleached, all-purpose white flour
Cornmeal or Whole wheat flour for the pizza peel

1:  Add yeast and salt to the water in a the large bowl you will be storing the dough in or you can use an electric mixer (that is my method and I use the dough attachment.)

2:  Mix in the flour—kneading is unnecessary.  The key to this recipe is do NOT knead at any point!

3: Allow to rise: cover with a lid (not airtight).  At least 2 hours or up to 5 hours.  You could use it at this point to bake but the book suggests that the refrigerated dough is easier to handle.  Put into the refrigerator.

On Baking Day:

4: The gluten cloak: DON’T knead, just “cloak” and shape a loaf in 30 to 60 seconds.  Sprinkle your surface with the cornmeal or whole wheat flour.  Sprinkle the surface of your refrigerated dough with flour.  Pull up and cut off a 1 pound piece (grapefruit size) of dough.  Gently stretch the surface of the dough around to the bottom on all four sides, rotating the ball a quarter-turn as you go.  The correctly shaped product will be smooth on the top and bunched ends on the bottom.

5: Rest the loaf on the pizza peel (or surface) for 40 minutes.

6: Twenty minutes before baking preheat the oven to 450 F with the baking stone on the middle rack and an empty broiler tray on the bottom for holding water.

7: Dust with flour and slash the dough with a cross or X.

8:  Quickly slide the dough off of the surface onto your baking stone.  Quickly and carefully pour 1 cup of hot water into the broiler tray and close the oven door to trap the steam.  Bake for 30 minutes or until the crust is browned and firm to the touch (less time for Baguettes.)  When you take the bread out of the oven it will crackle to the room temperature and cool on a rack.

That is it! I encourage you to get the book if you are interested in other variations or are interested in other details like problem solving your challenges. Once you practice a couple of times you really could come home from work and have fresh bread within the hour. Then opening a can of soup for dinner seem that bad!

~ Jolie

Ta-da! Finished product.

Friday, December 6, 2013

Mandarin Orange Blue Cheese Salad


It’s pretty typical that all six of us don’t get together unless Megan is in town. She’s sort of like the Movie Star amongst us, flitting here and there on yachts, dining at places like Italy, Greece, and Aspen, and experiencing the beauty of a world the five of us could only imagine. Yes, she does have to work hard, clean up and prepare food for rich people, but to the rest of us being a stewardess on a yacht seems like a pretty glamorous life. So when she does make time in her schedule to come home to Washington State we can’t help ourselves but plan a big get-together complete with lots of laughter, trashy magazines, spa time, and what else…. Hmmm… it feels like I’m missing something here. Oh yeah! FOOD!

This year we decided to spend an evening preparing a Christmas Feast, to, um, do our followers a favor and help them with some recipe ideas. I know, we are so selfless. We do this ALL for you. I was in charge of the salad. Can you believe it? Just the salad! So since I felt like I’d gotten off a little easy this time around I knew it couldn’t be any old salad. Which is why I chose my most favorite salad of all time, originally posted by my cousin Beth Sobel. Mandarin Orange Blue Cheese Salad. It was perfect for a Christmas Feast. Light, citrusy, a bit creamy and a little crunchy and sweet. It was just what we needed.
 
Because we were waiting for our honorary Beauty, Kirsten (Megan’s childhood friend and fellow foodie), to arrive at the cabin on the shuttle, we thought we’d start the evening off with the salad. Here’s my simplified recipe of the original below. (And for the original recipe, complete with instructions on making your very own caramelized pecans, click here.)


Here's the final product, paired with Apple Cider Honey Bourbon. Recipe coming soon...
 
Mandarin Orange Blue Cheese Salad serves 8
2 large heads Lettuce, chopped small
2 cans Mandarin Oranges
½ cup Scallions, sliced
1 cup (or more) Blue Cheese crumbles
1 bag Emerald Glazed Pecans
½ cup Poppy Seed Dressing
½ cup to 1 cup orange juice


Directions
Add all salad ingredients into a big bowl. Combine Orange Juice and Poppy Seed Dressing together and mix well. Toss.

Rachel and me. Obviously very proud of the salad.


"I hate when you are doing something and you think 'isn't there someone you can pay to do this?'  And you realize you are the person being paid to do this. My glamorous life!" - Megan Crosby


Friday, November 1, 2013

Slow-Cooker Chunky Beef Chili

I wish I could get a picture that does justice to the amount of leaves, dirt and food left on my floor from our Halloween celebration. It's pretty impressive. I should be sweeping and mopping but I'd rather blog and ignore it.

Halloween this year swept thru like a raging storm. I volunteered to be in charge of my son's preschool party -- why? Because I'm insane. (wow, that was loud.) I will say, the snacks probably saved my life because that little platter of fruits, crackers, veggies and cheese was the healthiest thing my 3-year-old consumed all night. During set-up, the teacher didn't disguise very well how tough the day had been after classroom trick-or-treating and parades and costumes (can you imagine potty time for 20-some kids in costumes, omg). Whole new level of respect for teachers!

Then our party at home started and even before we could eat, the trick-or-treaters began knocking. Since my kid was already jacked to the max, we decided we'd let the chili sit on warm in the Crock Pot (slow-cooker bonus!) and go pound the pavement for a bit. So. Much. Fun! Our neighbors really get into the spirit of Halloween, which is merely a warm up for what Christmas brings.

When we returned, we dove into the chili right away. It rocked! It was chunky, meaty, hearty and spicy. And prep was so easy it's almost ridiculous it turned out so good. As the weather turns colder, I will be making this again 100%. This dish screams to be fed to hungry football fans...


The Chili Ingredients

2+ lbs ground beef, lightly browned and drained (I used fattier beef, c'mon it's Halloween, who cares.)
Kirkland no-salt seasoning
6 oz can of tomato paste
2- 16 oz cans of Bush's Chili Beans (I used medium spice)
16 oz can of black beans
2 Tbsps minced garlic
1 pkge chili seasoning
1 cup ketchup
1 onion, chopped
10 oz can of diced tomatoes (I used fire-roasted)

The Bar Ingredients

Shredded cheddar cheese
Chopped onion
Black olives
Corn kernels
Sour cream
Fritos corn chips

Directions

ln a skillet, lightly brown your ground beef and drain it. Add some very hefty shakes of the no-salt seasoning for added flavor. Stir well and simmer for a few minutes.
Add all chili ingredients to the slow cooker.
Cook on low for 8-10 hours.
Top with chili bar ingredients of choice.

Adapted from the Crockin' Girls Hearty Chili recipe.

***

As a bonus, I'm going to post Emily's Pumpkin Dip which was a whipped creamy amazing little appetizer (or dessert) that I went to town on as soon as she put it out. With ginger snaps, it's like mini bites of pumpkin pie. Sooo good! I'm sorry I didn't get a pic so you'll just have to believe it's incredible without a photo -- for now.

Pumpkin Dip

1 block cream cheese
1/3 cup brown sugar
1/2 cup pumpkin
1 Tbsp maple syrup
1/2 tsp ground cinnamon
1/2 cup Cool Whip (or to taste)

Soften the cream cheese and blend everything together with a hand mixer.
Chill for 30 minutes.
Serve with apples, pears, graham crackers, or ginger snaps.


Slow-cooking to perfection.

Graham turned into Grahambo for his very first Halloween. Except he's far too sweet to play the part very well. 

Our trick-or-treaters, young and old, ready to go! You can see how jacked out of the gym my child is...

"Mom, I'm gonna need you to replace all of my pureed squash dinners with  this Milky Way bar from now on."

Big shout out to my sister-in-law Michelle for her candy corn Rice Krispie treats!

And just for fun, this spooky house rocked, complete with bubble and smoke-machines. Plus, they gave out full-sized candy bars so now Emily is going to stalk them every year.

Wednesday, September 25, 2013

Roasted Cauliflower with Date Syrup

We were called out this month by Girl Has Thyme. Yes we've been slackers and yes you may get an influx of "ethnic" recipes before September wraps up!

This is a recipe from the Calilee Cooking School in Israel that was in Bon Appetit. And I need to state right off the bat, I didn't find date syrup, nor did I spend much time looking for it, but molasses worked as a great substitute. I told my mom I needed an "ethnic" recipe for this month and as she was browsing through her cooking magazines she suggested this one. I'm a big fan because I'm always looking for new exciting vegetable dishes (sometimes the same ol' salad every night just gets old) and this is a cool recipe because it can be served as an appetizer or side dish. It would go really well with Missy's piroshky recipe!


Roasted Cauliflower with Date Syrup
From Bon Appetit 

Ingredients: 

1 head of cauliflower (about 2 lb.), cored and broken into florets (I just bought a bag from Costco) 
2 tablespoons olive oil plus more for drizzling (I used coconut oil)  
Kosher salt and freshly ground black pepper
1/4 cup tahini (sesame seed paste)
2 tablespoons (or more) date syrup or dark honey (I used molasses) 
2 teaspoons (or more) fresh lemon juice
Sea salt


  Directions
  • Preheat oven to 500°. Place cauliflower on a baking sheet and toss with 2 Tbsp. olive oil or coconut oil. Season with salt and pepper. Roast, tossing occasionally, until browned in spots and tender, about 20 minutes.
  • Transfer cauliflower to a serving platter. Drizzle tahini and date syrup over. Sprinkle 2 tsp. fresh lemon juice over. Season to taste with sea salt. Drizzle with more olive oil and lemon juice, if desired.